
Crafting personalized goodie bags for a child’s birthday party is a wonderful way to add a touch of magic to the celebration while staying mindful of your budget. Instead of purchasing generic plastic loot bags, you can transform standard rolls of wrapping paper and vibrant ribbons into custom, sturdy gift bags. This DIY approach allows you to tailor the size, color scheme, and theme perfectly to your child’s interests, whether they are obsessed with dinosaurs, outer space, or whimsical fairy tales. It is also an excellent way to upcycle leftover gift wrap from previous holidays, turning potential waste into delightful party favors.
For parents planning a celebration in a cozy home, a local function room, or an outdoor park, crafting these bags ahead of time offers a satisfying creative outlet that kids can even help with. By mastering a few simple folding techniques, you can create professional-looking bags that are both beautiful and durable enough to hold all sorts of party treasures. With just a few basic stationery tools and some colorful materials, you can assemble custom party packaging that elevates the entire gifting experience for your young guests.
Materials and Tools You Will Need
Before beginning your crafting session, gathering the right materials ensures a smooth process and a sturdy finished product. The foundation of your goodie bag is the wrapping paper. For the most reliable results, select a medium-weight paper, ideally between 80 and 120 GSM (grams per square meter). Paper that is too thin, such as cheap newsprint-grade wrap, tears easily when filled with toys, while excessively thick cardstock is difficult to fold cleanly. Look for vibrant patterns with a small-to-medium scale so the designs remain fully visible on a smaller bag surface.
Products mentioned in this guide
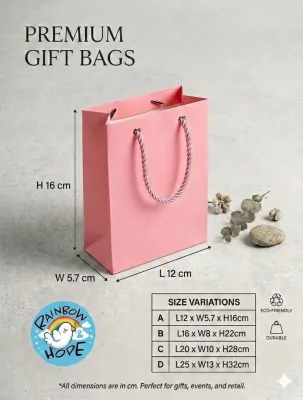
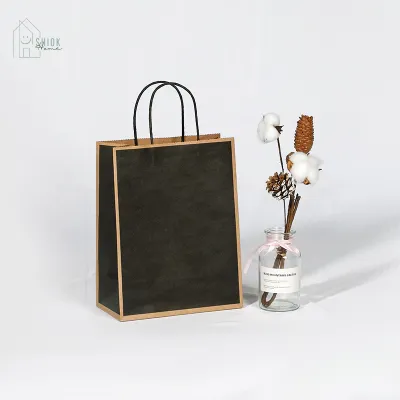
![[SG Ready Stock] Goodie Bag Gift Kids Tin Toy Motor Skills Toys in Travel for Childrens Day Gift Birthday Party Present](https://img.lazcdn.com/g/p/585aec7394672e03556866b6129839cc.jpg_400x400q80.jpg_.webp)
![[SG SELLER] SimplyKids.SG® - Prepacked Children Birthday Goodie Bag Kids Birthday Goodies Bag Party Pack Birthday Pack Birthday Return Gift Childrens Day Christmas - READY STOCK FAST SHIPPING!](https://img.lazcdn.com/g/p/3d7296fe1da879f1beb004dd56ef8c16.jpg_400x400q80.jpg_.webp)
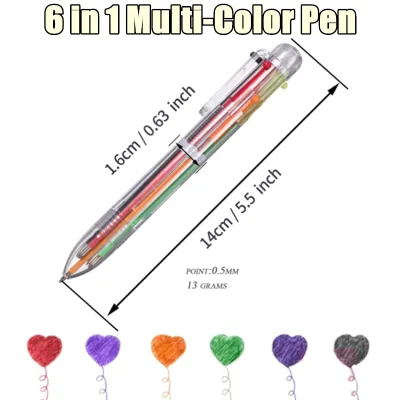
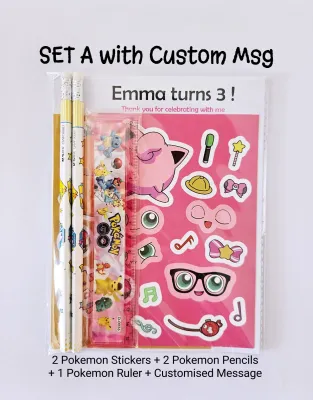
Prices are valid at publication and may change. Please refer to the product page for the latest price.
Your choice of ribbon dictates both the durability of the handles and the overall aesthetic of the bag. Grosgrain ribbon is highly recommended for handles because its ribbed texture provides excellent grip and structural integrity, preventing knots from slipping. Satin ribbon offers a glossy, festive look that is well-suited for decorative bows, though it requires tighter knotting due to its slippery surface. Cotton ribbon or natural twine can also be used to achieve a rustic, eco-friendly appearance.
To assemble the bags cleanly, you will need high-quality adhesives and precise cutting tools. Double-sided tape is the preferred choice because it creates strong, invisible seams without the messy wetness of liquid glue, which can warp paper. A glue tape runner is also highly efficient for quick assembly. For cutting, a sharp utility knife, a metal ruler, and a self-healing cutting mat will help you achieve perfectly straight, fray-free edges. Standard craft scissors are essential for trimming ribbon ends at an angle to prevent fraying.
Step-by-Step Guide to Folding and Assembling the Bags
Creating a custom goodie bag requires precise folding, but once you understand the basic geometry, the process becomes quick and repetitive. To make a standard-sized goodie bag that measures approximately 15 cm wide, 20 cm high, and 8 cm deep, start by cutting a rectangular piece of wrapping paper measuring 42 cm wide by 28 cm high. This size is highly versatile, but you can adjust the dimensions proportionally for larger or smaller treats.

First, lay the cut paper face down on your work surface so the plain white side faces up. Fold the top edge down horizontally by 3 cm to create a clean, reinforced top rim. Apply a strip of double-sided tape along the inside of this fold and press down firmly to secure it. This reinforced rim is crucial because it will eventually support the weight of the ribbon handles.
Next, fold the left and right vertical edges of the paper toward the center so they overlap by about 2 cm. Apply a strip of double-sided tape along the overlapping edge, ensuring it runs from the top rim to the bottom edge, and press firmly to seal. You should now have a flat paper cylinder. Slide your hands inside to gently open the cylinder, then flatten it so the taped seam is positioned either directly in the center of the back panel or along one of the side folds.
To create the side gussets, which give the bag its depth, fold each side edge inward by 4 cm. Crease these folds sharply with your fingers or a bone folder. Open the side folds back up, then push the center crease of each side inward to form a classic “M” shape. This allows the bag to expand and fold flat easily, just like a store-bought paper bag.
To construct the flat base, fold the bottom edge of the bag upward by 6 cm and crease it well. Open this bottom fold back up, then open the bottom opening of the bag. Press the left and right corners inward, flattening them into neat triangular flaps. You will now have a hexagonal opening at the bottom of the bag.
Fold the top and bottom horizontal flaps of this hexagon toward the center, overlapping them slightly by about 1.5 cm. Apply double-sided tape generously across these overlapping flaps to seal the bottom of the bag securely. To ensure the bag can hold heavier items without sagging, measure the bottom dimensions (approximately 15 cm by 8 cm) and cut a matching piece of recycled cardboard. Slide this cardboard insert down to the bottom of the bag to distribute weight evenly.
How to Add Ribbon Handles and Decorative Touches
Once the main body of your goodie bag is assembled, adding ribbon handles provides both functionality and a polished look. Cut two equal lengths of ribbon, each about 30 cm long. This length allows for a comfortable handle drop while leaving enough ribbon inside the bag to secure the ends. On the reinforced top fold of the bag, use a pencil and ruler to mark two points on the front panel and two points on the back panel, spacing them evenly about 6 cm apart and 1.5 cm down from the top rim.
Use a single-hole punch to create clean holes at the marked spots. If you do not have a hole punch, a small eyelet tool can work, though a standard punch is cleanest. Thread one end of the ribbon from the outside of the bag to the inside through one hole. Tie a secure double knot on the inside of the bag, pulling it tight to ensure the knot is larger than the punched hole. Repeat this process with the other end of the ribbon through the adjacent hole, and then repeat the entire sequence on the back panel with the second piece of ribbon.
If you prefer a clean exterior look without visible holes, you can attach the ribbon handles directly to the inside of the top fold before sealing it down. Apply heavy-duty double-sided tape over the ribbon ends to sandwich them securely between the paper layers. This method is highly effective for lighter bags, though punched holes with knots remain the sturdiest option for heavier contents.
To elevate the presentation, consider adding simple decorative embellishments. You can tie a contrasting ribbon bow around one of the handle bases for a pop of color. Attaching a personalized, hand-written gift tag using a thin piece of baker’s twine adds a thoughtful touch. For a whimsical, festive look, curl lightweight curling ribbon using the edge of a pair of scissors and let it drape down the side of the bag alongside the main handles.
Tips for Filling and Personalizing Kids' Goodie Bags
Filling your DIY goodie bags requires a thoughtful balance of weight, variety, and presentation. Because handmade paper bags are more delicate than plastic options, avoid overloading them with heavy items. A balanced mix of lightweight, engaging items works best. Consider combining a small stationery item, such as a colorful eraser or a mini notebook, with a small non-toxic toy like a wooden spinning top, and one or two individually wrapped treats.
To protect the contents and add visual volume, tuck a sheet of colorful tissue paper or a handful of shredded paper filler inside each bag. This cushions delicate items and adds a burst of color peeking out from the top, making the bag look professionally styled and exciting for children to open. You can coordinate the tissue paper color with the ribbon handles to tie the entire theme together.
Personalizing the bags makes each young guest feel uniquely welcomed and prevents mix-ups during party games. Create custom name tags using matching cardstock and tie them to the ribbon handles. If you are hosting a themed party, you can print themed labels or let your child help decorate the tags with stamps or stickers. This extra step transforms a simple party favor into a cherished keepsake from the celebration.
Frequently Asked Questions (FAQ)
How can I reinforce thin wrapping paper so it holds heavier treats?
If you are working with lightweight wrapping paper, you can reinforce it before folding. Apply wide, clear packaging tape along the areas that will form the bottom seams and the top rim on the reverse side of the paper. Alternatively, you can line the wrapping paper by gluing it to a sheet of plain brown kraft paper or lightweight butcher paper using a thin layer of spray adhesive or double-sided tape. This double-layer technique dramatically increases tear resistance while keeping the beautiful exterior pattern.
What is the best way to store assembled goodie bags before the party?
To keep your DIY goodie bags pristine, store them flat before adding the cardboard bottom inserts and ribbon handles. If you have already fully assembled them, stand them upright inside a sturdy plastic storage bin or a clean cardboard box. Keep the storage container in a cool, dry place away from direct sunlight to prevent the wrapping paper colors from fading and the adhesives from softening in warm, humid climates. Avoid draping heavy items over the bags to prevent the ribbon handles from getting crushed or tangled.

Community discussion
Share your experience or ask a question. Comments are reviewed before publication.