
Starting your creative journey with Kangkang painting tools opens up a world of artistic expression, whether you are exploring vibrant watercolors, rich acrylics, or detailed colored pencils. For a beginner, the key to a successful first session lies in understanding your specific medium, preparing your workspace, and mastering basic brush control. By focusing on the instructions provided on your product packaging and practicing fundamental techniques, you can build confidence and enjoy a smooth introduction to painting.
Understanding Kangkang Painting Tools and What You Need
Before opening your new art supplies, it is essential to identify exactly what kind of medium you have and what accessories are included. Kangkang offers various product configurations, ranging from comprehensive starter kits to individual tools designed for specific techniques. Checking the product packaging and labels will help you determine whether you have a complete set or if you need to acquire additional items before you begin.
The primary medium—such as watercolor, acrylic, or colored pencils—is always indicated clearly on the product exterior. Each medium has distinct characteristics, drying times, and water-compatibility levels that dictate how you will use them. For instance, watercolors require water for activation and blending, while acrylics are water-soluble when wet but dry into a water-resistant layer.
Products mentioned in this guide
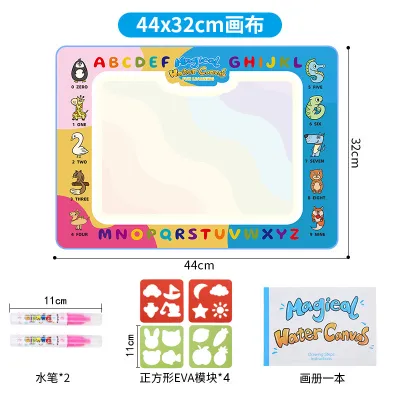
Prices are valid at publication and may change. Please refer to the product page for the latest price.
Review the manufacturer’s included component list, which is typically printed on the back or side of the box. This list helps you verify that all necessary accessories, such as mixing palettes, paint trays, or specific brush types, are present. If your kit does not include a palette or a water container, you will want to gather these basic household items before starting your first painting session.
Additionally, check the packaging for safety labels and non-toxicity certifications. Many beginner-friendly art supplies are formulated to be non-toxic, which is especially important if you share your creative space with children or pets. Understanding these product details before you begin ensures a safe, organized, and prepared start to your artistic journey.
Choosing Your First Kangkang Starter Kit or Supplies
Selecting the right entry-level products depends heavily on your preferred painting style and the surface you plan to use. To ensure a successful application, always match the tool type to the intended painting surface by checking the manufacturer’s recommended paper or canvas specifications. Using watercolor on thin sketch paper, for example, can cause severe warping, so verifying compatibility beforehand is crucial.

Another practical consideration is the long-term usability of your tools. Evaluate the availability and compatibility of refills, replacement brush heads, or extra paint tubes within the product line. Choosing a starter kit that allows you to replace individual colors or worn-out brushes ensures you can continue practicing without needing to purchase an entirely new set.
When comparing starter sets, look at the variety of colors and brush sizes included in the package. A well-balanced beginner set should cover fundamental practice needs—such as a few primary colors and a couple of versatile brush shapes—without overwhelming you with too many specialized options. Starting with a focused selection allows you to master color mixing and basic strokes before expanding your collection.
Pay close attention to the brush shapes included in your starter kit. Most beginner sets feature a mix of round brushes for detail work and flat brushes for covering larger areas. Understanding how these different shapes function will help you select a kit that aligns with the specific types of projects you want to create.
Setting Up Your Workspace and Preparing Materials
A safe, organized, and comfortable environment is key to enjoying your painting session and protecting your home. Begin by covering your work surface with newspaper, plastic sheeting, or a reusable silicone mat to guard against accidental spills and stains. If you are working with mediums that require specific mediums or solvents, ensure your room has adequate ventilation by opening a window or using a fan.
Next, prepare your cleaning station so everything you need is within arm’s reach. Set up two jars of clean water—one for rinsing dirty brushes and one for mixing clean water into your paint—along with a stack of paper towels or a lint-free cloth. Having these items ready prevents you from having to leave your desk with wet paint on your hands or brushes.
Good lighting is also essential for accurate color mixing and reducing eye strain during long sessions. Position your workspace near a window for natural daylight, or use a neutral-colored desk lamp that illuminates your paper without casting harsh shadows. Setting up an ergonomic seating arrangement will also help you maintain comfort as you paint.
Always read and follow any safety warnings, age recommendations, or ventilation guidelines printed on the product labels. This is especially important if children are participating in the activity, as some art supplies may contain small parts or require adult supervision. Taking a few minutes to review these instructions ensures a safe and worry-free creative experience.
Fundamental Techniques for Your First Painting Session
Basic Brush Control and Strokes
Developing control over your brush is the first step toward building confidence in your painting. Start by holding the brush near the metal ferrule for detailed work, or further back along the handle for looser, more fluid strokes. Experiment with holding the brush at different angles relative to the paper to observe how the line width and texture change.
Practice executing basic strokes on a sheet of scrap paper before moving to your main project. Try painting straight lines, smooth curves, and small dots, paying close attention to how the brush responds to changes in hand pressure. Pressing down firmly creates wider strokes, while lifting the brush lightly allows you to paint fine, delicate lines.
Observe how the specific brush material—whether synthetic or natural bristle—interacts with your chosen paper surface. Some brushes hold more liquid and glide smoothly, while others offer more resistance and create textured dry-brush effects. Understanding these physical characteristics through simple practice strokes will help you control your paint application.
During your practice session, avoid leaving your brushes resting face down in your water jar. Leaving a brush resting on its bristles can permanently bend and damage them, ruining the brush’s shape. Instead, rinse the brush thoroughly and lay it flat on a paper towel when you need to switch tools.
Mixing Colors and Managing Consistency
Learning to mix your own colors is both economical and highly rewarding. Squeeze or place small amounts of your primary colors—red, yellow, and blue—onto your mixing palette, leaving plenty of space between them. Use your brush to bring small portions of these colors to the center of the palette, blending them gradually to observe how they create secondary shades like green, orange, and purple.
To keep your mixed colors from becoming muddy, try mixing only two or three colors at a time. Understanding basic color theory—such as how complementary colors neutralize each other—will help you create clean, vibrant shades. Take your time to observe how subtle adjustments in color ratios can dramatically alter the final hue.
Managing the consistency of your paint is critical for achieving the desired effect on paper. Adjust the paint consistency by adding small drops of water or the manufacturer’s designated medium, strictly following any dilution guidelines on the packaging. Adding too much water can weaken the paint’s binder, while too little water can make the paint difficult to spread smoothly.
Before committing any mixed color to your main artwork, test it on a separate scrap sheet of the same paper. This quick test allows you to verify the exact shade, opacity, and drying behavior of the mixture. Because many paints dry slightly lighter or darker than they appear when wet, this step prevents unexpected results on your final piece.
Cleaning, Storing, and Maintaining Your Tools
Proper post-session care is the best way to preserve the quality and extend the lifespan of your art supplies. Clean your brushes immediately after you finish painting, as dried paint can permanently damage the bristles and ruin the brush shape. Rinse them thoroughly under lukewarm water, using a mild soap or dedicated brush cleaner if recommended by the manufacturer, and gently reshape the bristles with your fingers before laying them flat to air dry.
To prevent your paints from drying out and becoming unusable, seal all tubes, pans, or containers tightly immediately after use. Store your paint sets in a cool, dry place away from direct sunlight and extreme temperature fluctuations. Proper storage protects the chemical binders in the paint, ensuring they remain fresh and ready for your next creative session.
Keep your storage area organized and free of dust to protect your tools when they are not in use. Storing brushes upright in a cup or flat in a dedicated brush roll prevents the bristles from being crushed or bent. Keeping your paints and brushes in a designated drawer or box also makes it easier to set up for your next session.
Finally, always consult the product’s specific care instructions for any unique maintenance rules regarding specialized tools or mediums. Some brushes or specialty paints may require specific cleaning agents or storage orientations to maintain their performance. Following these manufacturer guidelines ensures your investment in your creative tools lasts for a long time.
Frequently Asked Questions (FAQ)
How do I know which paper or canvas is compatible with my Kangkang tools?
To find the right surface, check the product packaging for recommended paper weights, which are typically measured in grams per square meter (GSM). Heavyweight papers, such as 300 GSM, are generally recommended for wet mediums like watercolor to prevent warping, while lighter papers work well for dry colored pencils. Before starting a major project, test a small amount of paint on the edge or a scrap piece of the paper to observe how it absorbs the moisture and whether it bleeds through.
What should I do if my paint dries out between sessions?
If your paint dries out, check the manufacturer’s guidelines to see if the specific paint type can be reactivated. Watercolors and gouache can typically be revived simply by adding a few drops of clean water directly to the dry pan or palette. Acrylic paints, however, dry into a permanent plastic film and cannot be reactivated once fully cured; if your acrylics have hardened completely, they must be discarded and replaced, as adding unapproved solvents will damage the binder and ruin your brushes.
Community discussion
Share your experience or ask a question. Comments are reviewed before publication.