
A broken zipper puller can render an otherwise perfect jacket or travel bag completely unusable. Fortunately, you do not need to discard the entire item or pay for a costly full-zipper replacement. To find the correct replacement zipper puller, you must determine whether you need to replace only the hanging pull tab or the entire sliding mechanism (the slider). This decision depends on identifying your zipper’s teeth material, measuring its precise industry size, and matching the puller’s design to how your item is used.
Diagnose Your Zipper: What to Check Before Buying a Replacement
Before you purchase any replacement parts, you must conduct a quick visual and physical inspection of your existing zipper. Zipper components are not universally interchangeable, and using mismatched parts will cause the zipper to jam, stick, or fail entirely.
First, identify the zipper teeth material. Zipper tracks generally fall into one of three categories:
Products mentioned in this guide
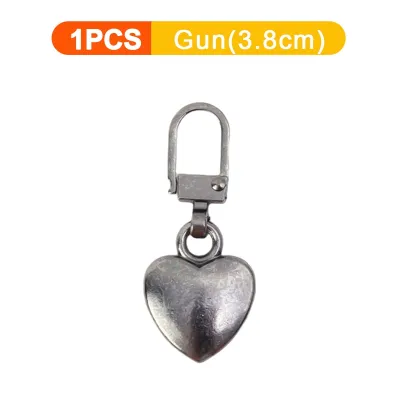
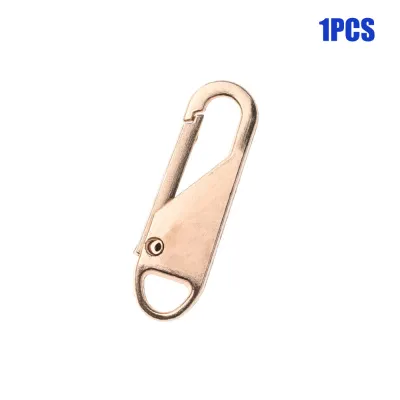
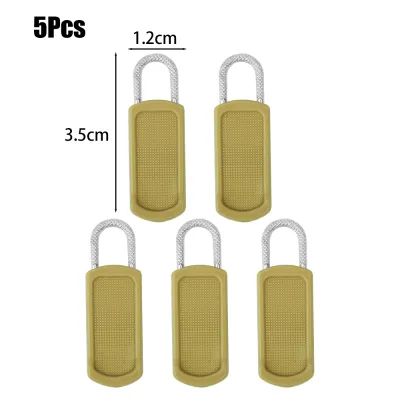
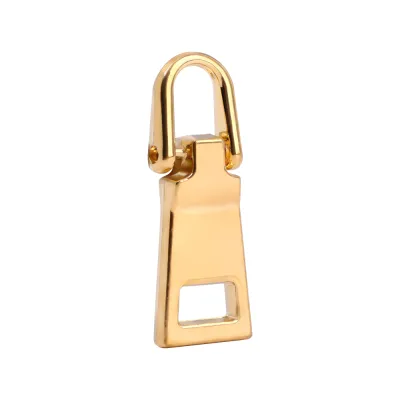
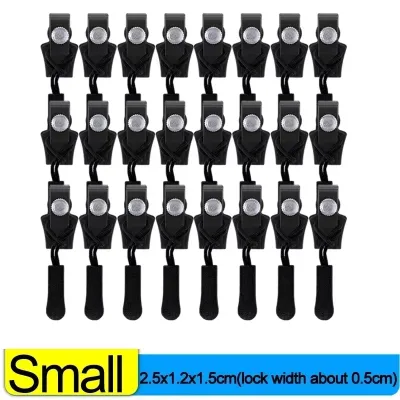
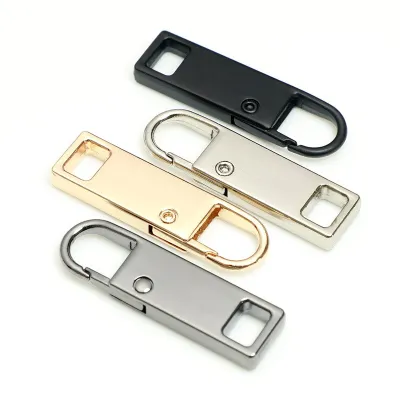
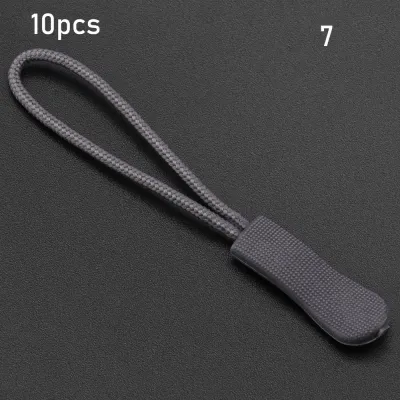
Prices are valid at publication and may change. Please refer to the product page for the latest price.
- Metal Teeth: Individual metal pieces (often brass, aluminum, or nickel) clamped onto the fabric tape. These are highly durable and commonly found on heavy jackets and denim.
- Nylon Coil: A continuous plastic coil stitched to the fabric tape. Highly flexible and water-resistant, nylon coil zippers are the standard choice for lightweight rain jackets, activewear, and backpack compartments.
- Molded Plastic or Resin: Individual, blocky plastic teeth melted directly onto the tape (often referred to as Vislon zippers). These are common on heavy-duty outdoor gear and winter coats.
Sliders are engineered to match the specific geometry of these teeth. A slider designed for metal teeth will not glide smoothly on a nylon coil track; instead, it will pinch the coil, causing permanent damage to the zipper tape.
Next, determine the size of your zipper. Look at the flat reverse side of your original slider body, where you will typically find an engraved number such as 3, 5, 8, or 10. This standard industry number corresponds to the width of the closed zipper teeth in millimeters. For example, a #5 zipper has teeth that measure approximately 5 millimeters across when zipped shut. If the number has worn off or is absent, close the zipper and use a precise ruler or caliper to measure the width of the teeth track. Your replacement slider must match this exact size number.
Finally, identify the zipper’s end type. Closed-end zippers feature a metal or plastic bar at the bottom that prevents the slider from detaching, which is the standard configuration for bags, pockets, and boots. Separating or open-end zippers, commonly found on the front of jackets and hoodies, allow the two halves of the zipper tape to separate completely via a pin-and-box mechanism at the bottom.
Use this quick checklist to note down your zipper’s specifications before shopping:
- Teeth Material: Metal, Nylon Coil, or Molded Plastic
- Size Number: #3, #5, #8, #10, etc.
- Zipper End Type: Closed-end (bags) or Separating (jackets)
- Current Slider Condition: Intact (needs pull tab only) or Damaged (needs full slider)
Identify the Zipper Puller Attachment Style
Understanding how the puller connects to the slider body determines the complexity of your repair. You must decide whether you can get away with a simple pull tab swap or if you need to replace the entire slider.

Replacing Just the Pull Tab
If the slider body still glides smoothly and locks the teeth together, but the hanging metal tab has snapped off, you only need to replace the pull tab itself. Examine the top of your slider, specifically the small loop or arch known as the crown. Some crowns are solid, fixed loops of cast metal. For these solid crowns, you cannot slide a standard solid-ring replacement tab onto them; instead, you must select a split-ring pull tab (which functions like a miniature key ring) or a clip-on puller that snaps shut.
Other sliders feature a small gap or a spring-loaded gate within the crown. This allows you to slide a standard replacement loop directly into place. Checking this mechanism beforehand ensures you do not buy a solid-ring tab that cannot be attached to a solid crown without specialty tools.
Replacing the Entire Slider and Puller
When the slider body itself is compromised, replacing the pull tab will not solve the issue. Common signs of a failing slider include the zipper track splitting open behind the slider after you pull it up, the slider feeling exceptionally loose or wobbly, or the internal locking mechanism failing to hold. In these cases, you must replace the entire slider assembly.
Keep in mind that the new slider’s internal cavity must align perfectly with the shape of your zipper teeth. A slider designed for a #5 metal zipper will not fit a #5 nylon coil zipper, as the internal channels are shaped differently to guide the specific teeth profiles. Always purchase a slider that explicitly matches both the size and the material of your zipper track.
Match the Puller Type to Your Item: Jackets vs. Bags
The physical demands placed on outerwear differ significantly from those on carry goods, dictating the type of replacement puller you should choose.
Jacket Zipper Pullers
Outerwear zippers are subject to constant movement, tension, and exposure to the elements. For jacket fronts, it is essential to use a locking slider, typically labeled as an auto-lock or semi-auto-lock slider. These sliders contain a small internal pin that drops down into the teeth when the pull tab is laid flat. This prevents the zipper from sliding open on its own when you move, walk, or face strong winds.
For jackets worn during outdoor activities or during sudden tropical downpours, look for ergonomic pull tabs. Large, textured plastic tabs, molded rubber grips, or heavy-duty cord loops are much easier to grasp with wet hands or when wearing gloves. Additionally, ensure the replacement matches the separating design of your jacket, which relies on a precise fit over the insertion pin at the bottom of the track.
Bag and Backpack Zipper Pullers
Bags and backpacks generally require non-locking sliders. Because bag compartments are often opened from various angles and do not face the same vertical tension as a jacket, a non-locking slider allows for quick, effortless opening without needing to pull the tab at a specific angle to disengage a lock.
For large travel packs, school bags, or duffel bags, double sliders (two sliders facing each other on a single track) are common. This setup allows you to open the bag from either side or access specific sections without opening the entire compartment. When replacing these, choose pull tab styles like cord pulls or ring pulls. Cord pulls made of durable paracord with plastic tips are highly favored for backpacks because they do not jingle or clatter when you walk, and they provide a generous loop for quick finger access.
Explore Universal and No-Sew Zipper Puller Solutions
If you are looking for a rapid fix, do not have access to specialty tools, or want to avoid sewing and dismantling your zipper track, several no-sew alternatives are available.
Universal snap-on zipper sliders are designed to open up like a clam shell, allowing you to clip them directly onto the existing zipper track without having to pry off the metal top stops at the end of the tape. These are highly convenient for emergency repairs during travel or outdoor excursions. Another popular option is the zipper pull extension, which includes silicone tags, nylon cord loops, or metal clip-on hooks. These can be threaded directly through the remaining eyelet of a broken slider, bypassing the need to replace any metal components.
While these quick-fix solutions are incredibly convenient, they do have distinct limitations. Snap-on universal sliders are generally bulkier than original equipment manufacturer (OEM) parts and may not glide as smoothly over tight curves. Because they rely on a hinge mechanism, they are less durable under high-tension scenarios, such as a tightly packed suitcase or a form-fitting jacket front. Use them as reliable temporary fixes or for low-tension compartments, but plan on a standard slider replacement for long-term durability on heavy-use items.
Step-by-Step Guide to Installing Your New Zipper Puller
Performing the repair yourself is straightforward if you follow the correct sequence and use the right tools.
For Pull Tab Only: If you are only replacing the pull tab on an intact slider, you will need a pair of small needle-nose pliers. If using a split-ring or clip-on puller, simply thread the ring through the crown of the slider and snap or twist it into place. If you are using a standard replacement tab with an open metal loop, gently pry the loop open just enough to clear the slider’s crown. Slide it into position, then use the pliers to squeeze the loop closed. Apply gentle, steady pressure; squeezing too hard can snap the cast zinc alloy common in zipper hardware.
For Entire Slider (Closed-End): To replace the entire slider on a closed-end zipper (like on a bag pocket), you must access the top of the zipper track. Use end-cutting pliers to gently pry off or snip the metal top stops at the very top of the zipper tape, taking care not to cut the fabric tape itself. Slide the old, damaged slider up and off the track. Position the new slider with its nose facing down the track, and carefully feed both sides of the zipper tape into the slider’s side channels. Once threaded, slide it down to ensure the teeth mesh correctly. Finally, slide a new metal top stop over the fabric edge at the top of each side and crimp it firmly with pliers to prevent the slider from coming off.
For Entire Slider (Separating/Jacket): For a separating jacket zipper, the process is similar but occurs at the top of the pin-and-box side. Pry off the top stop on the side of the zipper tape that carries the slider. Slide the old slider up and off the tape. Slide the new replacement slider onto the tape in the same orientation, ensuring the internal locking mechanism faces outward. Slide it all the way down to the bottom box to verify it aligns perfectly with the insertion pin on the opposite tape. Secure the top of the tape with a replacement top stop, crimping it tightly with your pliers.
Safety and Limitations: Never force a slider onto a track if it resists, as this can bend the teeth or tear the fabric tape. Do not attempt to pry open molded plastic stops, as they will snap and cannot be reattached. If your zipper has missing or severely bent teeth, replacing the slider will not fix the issue; the entire zipper assembly must be replaced. For delicate fabrics like silk, fine wool, or high-end technical outerwear, or if you feel uncomfortable removing top stops, consult a professional tailor or cobbler to ensure a flawless repair.
Frequently Asked Questions (FAQ)
Can I use a metal zipper puller on a nylon coil zipper?
The slider body must match the specific teeth type of your zipper track. You cannot use a slider designed for metal teeth on a nylon coil zipper. The internal channel shapes differ significantly, and using the wrong type will result in jamming, failure to close, or permanent damage to the nylon coils.
What does the number on the back of the zipper slider mean?
The number engraved on the back of the slider (such as #3, #5, or #8) indicates the standard industry size of the zipper, which corresponds to the approximate width of the closed teeth in millimeters. Your replacement slider must have the exact same number to fit and glide smoothly along the track.
Community discussion
Share your experience or ask a question. Comments are reviewed before publication.