
Transforming a basic kraft or solid-color paper gift bag into an elegant, premium presentation relies on three core principles: creating volume with layered tissue paper, adding structural elegance with well-proportioned ribbon bows, and incorporating subtle, high-quality embellishments. By mastering simple folding, threading, and tying techniques, you can elevate everyday wrapping materials into a sophisticated gift presentation that rivals professional boutique packaging. This approach not only saves money but also allows you to customize the aesthetic to suit any occasion, from weddings to corporate events.
The key to success lies in the details. A plain bag acts as a blank canvas, meaning every fold of tissue paper and every loop of ribbon will stand out. By selecting complementary textures, coordinating your color palette, and securing your materials properly, you can ensure the final presentation looks intentional, polished, and secure during transit.
Materials and Tools You Will Need
Before beginning, gathering the correct supplies will ensure a smooth and professional-looking wrapping process. The foundation of your presentation is the plain gift bag itself. When selecting a bag, pay close attention to the paper weight and structural integrity. Standard kraft paper bags with a weight of 120 grams per square meter (gsm) to 150 gsm offer a sturdy base that resists creasing, while premium bags of 200 gsm or higher provide a rigid, luxurious feel. A high-quality plain kraft bag typically costs between S$1 and S$3, making it an incredibly cost-effective starting point compared to pre-decorated boutique bags. Ensure the bag size matches the gift; a bag that is too large will cause the tissue paper to collapse inward, while a bag that is too small will bulge and distort the overall shape.
Products mentioned in this guide

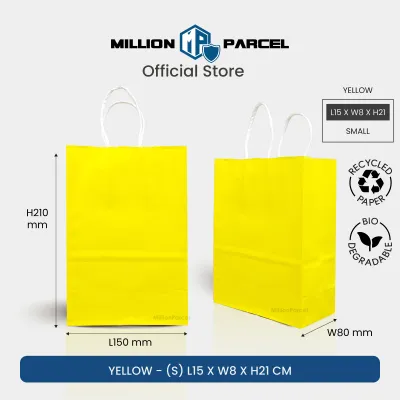
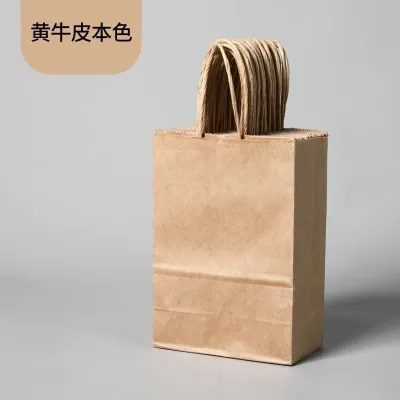
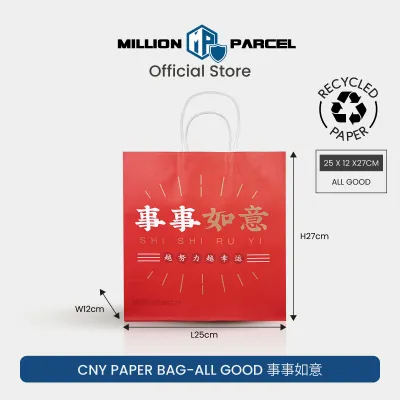
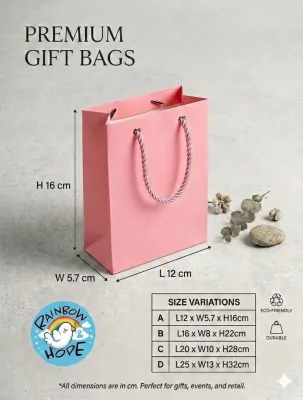

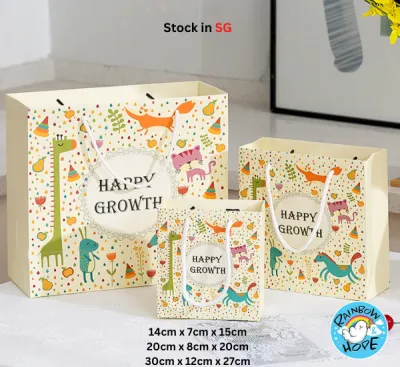
Prices are valid at publication and may change. Please refer to the product page for the latest price.
Next, choose your tissue paper. For a rich, opaque look, select high-quality tissue paper with a weight of 14 gsm to 17 gsm. Standard white tissue paper works well as a neutral filler, but incorporating colored, metallic, or subtly patterned sheets adds depth. When planning your color scheme, a good rule of thumb is to use two coordinating colors—such as a soft pastel paired with a metallic gold, or two different shades of the same hue—to create visual interest without overwhelming the design.
Ribbons are the primary decorative element and must be scaled to the size of the bag. For small bags, a ribbon width of 1.5 centimeters is ideal, while medium to large bags can accommodate wider ribbons of 2.5 centimeters to 3.8 centimeters. Satin ribbons offer a classic, glossy finish, grosgrain provides a ribbed texture that holds knots exceptionally well, and organza adds a sheer, delicate touch. Ensure you have enough length; a standard bow typically requires 50 to 80 centimeters of ribbon, while wrapping handles will require more depending on their length.
Finally, assemble your tools. You will need a pair of sharp fabric shears to ensure clean, fray-free ribbon cuts. Standard household scissors often chew through delicate ribbon fibers, leaving unsightly frayed edges. For securing your decorations, keep high-quality double-sided tape, clear glue dots, and a ruler on hand. If you plan to add custom tags or seals, a hole punch and a wax seal kit can provide an excellent finishing touch.
Preparing the Tissue Paper Base
The way you arrange and fold your tissue paper determines the volume and elegance of the presentation. A common mistake is simply crumpling the paper and stuffing it into the bag, which results in a messy, unpolished look. Instead, use structured folding techniques to create a full, natural backdrop that frames the gift beautifully.

One of the most reliable methods is the “point-and-tuft” technique. Lay a sheet of tissue paper flat on a clean surface. Pinch the exact center of the sheet and lift it upward, letting the corners drape naturally. With your other hand, gently slide down the gathered paper from the center point to the bottom, smoothing the folds into a cone shape. Rotate your wrist slightly to flare out the corners, creating a soft, voluminous tuft. For a richer look, layer two sheets of tissue paper—either offset slightly or in contrasting colors—before pinching the center. This creates a multi-layered, opaque effect that hides the gift completely.
If you prefer a more structured, modern aesthetic, try the accordion fold. Lay two sheets of tissue paper flat, one on top of the other. Fold the paper back and forth in 5-centimeter increments, creating a long pleated strip. Pinch the center of the pleated strip and fold it in half to form a fan shape. When placed inside the bag, this fan opens up to create a crisp, geometric border that frames the opening of the bag with clean lines.
When placing the tissue paper inside the bag, timing is crucial. Place your gift at the bottom of the bag first, ensuring it is centered and stable. If the gift is lightweight or has sharp corners, wrap it in a single sheet of plain tissue paper first to protect it. Next, insert your prepared tissue paper tufts or fans around the sides of the gift. Adjust the height so that the tissue paper peeks out of the top of the bag by approximately one-third of the bag’s total height. This proportion is visually pleasing and prevents the paper from looking either lost inside the bag or excessively oversized. To keep the paper from shifting or sinking during transport, apply a small piece of double-sided tape to the inner rim of the bag and press the base of the tissue paper tufts firmly against it.
Styling the Ribbon Handles and Bows
Ribbons offer an excellent opportunity to customize a plain gift bag and tie the entire presentation together. If your bag has standard rope or twisted paper handles, you can wrap them to create a cohesive, premium look. Secure one end of a 1.5-centimeter satin ribbon to the inside base of the handle using a small dab of clear adhesive or double-sided tape. Wrap the ribbon tightly around the handle in a spiral pattern, overlapping each turn slightly to ensure the original handle material is completely covered. Secure the opposite end on the inside of the bag. This simple upgrade instantly elevates the tactile experience of carrying the bag.
For bags with pre-existing handles, adding a structured bow to the handle base is a classic embellishment. To create a classic bow, cut a length of ribbon and tie it directly around one of the handle attachments. If you prefer a more symmetrical, professional-looking bow, construct it separately and attach it afterward. Create two loops with your ribbon, cross them over, and pull one loop through the center opening. Pull the loops tight and adjust their size until they are perfectly symmetrical. To attach the finished bow, thread a thin piece of wire or a smaller piece of ribbon through the back of the knot and tie it securely to the handle base.
If your plain bag does not have handles, or if you want to conceal them, you can use ribbon to create a decorative band around the top rim. Wrap a wide ribbon horizontally around the upper third of the bag, securing it at the back with double-sided tape. You can then attach a pre-made bow to the center front of this band. This technique mimics the look of a high-end gift box and adds structural stability to the top opening of the bag.
To ensure your ribbon work looks professional, always cut the ribbon ends cleanly. Use sharp fabric shears to cut the ends at a precise 45-degree angle, or fold the ribbon end in half vertically and cut upward at an angle to create a classic swallowtail shape. If you are using synthetic ribbons like satin or polyester, you can prevent the edges from fraying by carefully passing the cut edge near a small flame for a fraction of a second. The heat will melt the synthetic fibers slightly, sealing the edge. For natural fibers like cotton or linen, apply a tiny drop of clear fabric glue or clear nail polish to the very edge of the cut to lock the threads in place.
Adding Simple Embellishments for a Premium Finish
Once your tissue paper and ribbons are in place, adding subtle, lightweight embellishments can provide a highly personalized, premium finish. The key is restraint; too many additions will make the bag look cluttered and detract from the clean lines of your wrapping. Aim for one or two carefully chosen accents that complement your color palette.
Natural elements are an excellent choice for a rustic or elegant aesthetic. You can tuck a small sprig of dried lavender, eucalyptus, or baby’s breath behind the knot of your ribbon bow. These elements add texture and a subtle, pleasant fragrance. If you prefer a more classic look, attach a small, high-quality gift tag. Write your message in neat calligraphy using a fine-tip gel pen or calligraphy marker. To attach the tag, thread a piece of thin twine or metallic thread through the tag’s eyelet and tie it directly to the ribbon handle.
For an ultra-premium touch, consider using a wax seal. You can melt a small amount of sealing wax onto a silicone mat, press a decorative stamp into it, and let it cool. Once set, peel the wax seal off the mat and apply a double-sided adhesive circle to the back. This allows you to stick the wax seal directly onto the center of your ribbon bow, the front of the gift bag, or the corner of your gift tag without risking hot wax dripping onto your wrapping materials.
If you want to add a subtle pattern to your tissue paper, use decorative edge scissors (such as pinking shears or wave-edge scissors) to trim the top borders of the sheets before folding them. This simple step creates a delicate, lace-like edge that catches the light beautifully. Regardless of the embellishments you choose, ensure they are lightweight and securely fastened. Use strong double-sided tape or glue dots to hold elements in place, ensuring they will not shift, fall off, or damage the bag during transport.
Common Mistakes to Avoid When Decorating Gift Bags
While decorating a gift bag is a creative process, avoiding a few common pitfalls will ensure your final presentation looks professional and remains structurally sound. One of the most frequent errors is overstuffing the bag with too much tissue paper. While volume is desirable, excessive paper can crowd the opening, hide the gift entirely, and make the presentation look chaotic. The tissue paper should frame the gift, not compete with it. If the bag is bulging or the paper is spilling out untidily, remove a sheet or two and re-adjust the remaining pieces.
Another common mistake is using ribbons that are poorly scaled to the size of the bag. Using a very thin ribbon on a large, heavy kraft bag can look cheap and disproportionate, while an excessively thick, heavy ribbon on a small jewelry-sized bag can overwhelm the delicate packaging. Always match the ribbon width to the bag’s dimensions. Additionally, ensure the ribbon material matches the formality of the occasion; for example, rustic twine may clash with a glossy, metallic bag, while shiny satin might look out of place on a rustic, unfinished kraft paper bag.
Relying on weak or low-quality adhesives is another error that can ruin your hard work. Standard clear tape often loses its grip when exposed to humidity or movement, causing bows to fall off and tissue paper to slip. Always use high-quality double-sided tape or specialized glue dots designed for paper crafting. These adhesives provide a strong, low-profile bond that remains invisible and secure.
Finally, never ignore the weight of the gift inside the bag. If you are gifting a heavy item, such as a bottle of olive oil or a ceramic mug, the weight can cause the bottom of a plain bag to sag or the handles to tear. Before you begin decorating, reinforce the bottom of the bag by cutting a piece of thick cardboard to fit the interior base. This distributes the weight evenly and maintains the bag’s clean, rectangular shape. When carrying a heavy gift, always support the bag from the bottom rather than relying solely on the decorated handles, ensuring your beautiful presentation arrives intact.
Frequently Asked Questions (FAQ)
How do I keep tissue paper from falling into the bag?
To prevent tissue paper from slipping down into the bag, you can secure it using a few simple techniques. First, ensure the gift itself is placed at the bottom of the bag to act as an anchor. You can wrap the bottom half of your folded tissue paper tufts around the gift box before lowering it into the bag, which naturally holds the paper in place. Alternatively, apply a small strip of double-sided tape to the inside collar of the gift bag, approximately two centimeters below the rim. Press the gathered base of each tissue paper tuft firmly against the tape. This keeps the paper upright and prevents it from sliding downward, even if the bag is carried over long distances.
Can I reuse ribbons and tissue paper from previous gifts?
Yes, reusing ribbons and tissue paper is an excellent, eco-friendly practice, provided the materials are in good condition. Inspect the tissue paper for deep creases, tears, or discoloration. If a sheet is lightly wrinkled, you can smooth it out by laying it flat on a clean surface and gently pressing it with your hands, or by placing it under a heavy book for a few hours. For ribbons, check for fraying, stains, or permanent creases from previous knots. You can smooth out satin or grosgrain ribbons by pulling them gently over the edge of a clean desk or using a hair straightener on a very low heat setting. Simply cut away any damaged or frayed sections to leave a clean, reusable length.
What is the best way to transport a heavily decorated gift bag?
Transporting a decorated gift bag requires care to avoid crushing the tissue paper or damaging delicate embellishments. Always carry the bag by supporting the bottom with one hand while holding the handles loosely with the other. This prevents the weight of the gift from straining the handles or distorting the bag’s shape. When placing the bag in a vehicle, position it on a flat, level surface, such as the floorboard of the passenger seat, rather than on an angled car seat where it might tip over. Keep it away from direct air conditioning vents, which can blow the tissue paper out of place, and ensure other items are not leaning against it to protect your bows and embellishments from being crushed.
Community discussion
Share your experience or ask a question. Comments are reviewed before publication.