
Creating elegant, bespoke thank you cards at home is an exceptional way to express gratitude while maintaining full creative control over your event’s aesthetic. Whether you are celebrating a wedding or hosting a high-profile corporate gathering, handmade stationery adds a level of warmth and sophistication that mass-produced alternatives simply cannot replicate. Achieving a professional, boutique-quality finish at home requires a thoughtful combination of design principles, high-grade materials, and precise execution.
Using reliable crafting equipment—such as a precision paper trimmer from specialized brands like Thanko or a dedicated heavy-duty scoring board—ensures your handiwork displays the clean lines of a professional print shop. By mastering a few key techniques, you can produce stunning cards that delight your recipients and elevate your overall presentation without exceeding your budget.
Designing Elegant Thanko-Style Cards: Wedding vs. Corporate Styles
The definition of elegance is highly contextual and depends entirely on the nature of your event. For a wedding, elegance is often synonymous with romance, intimacy, and deeply personalized details that reflect the couple’s journey. Conversely, corporate elegance demands a sleek, minimalist, and highly structured aesthetic that aligns seamlessly with professional branding. Understanding these stylistic boundaries will guide your choices in typography, color palettes, and paper textures.
Products mentioned in this guide
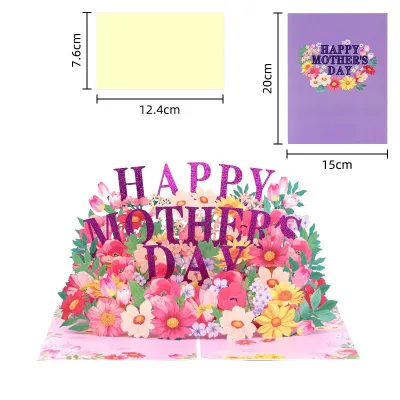
![Greeting Gift Card Thank You Card [Series 15] Appreciation](https://img.lazcdn.com/g/p/518da036417d468a7998e9cbd8198591.jpg_400x400q80.jpg_.webp)
Prices are valid at publication and may change. Please refer to the product page for the latest price.
Paper weight and finish play a critical role in conveying luxury without the need for commercial letterpress machinery. A heavy, textured paper like cotton or linen cardstock immediately signals quality to the touch, whereas a smooth, ultra-matte finish offers a modern, crisp canvas. Selecting the right color palette is equally vital: soft neutrals, muted pastels, and metallic accents suit romantic celebrations, while classic monochrome, deep navy, or brand-specific tones establish a sophisticated corporate presence.
Wedding Thank You Cards
Wedding thank you cards should feel like a warm, personal extension of your special day. Incorporating intimate design elements, such as a custom monogram of your initials, a hand-drawn illustration of your venue, or a high-resolution photo from the ceremony, immediately makes the card a cherished keepsake. These personal touches help guests recall the joy of the celebration and feel genuinely appreciated for their presence and gifts.
To elevate the romantic aesthetic, consider layering materials to add physical depth and tactile interest. A translucent vellum overlay secured with a delicate thread, a subtle botanical blind-deboss, or a soft-touch paper finish can transform a simple card into an artistic statement. When designing the layout, always prioritize breathing room; leaving ample blank space on the interior ensures your handwritten, heartfelt messages remain the focal point without feeling cramped or cluttered.
Corporate Thank You Cards
Corporate appreciation cards must project professionalism, reliability, and polished brand identity. The design should rely on clean, sophisticated typography, generous white space, and premium, heavy-weight cardstock rather than elaborate decorative elements. A minimalist layout ensures the message of gratitude is communicated clearly and respectfully, reinforcing the strength of your professional relationship.
Subtle brand integration is key to keeping the card elegant rather than promotional. Instead of printing a loud, full-color logo on the front, opt for a discreet, blind-debossed emblem or a small, metallic foil-stamped company mark in a corner. The interior should feature a beautifully typeset, standardized message of appreciation, leaving a dedicated space at the bottom for a brief, handwritten signature or a personalized sentence from the account manager or executive.
Essential Tools and Materials for a Professional Finish
To achieve a flawless, boutique-style finish at home, you must curate a toolkit of high-quality stationery and crafting essentials. The foundation of any premium card is the cardstock itself. For a luxury feel, select paper weights between 250 and 300 GSM (grams per square meter). Before purchasing your paper, consult your home printer’s manual to verify its maximum paper weight capacity; standard desktop printers often struggle with media thicker than 220 GSM, which can lead to paper jams, roller slippage, or ink smudging.

The choice of printing equipment significantly influences your final design options. Home inkjet printers excel at reproducing rich, vibrant colors and photographic details on textured matte papers, while laser printers offer crisp, sharp text that resists moisture. However, if your design calls for specialized finishes like metallic foil stamping, white ink on dark paper, or deep letterpress debossing, printing the base cards at a local print shop before hand-assembling them at home is often the most reliable path.
Precise cutting and scoring are non-negotiable for a professional look. A heavy-duty rotary paper trimmer or a guillotine cutter is essential for achieving straight, clean edges that scissors simply cannot provide. Additionally, a dedicated scoring board and a bone folder are critical; these tools compress the paper fibers along the fold line, allowing you to create a sharp, crack-free crease in heavy cardstock.
Finally, selecting the correct adhesive prevents your assembled elements from warping or deteriorating over time. Always use acid-free, archival-quality double-sided tape or high-tack glue dots to secure layers, vellum, or photo inserts. Standard liquid school glues contain high water content, which inevitably causes thick cardstock to buckle, ripple, and lose its flat shape as it dries.
Step-by-Step Guide to Assembling Your Thank You Cards
Assembling your thank you cards systematically ensures consistency across your entire batch, whether you are producing fifty cards or five hundred. Follow these precise steps to format, print, cut, and fold your stationery flawlessly.
Step 1: Formatting and Test Printing Begin by setting up your card template in a design program, ensuring you include a 3mm bleed area and visible crop marks if your design extends to the edge of the paper. This bleed area prevents unsightly white borders from showing after the cards are trimmed. Before printing onto your expensive, high-quality cardstock, perform a test print on standard printer paper. Place the test print against a light source or fold it manually to verify that the text alignment, margins, and color rendering are exactly as intended.
Step 2: Printing on Cardstock Once your alignment is verified, load your premium cardstock into the printer. To prevent feeding issues and ink smudging, utilize the printer’s manual feed tray or rear bypass slot rather than the standard bottom paper cassette. Adjust your printer software settings to match the exact media type, selecting options such as “Heavy Paper,” “Cardstock,” or “Thick Matte.” Feed the sheets one at a time if necessary, and allow each printed page to dry completely on a flat surface before handling or stacking them.
Step 3: Scoring and Folding Heavy cardstock must never be folded dry without preparation, as doing so tears the paper fibers and leaves a jagged, unprofessional edge. Align your printed sheet on a scoring board, placing the fold line directly under the scoring groove. Run your bone folder firmly down the groove once to compress the fibers, creating a clean indentation. Fold the card away from the indentation (the mountain side), and slide the flat edge of the bone folder over the crease to press it flat and lock in a sharp, crisp fold.
Step 4: Trimming to Size Place your scored and folded card onto your paper trimmer. Line up the blade precisely with the printed crop marks, holding the paper firmly against the trimmer’s guide rail to prevent shifting during the cut. Lower the blade in a smooth, continuous motion to slice away the excess margin. Trimming after folding, rather than before, ensures that both halves of the card align perfectly at the edges without any awkward overhang.
Step 5: Assembly With the card bases cut and folded, you can begin the final assembly process. Lay your cards flat on a clean, dust-free workspace. Apply small strips of acid-free double-sided tape or strategically placed glue dots to secure any vellum overlays, photo prints, or decorative inner liners. Once the adhesives are set, gently slide each completed card into its matching envelope, ensuring the front of the card faces the back of the envelope so the recipient sees the design immediately upon opening.
Elevating the Design with Elegant Embellishments
Adding subtle, tactile embellishments is the secret to transforming a standard home-printed card into an extraordinary piece of custom stationery. These details engage the recipient’s senses and highlight the care poured into the project.
Calligraphy and Hand-Lettering Integrating handwritten elements creates an instant personal connection. Use a high-quality metallic gel pen, archival fine liner, or flexible brush pen to hand-write the recipient’s name on the envelope or add a brief personal note inside. The contrast between structured, printed typography and the organic flow of hand-lettering provides a beautiful, high-end contrast that feels highly exclusive.
Wax Seals A classic wax seal adds an old-world charm and physical weight to your envelopes or card closures. To execute this safely, melt high-quality flexible wax beads in a melting spoon over a small tea light candle, ensuring the wax does not overheat or boil. Pour a small pool of wax onto your target surface and press a metal stamp firmly into the center, leaving it to cool for fifteen seconds before lifting. To eliminate the risk of damaging your finished cards with spilled wax, pre-make your seals on a non-stick silicone mat or parchment paper, peel them off once cooled, and attach them to your cards using double-sided adhesive glue dots.
Ribbons and Edge Painting Wrapping your cards with a delicate band of hand-frayed silk ribbon, cotton twine, or chiffon adds a soft, luxurious texture. Secure the ribbon at the back with a tiny glue dot or tie it into a neat, flat knot at the front. For an extra touch of glamour, clamp a stack of trimmed cards tightly together and run a metallic gold or silver paint marker along the exposed edges of the cardstock, creating a brilliant, gilded edge that shines when the card is handled.
Embellishment Warning While embellishments elevate your design, restraint is crucial. Over-embellishing can make your cards look cluttered, amateurish, and bulky. Excessive layers or heavy wax seals can also cause the cards to exceed standard postal limits, increase shipping costs, or suffer damage as they pass through automated sorting machines. Focus on one or two cohesive accents that complement rather than compete with your overall design.
Final Quality Checks and Mailing Preparation
Before sending your handiwork into the world, a rigorous quality control check ensures that every recipient receives a flawless token of your appreciation. Inspect each completed card individually under bright, natural light. Check for any faint ink smudges, uneven margins, loose embellishments, or jagged edges. Wipe away any stray paper dust or adhesive residue with a clean, dry microfiber cloth to keep the presentation pristine.
The envelope you select should match the quality and weight of the card inside. Opt for premium, heavy-weight envelopes (ideally 120 GSM or higher) with a secure peel-and-seal strip to ensure a clean, moisture-free closure. A subtle inner lining or a textured finish that coordinates with your cardstock color palette completes the cohesive, high-end presentation.
When preparing your cards for mailing in Singapore, special care must be taken to avoid postage complications. Assembled cards with wax seals, ribbons, or thick cardstock can easily exceed standard weight and thickness limits. Weigh your completed, stuffed envelopes using a digital kitchen scale and measure their thickness. Consult SingPost’s current guidelines to determine if your mail falls under standard local mail, non-standard mail, or package rates. Using the correct postage prevents returned mail and ensures your elegant thank you cards arrive safely and promptly at your guests’ doorsteps.
Community discussion
Share your experience or ask a question. Comments are reviewed before publication.