
Creating a custom DIY wedding guest book allows you to capture heartfelt messages from your loved ones in a keepsake that mirrors your exact wedding aesthetic. By selecting your own paper stock, cover materials, and binding style, you can design a cohesive piece that fits your celebration far better than any mass-produced alternative. The process involves defining your theme, gathering archival-quality stationery supplies, assembling the book with precise binding techniques, and setting up an inviting display on your big day.
Define Your Wedding Theme and Guest Book Format
To ensure your guest book feels like a natural extension of your wedding, begin by aligning its physical format with your overall design theme. A rustic celebration often calls for natural textures like kraft paper, exposed wooden covers, or twine bindings. For a minimalist or modern aesthetic, clean lines, monochromatic book cloth, and generous white space on each page work beautifully. If your theme leans vintage, consider using textured handmade paper with deckled edges and a classic leather or velvet cover.
Next, calculate the size and page count of your book based on your guest list. You do not need a single page for every individual guest, as couples and families usually sign together. A safe estimate is to allocate one page for every three to four guests if you want them to write longer messages, or one page for every ten guests if they are only signing their names. For a standard wedding of 150 guests in Singapore, a book with 40 to 50 pages (80 to 100 sides) provides ample space without leaving too many empty sheets at the back. Common dimensions like A5 (148mm x 210mm) or a square 200mm x 200mm format offer a balanced canvas that is easy for guests to handle on a busy reception table.
Products mentioned in this guide
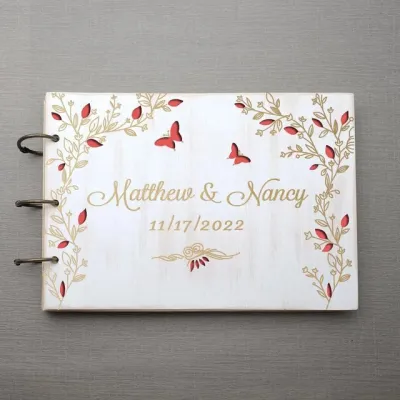
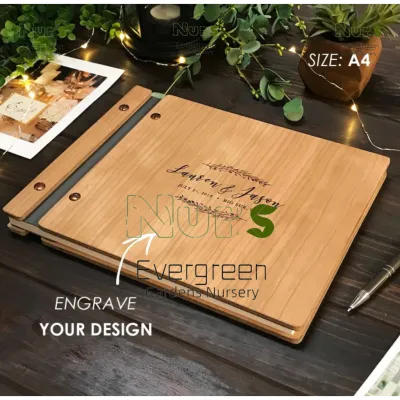
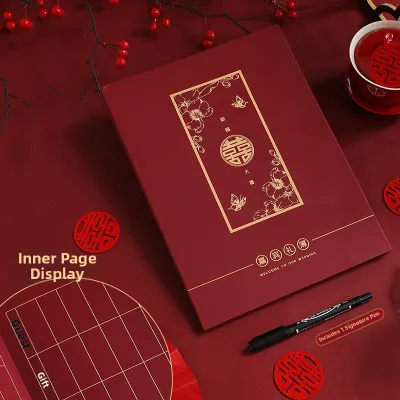
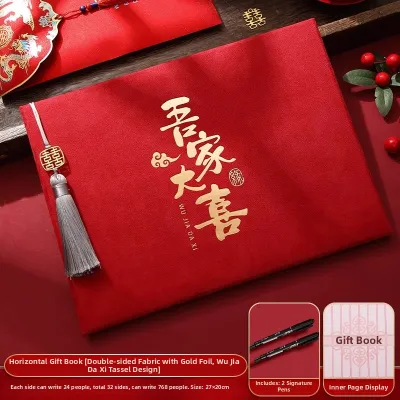
Prices are valid at publication and may change. Please refer to the product page for the latest price.
Finally, choose a structural format that suits your wedding-day flow. A traditional bound book keeps all messages securely in one place and is easy to store on a bookshelf. Alternatively, a loose-card collection housed in a decorative box allows multiple guests to write their notes simultaneously, preventing bottlenecks at the reception desk. You can also explore interactive formats, such as a wooden frame where guests drop signed wooden tokens, or a custom-bound album with slots for instant photos taken during the cocktail hour.
Gather Materials and Tools for the DIY Project
Selecting the right stationery materials is critical to ensuring your guest book survives decades of handling and storage. When choosing paper, prioritize acid-free and archival-quality sheets to prevent yellowing and deterioration over time. A paper weight of at least 120 gsm (grams per square meter) is recommended to prevent ink from bleeding through to the other side. If your guests will be pasting instant photos or using heavy calligraphy ink, opt for a sturdier cardstock between 180 gsm and 220 gsm. Textured papers like cold-press watercolor paper or linen-finish sheets add a tactile quality, but ensure the surface is smooth enough to prevent pens from snagging.

For the cover, you will need a rigid base such as greyboard or book board, typically 2mm to 3mm thick, to prevent warping. This board can be wrapped in book cloth, linen, velvet, or faux leather to match your wedding color palette. If you prefer a simpler binding method, heavy-duty kraft cardstock or thin wooden panels can serve as durable covers. Depending on your chosen binding style, you will also need binding rings, satin ribbons, waxed linen thread, or a specialized bookbinding adhesive.
Having the correct crafting tools on hand ensures clean, professional results. Gather a heavy-duty utility knife or precision cutter, a metal ruler with a non-slip backing, a cutting mat, a scoring board, and a bone folder. The bone folder is essential for creating crisp, clean folds in your paper and smoothing out air bubbles when wrapping your cover boards. For adhesives, use a neutral-pH, acid-free PVA (polyvinyl acetate) glue, which remains flexible when dry and will not cause your paper to warp or discolor over time. Double-sided archival tape is also useful for securing delicate liners and endpapers.
When working with sharp precision cutters and strong adhesives, safety is essential. Always cut away from your body on a stable cutting mat, and keep your fingers clear of the metal ruler’s edge. Work in a well-ventilated room when applying liquid glues or spray adhesives to avoid inhaling fumes, and wash your hands thoroughly after handling binding chemicals.
Step-by-Step Guide to Assembling and Binding the Guest Book
Begin by measuring and cutting your inner pages and cover boards to your desired dimensions. Use your metal ruler and precision cutter to make multiple light passes rather than trying to cut through thick board in a single stroke; this prevents jagged edges and slipping. If you are creating a folded-signature book, fold your pages in small groups (called signatures) using your bone folder to press each crease flat. Ensure your cover boards are cut slightly larger than your inner pages—typically 3mm to 5mm wider on the top, bottom, and outer edges—to protect the paper edges from wear.
Next, prepare and wrap your cover boards. Cut your chosen cover fabric or paper so that it extends about 20mm beyond the edges of your book board on all sides. Apply a thin, even layer of PVA glue to the board using a foam brush, then press it firmly onto the center of the cover material. Use your bone folder to smooth out any air bubbles, working from the center outward. Mitre the corners of the cover material at a 45-degree angle, leaving a small gap equal to the thickness of your board at each corner, then fold the edges over and glue them down securely. For a traditional hardback book, reinforce the spine area with a strip of mull cloth or spine tape to provide structural support before attaching the endpapers.
Once your covers and pages are prepared, execute your chosen binding method. If you are using a Japanese bookbinding technique (stab binding), clamp your pages and covers together, mark your hole spacing evenly, and use an awl or a Japanese screw punch to create clean holes through the entire stack. Thread a waxed linen cord through the holes in a decorative pattern, keeping the tension firm but not so tight that it puckers the paper. If you prefer a lay-flat binding, glue the folded spines of your signatures together using PVA glue and a fabric reinforcement strip, allowing it to dry completely under a heavy weight.
During assembly, monitor your progress closely for potential errors. If you notice that your punched holes are misaligned or that the adhesive is causing the paper to ripple, stop immediately before the glue cures. You can gently peel back damp paper and scrape away excess adhesive with a plastic scraper, or recut a damaged page before proceeding. Once the book is fully assembled, place it under a heavy stack of books for at least 24 hours to cure flat and prevent warping in Singapore’s humid climate.
Add Personalized Details and Thematic Decorations
With the structural base complete, you can now apply custom design elements that tie the guest book directly to your wedding theme. Consider printing a custom monogram, your wedding date, or a subtle floral motif on the front cover using heat-embossing powder or metallic foil transfer sheets. On the inside pages, you can print gentle writing prompts—such as “Share your favorite memory with us” or “Where do you see us in ten years?”—to help guests who might struggle with writer’s block. Keep these prompts small and positioned at the top or bottom of the pages to leave plenty of room for signatures.
The choice of writing instruments is just as important as the paper itself. Provide high-quality archival gel pens, fine-liner markers, or calligraphy pens that match your color scheme. Before the wedding, conduct a thorough test of your chosen pens on a scrap piece of your actual guest book paper. Check for feathering (where the ink spreads along the paper fibers), bleeding (where ink shows through to the back of the page), and drying speed. In humid conditions, some slow-drying gel or fountain pen inks can easily smudge when a guest turns the page, so opt for quick-drying, water-resistant pigment inks.
Enhance both the look and usability of your guest book with functional decorative accents. Metal corner guards in brass, rose gold, or silver protect the corners of your book from getting dented while adding an elegant touch that matches your wedding jewelry or hardware. Glue a satin or grosgrain ribbon bookmark to the top of the spine, allowing it to hang down past the bottom edge; this helps guests quickly find the next open page. You can also add small, themed paper pockets to the inside covers to hold loose cards, instant photo prints, or adhesive photo corners.
Final Checks and Display Setup for the Wedding Day
Before packing your guest book for the venue, perform a final quality check to ensure it can withstand a full day of enthusiastic use. Open and close the book multiple times, turning every page to verify that the binding is secure and that the pages turn smoothly without catching or tearing. Gently tug on the outer edges of the pages to confirm that the glue or thread is holding firm. If any pages feel loose, apply a tiny drop of PVA glue with a toothpick to reinforce the binding before the event.
Re-verify your pen and paper combination one last time by writing a test message, closing the book immediately, and checking if any ink transfers to the opposite page. If smudging occurs, swap out your pens for a faster-drying alternative, such as fine-tip pigment liners or specialized quick-dry gel pens. It is always wise to provide at least three to five pens at the guest book station so that multiple guests can write at once and to serve as backups if a pen runs out of ink or is misplaced.
On the wedding day, the presentation of your guest book station plays a major role in how many guests actually sign it. Set up a dedicated table in a high-traffic area, such as near the entrance of your reception hall or next to the photo booth, ensuring it has a flat, stable surface for comfortable writing. Frame a clear, beautifully printed sign that invites guests to leave a message, and place your pens in a stylish holder that matches your theme. Finally, ensure the area is well-lit so guests can read what they are writing, perhaps by placing a warm table lamp or arranging the table near the venue’s ambient lighting to create an inviting, photogenic setup.
Community discussion
Share your experience or ask a question. Comments are reviewed before publication.