
Printing custom greeting cards at home is a rewarding way to add a personal touch to birthdays, holidays, and special milestones. By taking control of the design, paper selection, and finishing steps, you can create professional-quality stationery right from your study or home office. While the process is highly accessible, achieving a polished, store-bought look requires careful attention to detail, from matching your cardstock to your printer’s mechanical limits to mastering the art of scoring and folding.
Designing and printing your own cards also allows for complete creative freedom. You can tailor the message, imagery, and layout to the recipient’s exact personality, creating a keepsake that stands out from mass-produced alternatives. With a few basic tools and a systematic approach, you can easily establish a reliable home printing workflow that saves money and produces beautiful results.
Essential Tools and Materials for Home Card Printing
Before starting your first print run, gathering the right equipment will save you time and prevent wasted materials. The most critical tool is your printer, and understanding how your specific model handles heavy paper is essential. Inkjet printers are generally preferred for home card printing because they spray liquid ink, which conforms well to textured cardstock and produces rich, blended colours. Laser printers, which use heat to fuse toner powder onto the page, offer exceptionally sharp text and fast print speeds, but the thick toner layer can sometimes crack along fold lines.
Products mentioned in this guide
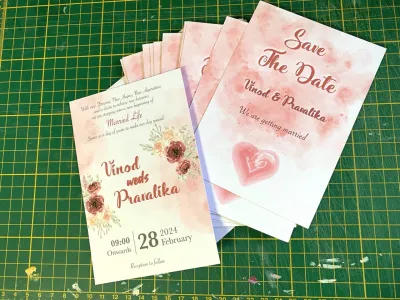
![Cards Prints Printing Custom sizes Wedding Invitations events party service [No MIN Qty]](https://img.lazcdn.com/g/p/2da5b0878ec636a94d5a2590c58bfff1.jpg_400x400q80.jpg_.webp)
Prices are valid at publication and may change. Please refer to the product page for the latest price.
Paper weight is measured in grams per square metre (GSM). Standard office copy paper is typically 80 GSM, which is far too flimsy for a greeting card. For a sturdy, premium feel, look for cardstock between 220 GSM and 300 GSM. However, before purchasing any paper, you must consult your printer’s user manual to verify its maximum supported paper weight. Feeding cardstock that exceeds your printer’s rated limit can cause severe paper jams, roller slippage, or permanent mechanical damage.
To transform your printed sheets into clean, professional cards, you will need a few basic finishing tools. Avoid standard household scissors, as they tend to create jagged, uneven edges on thick paper. Instead, invest in a metal ruler, a sharp craft knife, and a self-healing cutting mat. A metal ruler is crucial because plastic or wooden rulers can easily be nicked by a blade, leading to crooked cuts. Alternatively, a rotary paper trimmer can streamline the process if you plan to print cards in larger quantities.
Because this project involves sharp blades, safety should always be your top priority. When using a craft knife, always cut on a stable, flat surface and pull the blade away from your body. Keep your non-dominant hand firmly pressed on the centre of the metal ruler, ensuring your fingers are well behind the protective metal edge. If you choose to use liquid adhesives or spray glues for embellishments, work in a well-ventilated room to avoid inhaling fumes, or opt for mess-free alternatives like acid-free double-sided tape.
Step 1: Sizing and Designing Your Custom Card
Creating a successful card design begins with choosing the right dimensions. The most common approach is to print on a standard sheet of paper and fold it in half. For example, folding an A4 sheet in half yields an A5 card, while folding an A5 sheet yields an A6 card. If you prefer standard envelope sizes, you might design a card that folds to fit a classic C6 or C5 envelope. Deciding on your final folded size first ensures you set up your design canvas with the correct unfolded dimensions.

When setting up your document in your preferred design software, you must account for the fold line. If you are designing an A5 card that folds from an A4 sheet, your digital canvas should be set to A4 landscape. The right half of the canvas will serve as the front cover of your card, while the left half will be the back cover. If you wish to print a message on the inside, you will need to create a second page in your document, where the left half represents the inside-left panel and the right half represents the inside-right panel.
To ensure your cards look professional after cutting, you must incorporate bleed areas and safe zones into your layout. A bleed area is an extra 2 mm to 3 mm border around your design where background colours or images extend past the final trim line. This acts as a safety margin; if your knife slips slightly during cutting, you will not be left with an unsightly white edge. Conversely, keep all critical text, logos, and central images within a “safe zone” at least 5 mm away from the trim and fold lines to prevent them from being cut off or obscured by the crease.
Image resolution and typography also play a massive role in the final print quality. Always use high-resolution images set to at least 300 dots per inch (DPI) to avoid pixelation and blurriness. When selecting fonts, balance style with readability. While delicate, looping script fonts look elegant on a bright computer screen, they can easily bleed or become illegible when printed on textured cardstock. Choose high-contrast colour schemes and clean, legible typefaces for any body text or interior messages.
Step 2: Selecting and Preparing the Right Cardstock
Selecting the perfect cardstock involves balancing your aesthetic goals with your printer’s physical capabilities. As a general rule, standard home inkjet printers can comfortably handle cardstock up to 220 GSM through their primary paper trays, while models with a dedicated manual feed slot or rear tray can often accommodate up to 300 GSM. Always verify these specifications in your printer’s manual before loading heavy media, as forcing thick paper through a tight internal roller path will cause feed errors.
Paper finish significantly affects how ink is absorbed, how colours appear, and how long the print takes to dry. Because ink formulas and paper coatings vary widely, you should perform a small trial print to observe drying speed and bleed resistance before committing to a large run. Consider the following common finishes:
- Matte Cardstock: This uncoated or lightly coated paper is highly porous, meaning it absorbs ink quickly and virtually eliminates glare. It is excellent for text-heavy designs and offers a soft, modern, and elegant aesthetic.
- Glossy Cardstock: Coated with a reflective layer, glossy paper makes photographic elements pop with vibrant colours and sharp contrast. However, it requires significantly longer drying times and is highly susceptible to fingerprint smudges during handling.
- Textured Cardstock: Papers with a linen, felt, or hammered texture add a premium, tactile quality to your cards. These work best with inkjet printers, as the liquid ink can seep into the textured valleys, whereas laser toner may fail to adhere evenly to the uneven surface.
When preparing your paper, you must decide whether to print on pre-cut card blanks or full sheets. Pre-cut, pre-scored card blanks are highly convenient, but they can be difficult for standard printer rollers to grip and align accurately, often resulting in crooked prints. Printing your designs on full A4 sheets and trimming them down to size afterward is generally recommended. This method gives the printer’s feed rollers a larger, uniform surface area to grip, ensuring consistent alignment and reducing the risk of paper slippage.
Step 3: Configuring Printer Settings and Test Printing
To avoid wasting expensive cardstock and ink, you must configure your printer’s software settings to match your chosen media. Before hitting print, open your computer’s printer dialogue box and navigate to the advanced preferences. Change the paper type from “Plain Paper” to “Heavy Paper,” “Cardstock,” or “Matte Photo Paper.” This adjustment tells the printer to slow down the feeding mechanism and widen the gap between the printhead and the paper, preventing the printhead from scraping against the thick cardstock.
Additionally, set your print quality to “High” or “Best” rather than “Draft” or “Standard.” This ensures the printer deposits enough ink or toner to create rich, saturated colours on the dense cardstock fibres. If your printer allows you to select the paper source, choose the rear feed tray or manual bypass slot. These paths are much straighter than the lower paper cassette, which forces the paper to make a sharp U-turn that thick cardstock simply cannot navigate.
Before printing on your premium cardstock, always perform a test print on a standard sheet of cheap, lightweight copy paper. Cut and fold this test sheet exactly as you plan to do with the final card. This step allows you to physically verify that the front and back covers are oriented correctly, that the margins are even, and that no text is cut off. It also lets you check for unexpected colour shifts, as colours on a backlit computer screen often look different when translated to physical paper.
During the actual print run, monitor your printer closely. If you hear unusual grinding noises, loud clicking, or if the paper stops moving while the printhead continues to slide back and forth, immediately press the cancel button or turn off the power. These are immediate stop conditions indicating a paper jam or roller slippage. Forcing the printer to continue under these conditions can burn out the feed motor or scratch the delicate printhead assembly.
Step 4: Cutting, Folding, and Adding Finishing Touches
Once your cards are successfully printed, the final step is to cut and fold them with precision. Place your printed sheet face-up on a self-healing cutting mat. Align your metal ruler with the printed crop marks or trim lines. Hold the ruler down firmly with your non-dominant hand, spreading your fingers wide to apply even pressure. Using a sharp craft knife, make multiple light, controlled passes along the edge of the ruler rather than trying to slice through the thick cardstock in a single heavy stroke. This technique prevents the blade from slipping and ensures a perfectly straight, clean edge.
Folding thick cardstock without preparation will rupture the paper fibres along the crease, resulting in an ugly, cracked, and frayed spine. To prevent this, you must score the fold line before creasing. Place your card face-down on the cutting mat and align your metal ruler with the designated fold line. Using a bone folder, a scoring tool, or even the blunt back of a butter knife, press firmly along the ruler to create a neat, indented groove in the paper. This compresses the paper fibres, allowing them to bend smoothly without tearing.
After scoring, fold the card away from the groove (the groove should be on the outside of the fold). Use the flat side of your bone folder or a clean cloth to press down along the folded spine, creating a sharp, crisp crease. If you notice any slight misalignment along the outer edges of the folded card, you can use your craft knife and metal ruler to trim away a fraction of a millimetre, ensuring all edges are perfectly flush.
To elevate your DIY greeting cards, consider adding physical embellishments. A simple length of satin ribbon tied around the spine, a touch of metallic washi tape, or a classic wax seal can make your handmade card look like a luxury boutique item. If you are attaching physical elements, always use acid-free double-sided tape or high-quality glue sticks. Avoid cheap liquid school glues, as their high water content will cause the cardstock to warp, wrinkle, and lose its professional flatness.
Frequently Asked Questions (FAQ)
Why is my printer jamming or failing to feed thick cardstock?
Standard home printers are designed primarily for lightweight office paper. They pull sheets from a bottom tray and loop them 180 degrees around internal rollers to print. Thick cardstock is too rigid to bend around this tight radius, causing the paper to get stuck or the rollers to slip. To resolve this, check if your printer has a manual feed slot or a rear paper tray, which provides a straight-through paper path with minimal bending. Always consult your printer’s manual to verify its maximum supported paper weight; if your cardstock exceeds this limit, you must switch to a lighter paper weight to prevent hardware damage.
How do I prevent ink from smudging on glossy or coated cardstock?
Glossy and coated cardstocks have a non-porous surface layer designed to keep ink sitting on top of the paper for vibrant colours. Because the ink cannot soak into the paper fibres as quickly as it would on uncoated matte paper, it requires significantly more time to dry. To prevent smudging, adjust your printer settings to a specific glossy media profile, which optimizes and often reduces the volume of ink deposited. Once printed, handle the sheets carefully by their edges and lay them flat in a dry, dust-free area for at least 20 to 30 minutes. Avoid stacking freshly printed cards on top of one another until they are completely dry.
Community discussion
Share your experience or ask a question. Comments are reviewed before publication.