
Designing and ordering a customised paper bag is an effective way to elevate your brand presence, whether you are a retail business preparing for a product launch, an event planner sourcing corporate gifts, or a boutique owner looking to upgrade your packaging. A well-designed paper bag serves as a mobile billboard, carrying your brand identity through high-traffic shopping districts and corporate spaces. However, transitioning from a conceptual design to a finished, high-quality physical product requires careful planning and attention to technical specifications.
The process involves a systematic journey of defining physical dimensions based on your product’s size and weight, preparing print-ready digital artwork, selecting the right paper stocks and handle materials, and choosing compatible printing and finishing techniques. By understanding each of these steps, you can avoid common production errors, manage your budget effectively, and ensure that the final product aligns perfectly with your brand’s aesthetic and functional needs.
Step 1: Determine Dimensions and Weight for Your Customised Paper Bag
Establishing the correct physical specifications is the foundational step of the design process. A bag that is too small will crowd or damage its contents, while one that is excessively large can look awkward and allow items to shift, potentially causing damage during transit. To find the ideal size, you must measure the items the bag will carry.
Products mentioned in this guide
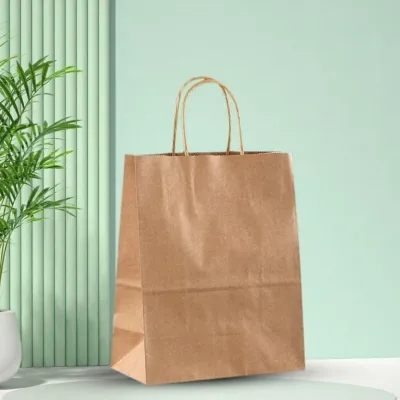
![[SG SELLER] Paper Bag with Customised Sticker / Kids Goodie Bags / Children Birthday Party Custom Gift Bag](https://img.lazcdn.com/g/p/72232330a93fe61893e0523658d7a7ba.jpg_400x400q80.jpg_.webp)
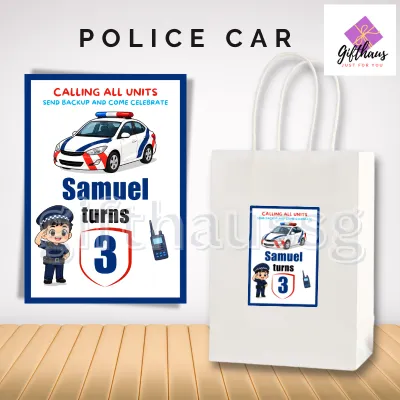
![[SG INSTOCK] Empty Kraft Paper Bag with Customised Sticker / Kids Goodie Bags / Children Birthday Party Gift Bag](https://img.lazcdn.com/g/p/3b6812372903afb2ef1a27e3770084f5.jpg_400x400q80.jpg_.webp)
![[SG INSTOCK] Empty Kraft Paper Bag with Customised Sticker / Kids Goodie Bags / Children Birthday Party Gift Bag](https://img.lazcdn.com/g/p/8a53689bc9ae570cb6b2011e58443abe.jpg_400x400q80.jpg_.webp)
![[SG INSTOCK] Empty Kraft Paper Bag with Customised Sticker / Kids Goodie Bags / Children Birthday Party Gift Bag / Kpop Demon Hunter Saja Boys Huntrix](https://img.lazcdn.com/g/p/fba0e0d2e017a5f0188bd500a0c65414.jpg_400x400q80.jpg_.webp)
![[SG INSTOCK] Empty Kraft Paper Bag with Halloween Customised Sticker / Kids Goodie Bags / Children Party Gift](https://img.lazcdn.com/g/p/9a37958b27b5b37172d921fe4b72a018.jpg_400x400q80.jpg_.webp)
Prices are valid at publication and may change. Please refer to the product page for the latest price.
Start by placing the target products or gift boxes on a flat surface in the exact arrangement they will be carried. Measure the maximum width, height, and depth of this arrangement. As a general rule, add at least 1.5 to 2 centimetres of clearance to each of these measurements to calculate the bag’s minimum inner dimensions. This buffer ensures that items can be placed inside and removed smoothly without stretching or tearing the paper. The depth of the bag, often referred to as the gusset, is particularly critical; an inadequate gusset will force the sides of the bag to bulge, distorting your printed design and weakening the structural integrity of the base.
Once the dimensions are set, you must assess the total weight of the intended contents to determine the structural requirements. Heavier items, such as glass cosmetic jars, wine bottles, or thick corporate annuals, demand a higher paper weight, measured in Grams per Square Meter (GSM). For lightweight items like apparel or small stationery pieces, a paper weight of 120 to 150 GSM is typically sufficient. Medium-weight goods benefit from 170 to 210 GSM, while premium, heavy-duty applications often require 230 GSM or higher.
To prevent the bottom of the bag from sagging or breaking under load, high-quality custom bags incorporate specific structural reinforcements. A cardboard base board (typically 300 to 450 GSM greyboard) should be inserted at the bottom of the bag to distribute weight evenly. Additionally, the top rim of the bag, where the handles are attached, should feature a folded-over top reinforcement board. This double-layer construction prevents the handles from tearing through the paper when the bag is carried.
The intended purpose of the bag also dictates its proportions. Retail packaging often prioritises height and ease of access, whereas corporate gifting bags are frequently wider to accommodate structured gift boxes. Event favour bags are typically compact and square, keeping the presentation neat and personal. Aligning the dimensions with the specific use case ensures the bag remains both functional and visually balanced.
Step 2: Prepare Print-Ready Artwork and Design Files
Converting a creative concept into a flawless physical print requires strict adherence to technical prepress standards. The most common cause of production delays and printing errors is incorrectly formatted artwork. Understanding how printing machinery interprets digital files will help you prepare assets that translate perfectly onto paper.

First, you must understand the difference between vector and raster files. Vector formats (such as Adobe Illustrator .AI, .EPS, or editable vector .PDF files) use mathematical formulas to define lines, shapes, and curves. This allows the artwork to be scaled to any size without losing sharpness. All logos, text, line art, and geometric patterns must be kept in vector format. Raster formats (such as .PSD, .TIFF, or high-resolution .JPEG files) are made of individual pixels and are used for photographs or complex digital paintings. If your design includes raster images, they must have a minimum resolution of 300 Dots Per Inch (DPI) at the exact physical size they will be printed. Lower resolutions will result in visible pixelation, blurriness, or jagged edges on the finished bag.
Your design software must be set to the CMYK (Cyan, Magenta, Yellow, Key/Black) colour mode rather than RGB (Red, Green, Blue). RGB is light-based and designed exclusively for digital screens, whereas CMYK is ink-based and designed for physical printing. Designing in RGB or failing to convert your files before submission can lead to dramatic, disappointing colour shifts, as physical inks cannot replicate the ultra-bright, neon spectrum of a backlit screen.
Every print-ready file must incorporate a bleed area and a safe zone. The bleed area is an extra margin of your design (typically 3mm to 5mm) that extends past the actual cutting and folding lines. This ensures that if the paper shifts slightly during the high-speed cutting process, there will be no unsightly white unprinted edges visible on the final bag. Conversely, the safe zone is an inner boundary (usually 5mm to 10mm inside the cut lines) where all critical design elements, such as text, logos, and contact details, must reside. Keeping important elements within the safe zone prevents them from being cut off or obscured by folds, seams, or handle attachments.
Before exporting your final file, you must convert all text to outlines (also known as converting fonts to curves). If the printing house does not have your specific font installed on their computers, their software will automatically substitute it with a default font, completely altering your design. Outlining converts the text into vector shapes, ensuring it displays identically on any machine. Finally, verify that all external images are fully embedded within the file rather than merely linked, preventing missing asset errors when the file is opened by the manufacturer.
Step 3: Select Paper Materials and Handle Types
The materials you select for your bag define its tactile experience, visual appeal, and durability. Your choices should align closely with your brand identity, target audience, and environmental values, as well as the practical weight-bearing needs of the packaging.
Comparing Paper Materials
There are several standard paper stocks used in custom bag manufacturing, each offering distinct aesthetic and physical properties:
- Kraft Paper: Available in natural brown or bleached white, kraft paper is highly durable due to its long chemical wood fibres. Natural brown kraft paper offers a rustic, organic, and eco-friendly appearance, making it highly popular for organic cosmetics, artisanal bakeries, and sustainable fashion brands. White kraft paper provides a cleaner canvas, allowing for brighter colour reproduction while maintaining a natural, tactile texture.
- Coated Art Paper: This stock features a smooth, clay-coated surface that prevents ink absorption, resulting in incredibly sharp details, high contrast, and vibrant colours. It is the standard choice for luxury retail, cosmetics, and high-end corporate events. Because art paper can crack along the fold lines during assembly, it almost always requires a plastic or bioplastic lamination to protect the print and reinforce the folds.
- Specialty and Textured Cardstock: For premium brands seeking a unique tactile experience, specialty papers with embossed textures, metallic flecks, or linen finishes are available. These papers are often dyed in the pulp, meaning the paper itself is a specific colour throughout, preventing white edges from showing at the seams.
Always request paper weight (GSM) specifications from your manufacturer to ensure the paper thickness matches the functional demands of your product.
Choosing the Right Handles
The handle is the primary point of physical contact between the user and your brand. It must be comfortable to hold, strong enough for the bag’s capacity, and visually cohesive with the overall design. Common options include:
- Twisted Paper Handles: Made from spun kraft paper, these handles are stiff, highly durable, and fully recyclable. They are a cost-effective and clean option for standard retail and food takeaway bags.
- Flat Paper Handles: Constructed from folded strips of kraft paper, these are the most economical choice. They are flat, comfortable for light loads, and commonly used in grocery and fast-food delivery.
- Cotton or PP (Polypropylene) Rope: These soft, thick cords provide a premium look and feel. Cotton is biodegradable and offers a soft, matte texture, while PP rope is highly durable and available in a wide array of vibrant colours. These handles are typically threaded through metal eyelets (grommets) or secured with internal knots.
- Satin or Grosgrain Ribbon: Ribbon handles add an elegant, luxury finish to cosmetic, jewelry, and high-end fashion packaging. They can be tied in bows or threaded through discrete slits in the top fold.
- Die-Cut Handles: A clean slot is punched directly into the upper portion of the bag, reinforced internally with cardboard. This creates a sleek, modern, and minimalist look, ideal for flat items like documents, books, or clothing.
Step 4: Choose Printing Techniques and Surface Finishes
The printing method and surface treatments you choose will determine how your design elements are rendered, how much the production will cost, and how well the bag resists wear, moisture, and handling.
Printing Methods for Different Designs
Selecting the right printing technique depends heavily on your design’s complexity, the number of colours, and your total order volume:
- Silkscreen Printing: This method involves pressing ink through a stencil mesh directly onto pre-made bags. It is highly cost-effective for small order quantities (e.g., 100 to 500 bags) and is ideal for simple, solid-colour designs, bold logos, and text. However, it cannot reproduce gradients, shadows, or photographic details.
- Offset Printing: The industry standard for high-volume production, offset printing transfers ink from metal plates to rubber rollers and then onto flat sheets of paper before they are folded into bags. It offers exceptional detail, smooth gradients, and precise colour matching using the Pantone Matching System (PMS). While the initial setup costs are high, the unit cost drops significantly as order volumes increase.
- Hot Stamping / Foil Printing: This specialty technique uses heat and pressure to apply a thin metallic or holographic foil (such as gold, silver, or rose gold) to specific areas of the bag. It is commonly used to make brand logos stand out with a reflective, premium shine.
Be sure to consult your supplier regarding the minimum line thickness and spacing requirements for your chosen printing method to prevent fine details from bleeding together.
Adding Premium Finishes
Surface finishes are applied to flat sheets of paper after printing but before the bag is folded and assembled. These finishes serve both aesthetic and protective functions:
- Lamination: A thin plastic or biodegradable film is bonded to the outer surface of the paper. Matte lamination offers a sophisticated, non-reflective, and velvety texture, though it can be susceptible to showing scuffs or fingerprints. Gloss lamination provides a high-shine, vibrant finish that enhances colour saturation and offers excellent water resistance, making it highly durable.
- Spot UV: A glossy, clear liquid polymer is applied to specific design elements (such as a logo or a subtle pattern) and cured using ultraviolet light. This creates a striking contrast when positioned against a matte-laminated background.
- Embossing and Debossing: Metal dies are used to physically press the paper, creating raised (embossed) or recessed (debossed) textures. This adds a physical, tactile dimension to logos or brand marks, encouraging customers to touch and interact with the packaging.
Step 5: Review Proofs and Finalise Production Details
Before committing to mass production, establishing a rigorous verification protocol is essential. Skipping or rushing this step can result in hundreds of unusable bags due to easily preventable errors.
Always request a proof from your manufacturer. A digital proof (usually a 2D or 3D PDF mockup) shows how the flat artwork aligns with the die-cut lines, folds, and handle placements. While digital proofs are excellent for verifying layout, text alignment, and spelling, they cannot guarantee exact colour accuracy or paper feel. For large or highly customised orders, it is highly recommended to invest in a physical pre-production sample. This physical prototype allows you to test the actual paper stiffness, handle strength, and colour accuracy under local lighting conditions.
When reviewing your proof or sample, use the following comprehensive checklist:
- Text and Content: Check every word for spelling, grammar, and accuracy. Double-check contact details, social media handles, and website URLs.
- Alignment and Seams: Ensure that patterns or lines designed to wrap around the sides of the bag align perfectly at the glued seams and gusset folds.
- Resolution: Inspect all images and fine lines to ensure there is no pixelation, blurriness, or ink bleeding.
- Colour Accuracy: Compare the printed colours against your brand's official Pantone swatches or CMYK targets.
- Structural Integrity: Place your heaviest target product inside the physical sample and carry it around to test the handle attachments, base board strength, and overall construction.
Once you are completely satisfied with the sample, you can finalise the production details with your supplier. Confirm the final unit price, which is typically structured in broad price bands where larger quantities significantly reduce the cost per bag. Clarify the Minimum Order Quantity (MOQ) and production lead times, which can range from two to six weeks depending on design complexity and shipping logistics.
If you are ordering in Singapore, factor in local delivery logistics, such as commercial building loading bay access or specific delivery timing windows. Finally, ensure you understand the payment terms (typically a 30% to 50% deposit with the balance due upon delivery or shipment clearance) before signing the production sign-off sheet.
Frequently Asked Questions (FAQ)
What is the minimum order quantity (MOQ) for customised paper bags?
Minimum order quantities vary widely depending on the manufacturing process and the level of customisation. For fully customised, offset-printed bags that require custom cutting dies, plate setups, and automated folding, MOQs typically range from 500 to 1,000 units per size. However, if you choose to print a simple logo via silkscreen onto pre-made, stock-sized paper bags, some local packaging suppliers offer much lower MOQs, starting at 100 units.
Can I use full-colour photographs on my paper bag design?
Yes, you can use full-colour photographs, but this design choice requires specific printing methods. To capture the complex gradients, shadows, and fine details of a photograph, you must use offset printing or high-quality digital printing. Silkscreen printing is not capable of reproducing photographic images. Additionally, ensure that your photographic files are high-resolution (at least 300 DPI) and fully converted to the CMYK colour space before submitting them to your manufacturer.
How long does it typically take to produce and deliver custom paper bags?
The overall timeline generally spans three to six weeks, depending on the complexity of your order and the location of the production facility. The process begins with artwork preparation and digital proofing (3 to 5 business days), followed by physical sampling if requested (5 to 10 business days). Once the sample is approved, mass production typically takes 15 to 25 business days. Finally, factor in shipping times; local delivery within Singapore is rapid, but overseas manufacturing using sea freight can add an extra 2 to 4 weeks to your schedule.
Community discussion
Share your experience or ask a question. Comments are reviewed before publication.