
A customised magnet serves as a highly functional keepsake, combining visual appeal with daily utility on refrigerators, filing cabinets, or office whiteboards. Whether you are creating tourist souvenirs, corporate gifts, wedding favors, or promotional items in Singapore, executing a successful custom magnet project requires balancing design preparation, material selection, and vendor logistics. By following a structured approach from initial concept to final quality check, you can avoid common printing mistakes and ensure your custom magnets are both eye-catching and durable.
Define Your Magnet Project: Purpose, Quantity, and Budget
Establishing a clear foundation before starting the design process prevents costly revisions and ensures the final product aligns with your goals. The primary use case of your customised magnet dictates the appropriate quality level, design complexity, and physical finish. For instance, tourist souvenirs and retail merchandise require high-durability finishes and vibrant prints to appeal to buyers, while corporate gifts often demand a sophisticated, understated aesthetic with precise brand color matching. Event favors, such as wedding or anniversary magnets, typically focus on high personalisation and may prioritize unique shapes over heavy-duty magnetic strength.
Estimating your required quantity early is crucial because production volume directly influences both the unit cost and the manufacturing method. Small batches—typically under 100 pieces—are best suited for digital printing, which offers fast setup times and low minimum order requirements but carries a higher cost per unit, often ranging from S$2.00 to S$4.00 per magnet. Conversely, large runs of 1,000 pieces or more are highly economical when produced via offset printing, where the initial setup costs are distributed across a large volume, driving the unit cost down significantly, sometimes to under S$0.50 per piece.
Products mentioned in this guide

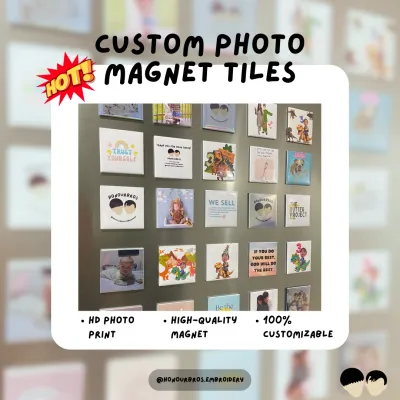

![[SG FREE DELIVERY🚚]Acrylic Personalized Customization Cute Cartoon Gift Souvenir Magnet Refrigerator Magnet Kueh Snacks](https://img.lazcdn.com/g/p/376a491ef2483e258887a0c52edbc051.jpg_400x400q80.jpg_.webp)
Prices are valid at publication and may change. Please refer to the product page for the latest price.
Your budget framework must account for more than just the base printing cost to avoid unexpected financial surprises. A comprehensive budget should incorporate design creation fees (if hiring a professional graphic designer), printing production costs, packaging materials, and delivery fees. If you are considering overseas manufacturing platforms, factor in international shipping fees, potential customs clearance charges, and the prevailing Goods and Services Tax (GST) in Singapore. Sourcing your order from a local Singapore-based printer can often eliminate international shipping uncertainties and simplify the overall budgeting process.
Prepare Print-Ready Artwork and Design Files
Creating a high-quality physical magnet begins with preparing digital artwork that meets professional printing standards. Improperly formatted files are the leading cause of blurry prints, color mismatches, and misaligned cuts.

Select File Formats and Resolution for Crisp Prints
Using the correct file format ensures that your designs remain sharp and clear when scaled to the final magnet size. Vector formats, such as Adobe Illustrator (AI), Encapsulated PostScript (EPS), or Scalable Vector Graphics (SVG), are highly recommended for logos, typography, and clean graphic illustrations. Because vector files are based on mathematical paths rather than pixels, they can be scaled infinitely without any loss of quality or sharpness.
For photographic designs or complex digital paintings, high-resolution raster formats like TIFF or high-quality PNG are acceptable. These images must be saved at a minimum resolution of 300 DPI (dots per inch) at the exact physical dimensions of the final printed magnet. Submitting a low-resolution image, such as a 72 DPI file scraped from a website, will invariably result in a pixelated, blurry, and unprofessional print.
Color mode management is another critical step in artwork preparation. You must convert your design files to the CMYK (Cyan, Magenta, Yellow, Key/Black) color space before exporting them for the printer. Computer monitors and mobile screens display colors using the RGB (Red, Green, Blue) light spectrum, which is significantly broader than the physical ink spectrum used by commercial printing presses. Designing in RGB without converting to CMYK can lead to disappointing results, as bright neon screen colors often print as dull, saturated tones.
Set Up Bleed Margins and Safe Zones
Structuring your design canvas with proper margins is essential to prevent critical design elements from being cut off during the manufacturing process. The bleed area is an extra border around the perimeter of your design that will be trimmed away during die-cutting. You must extend your background colors, patterns, or images fully into this bleed zone—typically 2mm to 3mm beyond the final cut line. This extension ensures that if the cutting blade shifts slightly during production, the finished magnet will not have unsightly white paper edges along the border.
Conversely, the safe zone is an inner boundary located 2mm to 3mm inside the final cut line. You must keep all critical text, contact details, logos, and essential facial features strictly within this safe zone. Placing important design elements too close to the cut line increases the risk of them being partially sliced off or appearing off-center on the final product.
Because cutting tolerances and template specifications vary between printing services, always download and use the specific product template provided by your chosen vendor. These templates come pre-configured with the correct bleed, trim, and safe zone lines, allowing you to align your design layers precisely before submitting the final artwork.
Choose the Right Magnet Material, Thickness, and Shape
The physical attributes of your customised magnet determine how it feels in the hand, how well it adheres to surfaces, and how long it lasts in Singapore’s tropical climate.
Flexible vinyl is the most common material for promotional and tourist fridge magnets. It is lightweight, highly pliable, and cost-effective, making it ideal for flat surfaces. For a more premium or tactile feel, rigid magnets utilizing acrylic, wood, or metal backings are excellent options. If you require exceptional holding power—such as a magnet capable of securing multiple sheets of thick paper to a whiteboard—opt for designs that embed small, powerful neodymium (rare-earth) magnets within a custom plastic or wooden casing.
Magnet thickness is typically measured in millimeters (mm) or mils (thousandths of an inch) and directly correlates with magnetic pull. Standard promotional magnets are usually thin, around 0.4mm to 0.5mm, which keeps production and shipping costs low but offers minimal holding power. For retail-grade souvenirs or corporate gifts that need to feel substantial and hold papers securely, select a thickness between 0.8mm and 1.5mm. Keep in mind that thicker magnets add weight, which can increase shipping costs.
Shape options range from standard geometric cuts to custom contours. Standard die-cut shapes, such as circles, squares, and rectangles, are highly cost-effective because vendors already possess the necessary cutting dies. If you want your magnet to stand out, contour-cut (or custom die-cut) shapes follow the exact outline of your artwork, such as the silhouette of the Merlion or a custom corporate mascot. While contour-cut magnets are highly engaging, they require a vector “cut path” layer in your design file and may incur additional tooling fees.
Surface finishes protect the printed design while enhancing its visual appeal. Consider the following options based on your project requirements:
- Glossy Lamination: Enhances color saturation and vibrancy, giving the magnet a shiny, modern appearance that catches the light.
- Matte Lamination: Provides a sophisticated, elegant, glare-free finish that makes text highly readable under direct lighting.
- Epoxy Dome (Resin Coating): Applies a thick, clear protective layer over the magnet, creating a premium 3D dome effect. This coating offers excellent water resistance and protects the print from scratches, making it highly durable in humid environments.
Evaluate and Select a Printing Vendor in Singapore
Choosing a reliable printing partner is critical to receiving a high-quality product on time. Rather than relying solely on online searches, evaluate potential vendors using objective criteria.
Begin by reviewing the vendor’s portfolio specifically for custom magnet projects. Pay close attention to the sharpness of their print registration and the precision of their cutting. Jagged edges on contour-cut magnets or misaligned borders indicate poorly maintained cutting blades or outdated machinery. A reputable vendor should showcase clear examples of past work that demonstrate consistent quality.
Customer service responsiveness is another key indicator of a professional vendor. Assess how quickly and clearly they answer your initial inquiries. A good printing partner should be willing to guide you through file preparation, recommend appropriate material thicknesses, and proactively flag potential design issues—such as low-resolution images or inadequate bleeds—before sending the job to production.
Logistics and convenience play a significant role in your overall experience. Opting for a Singapore-based printer or a vendor with a local physical presence allows you to utilize local pickup options in industrial hubs like Ubi, Kallang, or Toa Payoh. Local pickup saves on courier fees and eliminates the risk of transit damage associated with international shipping. Furthermore, dealing with a local entity simplifies communication if you need to resolve order discrepancies.
Before committing to a large bulk order, always request a physical sample pack or material swatches from the vendor. Testing these physical samples allows you to verify the actual magnetic strength on a metal surface, inspect the true-to-life color reproduction, and feel the difference between various laminations and thicknesses. This small step prevents major disappointments when the final bulk shipment arrives.
Navigate the Ordering Process and Production Timelines
Understanding the transactional steps of ordering custom magnets helps you manage your timeline effectively and avoid last-minute delays.
Once your artwork is ready and your specifications are chosen, you will upload the files to the vendor’s portal. Before finalizing the submission, double-check your order details, including the exact quantity, dimensions, material thickness, and finish. Even a small oversight at this stage, such as selecting the wrong lamination, can result in a large batch of unusable magnets.
After submission, the vendor will provide a proof for your approval. It is vital to understand the difference between digital and physical proofs:
- Digital Proofs (PDFs): These are sent quickly and are excellent for verifying layout, text spelling, cut line placement, and overall composition. However, because computer monitors are calibrated differently, a digital proof cannot guarantee 100% color accuracy.
- Physical Proofs (Pre-production Samples): The vendor prints a single, finished magnet using the exact materials and inks specified for your order. This is highly recommended for large, expensive corporate runs where precise brand color matching is mandatory. Note that requesting a physical proof will add extra cost and several days to your production timeline.
Standard production timelines for custom magnets typically range from 5 to 10 business days, depending on the complexity of the cut and the finish. If you have a tight deadline, ask the vendor about rush processing options, which are usually available for an additional fee. Always factor in domestic courier shipping times (typically 1 to 3 business days in Singapore) and plan around local public holidays, such as Chinese New Year or National Day, which can cause temporary closures and delivery backlogs.
Remember that the final approval step is a binding agreement. When you sign off on the digital or physical proof, you are instructing the vendor to print the file exactly as shown. The responsibility for catching typographical errors, layout mistakes, or design flaws shifts entirely to you once approval is given. Review every detail with a fresh pair of eyes before granting permission to print.
Inspect, Verify, and Store Your Finished Magnets
Your responsibility does not end when the delivery box arrives. Proper quality control and storage practices ensure that your investment remains in pristine condition until distribution.
As soon as you receive your shipment, perform a systematic quality inspection on a random sample of the magnets. If you have a small order, inspect every piece. Use the following checklist to verify quality:
- Print Alignment: Ensure the design is perfectly centered and that no background elements are cut off.
- Color Accuracy: Compare the printed colors against your approved proof to check for consistency across the entire batch.
- Edge Quality: Run your finger along the edges to verify that the die-cuts are clean, smooth, and free from fraying or peeling vinyl layers.
- Magnetic Strength: Test several magnets on a standard vertical metal surface, such as a refrigerator or a steel filing cabinet. The magnet should hold its own weight securely without sliding down. If it is rated to hold paper, test it with a standard sheet of 80gsm A4 paper to ensure it performs as expected.
If you discover widespread manufacturing defects, document the issues immediately. Take high-resolution photographs and clear video demonstrations showing the problem, such as a magnet sliding down a metal surface or visible print peeling. Contact the vendor’s customer service team promptly, referencing your order number. Most professional printers have a specific window (often 3 to 7 days post-delivery) within which you must report defects to qualify for a free reprint or refund under their quality guarantee.
Proper storage is essential to maintain the structural integrity and appearance of your magnets, especially in Singapore’s hot and humid climate. Store your magnets flat in a cool, dry indoor environment away from direct sunlight. Prolonged exposure to high humidity can degrade the adhesive bonding between the printed layer and the magnetic backing, causing warping or ink bleeding. Direct sunlight and UV rays will also fade the printed pigments over time.
Avoid stacking heavy, sharp, or uneven objects on top of flexible vinyl magnets, as this can cause permanent indentations or deform the pliable material. Finally, keep your finished magnets stored safely away from sensitive electronic devices, external hard drives, and magnetic stripe cards (such as credit cards or transit cards) to prevent accidental demagnetisation or data corruption.

Community discussion
Share your experience or ask a question. Comments are reviewed before publication.