
Transforming a plain return gift bag into a stunning, event-ready package is an excellent way to show appreciation to your guests. By combining wrapping paper and ribbons, you can elevate basic paper bags into customized party favors that match any theme. This process allows you to reuse leftover wrapping materials while creating a cohesive look for weddings, birthdays, or corporate gatherings.
To achieve a professional finish, the key lies in precise measurement, clean cuts, and the right choice of dry adhesives. Rather than relying on complex folding techniques, you can use strategic paper panels and elegant ribbon ties to add depth and texture. This step-by-step guide will walk you through selecting materials, preparing the paper, securing it seamlessly, and adding the perfect finishing touches.
Materials and Tools You Will Need
Before beginning, gathering all the necessary supplies ensures an efficient crafting process. Having your tools organized beforehand prevents adhesive from drying out or paper from shifting mid-application. This preparation is also highly cost-effective, allowing you to create high-end looks for under S$5 per bag using simple stationery items.
Products mentioned in this guide
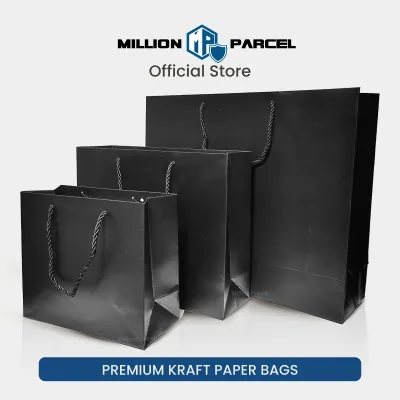

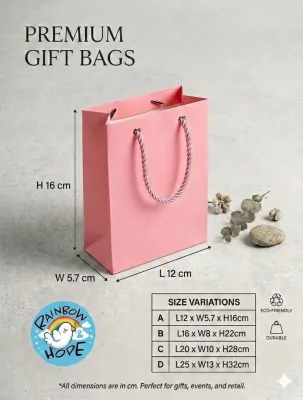
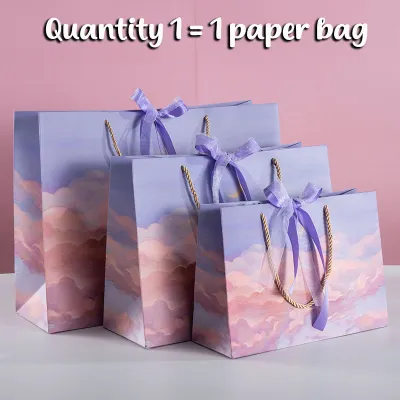

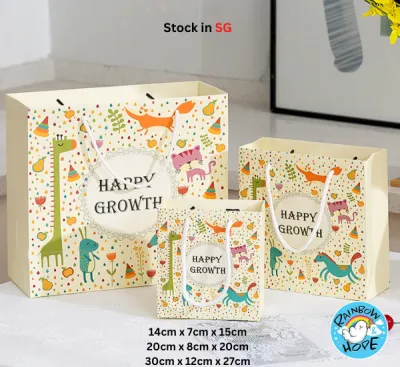
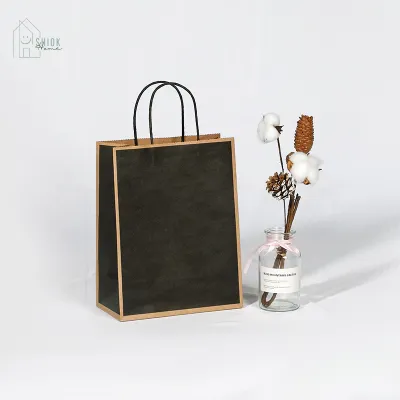
Prices are valid at publication and may change. Please refer to the product page for the latest price.
The foundation of your project starts with the base items: plain return gift bags, wrapping paper, and ribbons. Standard kraft paper bags or solid-color cardstock bags work best because they provide a sturdy, flat surface. When selecting wrapping paper, medium-weight paper is ideal because it is thick enough to hide the bag underneath but pliable enough to fold cleanly. For ribbons, satin, grosgrain, or organza options offer different textures and levels of shine to complement your paper design.
For securing and cutting, you will need double-sided tape, glue dots, sharp scissors, and a paper trimmer or a metal ruler paired with a utility knife. Double-sided tape is highly recommended over liquid glue because it prevents the paper from warping or wrinkling. Sharp scissors are essential for clean ribbon cuts, while a paper trimmer ensures perfectly straight edges on your wrapping paper panels.
Finally, consider optional embellishments like gift tags, custom stickers, dried flower sprigs, or small wooden clips. These small details help tie the overall theme together and make the return gift feel truly bespoke. Always handle cutting tools with care, keeping blades pointed away from your body and working on a dedicated cutting mat to protect your tabletop.
Step 1: Preparing and Cutting the Wrapping Paper
The secret to a polished, professional-looking gift bag is precise measurement. Before making any cuts, place your plain return gift bag flat on your work surface and measure its width and height using a reliable ruler.

Decide whether you want to cover the entire front face of the bag, wrap the paper completely around the sides, or create a centered decorative panel. For beginners, cutting a single panel that is slightly smaller than the front face—leaving a neat border of the original bag visible—is often the easiest and cleanest method. If you prefer a full wrap, measure the width of the front, back, and side gussets, adding an extra two centimeters to the total width to allow for a clean overlap seam at the back.
Once you have your dimensions, mark the cutting lines lightly on the reverse side of the wrapping paper using a pencil. Use a paper trimmer or a metal ruler and utility knife to make the cuts. Sliding a utility knife along a metal straightedge produces a perfectly crisp, unfrayed border that scissors can rarely replicate. If you must use scissors, make long, steady cuts rather than short snips to minimize jagged edges.
If your wrapping paper features a directional pattern, align the pattern so it runs vertically or horizontally in a consistent direction across all your bags. For multiple bags, try to cut the panels from the same section of the pattern roll to maintain visual consistency across the entire display table at your event.
Step 2: Applying the Wrapping Paper to the Bag
Attaching the wrapping paper smoothly requires patience and the right adhesive application technique. To avoid visible bumps or messy edges, double-sided tape or glue dots are the preferred choices for this step.
Begin by applying strips of double-sided tape along the outer perimeter of the reverse side of your cut wrapping paper. Place the tape as close to the edges as possible without letting it spill over. For larger panels, add an extra strip of tape down the center to prevent the paper from bowing outward later. Do not peel the backing off the tape just yet; first, dry-fit the paper onto the bag to ensure the alignment is correct.
Once you are satisfied with the placement, peel the backing off the tape on one side of the paper panel. Carefully align this edge with the corresponding edge of the return gift bag. Press down firmly along this secured edge, then slowly lower the rest of the paper onto the bag. Use the side of your hand or a clean plastic scraping tool to smooth out the paper, working from the secured edge outward to push away any trapped air bubbles or potential creases.
If your design involves wrapping the paper around the sides of the bag, fold the paper neatly over the corners. Press the creases firmly with your fingernail or a bone folder to create sharp, defined edges. Secure the overlapping seam at the back or side of the bag with another strip of double-sided tape, ensuring the seam is flat and tight against the bag’s structure.
Step 3: Adding and Tying the Ribbon
Ribbons serve as both a functional closure and a major decorative element that elevates the entire presentation. Choosing the right ribbon width and material is crucial for balancing the proportions of your return gift bag.
For small to medium bags, a ribbon width of 1.5 to 2.5 centimeters is generally ideal, while larger bags can accommodate wider ribbons of 3.8 centimeters or more. Satin ribbons offer a luxurious, glossy finish that catches the light beautifully, making them perfect for formal occasions. Grosgrain ribbons provide a ribbed texture that holds knots exceptionally well, while sheer organza ribbons add a delicate, airy feel. Select a color that either matches a dominant tone in your wrapping paper or provides a pleasing contrast.
To tie a classic bow, thread the ribbon through the bag’s handles or wrap it horizontally around the upper third of the bag. Pull the ribbon snug but not so tight that it distorts the shape of the paper bag. Tie a basic knot first to secure the tension, then form two even loops and tie them into a balanced bow. Adjust the loops and tails until they are symmetrical and proportional to the size of the bag.
To finish the ribbon ends professionally, fold the ribbon tail in half vertically and cut upward at a 45-degree angle toward the outer edge to create a classic swallowtail shape. Alternatively, a simple diagonal cut at a 45-degree angle works beautifully to prevent fraying. For synthetic ribbons like polyester satin, you can carefully pass the cut edge near a small flame for a fraction of a second to melt and seal the fibers, preventing any future unraveling.
Step 4: Final Touches and Quality Check
Once the paper is applied and the ribbon is tied, take a few moments to inspect your work and make any necessary adjustments. A thorough quality check ensures that every return gift bag looks pristine and remains fully functional for your guests.
Examine the edges of the wrapping paper to ensure they are completely adhered to the bag. If you spot any lifting corners, gently slide a small glue dot under the loose area and press down firmly to secure it. Check for any visible adhesive residue or pencil marks on the paper, and gently clean them off using a clean eraser or a slightly damp cloth, taking care not to damage the paper fibers.
Next, attach your personalized elements to complete the design. Slide a custom gift tag onto one of the ribbon tails before tying the final bow, or use a small wooden peg to clip a tag to the top rim of the bag. If you are using dried flowers, tuck a small sprig of lavender or baby’s breath directly into the ribbon knot for an organic, elegant touch.
Finaly, verify that the bag remains functional. Open the bag gently to ensure that the applied wrapping paper does not restrict the opening or put undue stress on the seams. The handles should be clear of any adhesive and easy to grip, allowing your guests to carry their return gifts comfortably without risking any damage to the beautiful exterior decoration.
Creative Variations for Different Events
The beauty of decorating return gift bags with wrapping paper and ribbons is the sheer versatility of the medium. By swapping out colors, textures, and patterns, you can adapt this tutorial to suit any event theme or recipient profile.
For rustic, eco-friendly, or minimalist themes, start with a plain brown kraft paper bag. Apply a panel of textured handmade paper or simple forest-green wrapping paper. Instead of shiny satin ribbon, use natural jute twine, cotton cord, or raffia to tie a simple knot. This understated look is highly popular for outdoor weddings, garden parties, or artisanal product launches, offering a warm and organic aesthetic.
For formal events, milestone anniversaries, or elegant weddings, opt for a sophisticated color palette. Pair a matte black or deep navy blue bag with metallic gold or silver wrapping paper panels. Use a wide, high-quality double-faced satin ribbon in a matching metallic or rich jewel tone to tie an opulent bow. This high-contrast, luxurious combination immediately signals to your guests that the contents inside are highly valued.
For children’s birthday parties or casual festive gatherings, embrace bright, playful combinations. Choose wrapping paper featuring whimsical patterns, polka dots, or cartoon illustrations. Pair this with vibrant, multi-colored curling ribbons or grosgrain ribbons in neon shades. You can use a pair of closed scissors to gently pull and curl the ribbon ends, creating a bouncy, energetic look that adds a sense of fun and excitement to the celebration.
Frequently Asked Questions (FAQ)
Can I use regular liquid glue instead of double-sided tape?
While liquid craft glue is highly accessible, it is generally not recommended for attaching wrapping paper to gift bags. Liquid glue contains water, which easily saturates paper fibers, leading to unsightly wrinkling, warping, or bubbling as it dries. It can also seep through thinner wrapping papers, leaving permanent dark stains. For a perfectly flat, smooth, and professional finish, dry adhesives like double-sided tape, glue dots, or adhesive rollers are much safer and easier to control.
How do I keep the ribbon from slipping off the handles?
If your ribbon tends to slide around the bag handles, there are several simple ways to secure it. You can apply a small, discreet glue dot or a tiny piece of double-sided tape to the underside of the ribbon where it contacts the handle base. Alternatively, if your paper bag has pre-punched holes for rope handles, you can thread the ribbon directly through these holes alongside the handle and tie a secure knot on the inside of the bag, ensuring it stays perfectly in place.
What is the best way to store decorated bags before the event?
To preserve the shape and pristine condition of your decorated return gift bags, store them upright in a clean, dry, and cool environment away from direct sunlight, which can fade paper colors. Avoid stacking heavy items on top of the bags, as this can crush the delicate paper panels and permanently flatten your carefully tied ribbon bows. If space is limited, you can store them gently nested inside a large plastic storage bin to protect them from dust and accidental moisture.
Community discussion
Share your experience or ask a question. Comments are reviewed before publication.