
A plain kraft paper bag serves as an exceptionally versatile canvas for personalized gift wrapping. Transforming this simple, utilitarian item into an elegant, custom-tailored presentation requires only a few carefully selected stationery tools and a bit of creative patience. Whether you are preparing a gift for a festive celebration, a wedding, or a housewarming in Singapore, custom decoration allows you to match the packaging to the recipient’s personal style while maintaining an eco-friendly aesthetic.
By understanding the physical properties of unbleached kraft paper, you can choose the right materials to ensure your designs remain vibrant and structurally sound. Kraft paper is characterized by its long, porous cellulose fibers, which provide excellent tensile strength but also make the paper highly absorbent. This means that standard liquid adhesives or water-based inks can easily warp the surface or bleed through the fibers. This guide walks you through the essential tools, precise application techniques, and structural reinforcements needed to elevate a standard paper bag into a premium, durable gift package.
Materials and Tools You Will Need
Before starting your decorating project, gathering the correct tools ensures a seamless workflow and prevents damage to the paper. The primary canvas is a standard kraft paper bag, typically ranging from 120 to 150 grams per square meter (gsm) in weight. To handle the physical preparation and assembly, you will need a pair of sharp precision scissors, a metal cork-backed ruler to prevent slipping on the paper surface, and a bone folder. A genuine bone folder made from cattle bone is highly recommended over plastic alternatives, as it allows you to crease and flatten the paper smoothly without leaving shiny friction marks on the matte kraft surface.
Products mentioned in this guide
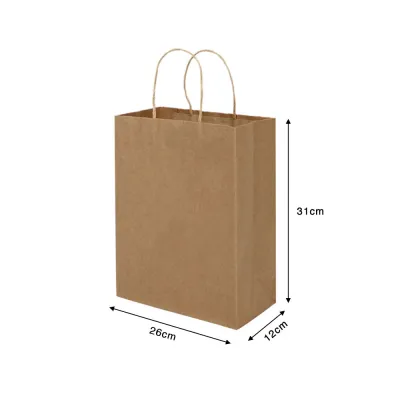
![[SG Stock] 10 Pcs Kraft Paper Bags with Handles Party Bags Birthday Bags Goodie Bags Colour Paper Bags Gift Bags](https://img.lazcdn.com/g/p/125c8522e89dfb6d8f20af7b66e96f8b.jpg_400x400q80.jpg_.webp)
Prices are valid at publication and may change. Please refer to the product page for the latest price.
Selecting the correct adhesive is critical to preserving the flat, crisp texture of the bag. You should use dry or low-moisture adhesives, such as high-tack double-sided tape, acid-free glue sticks, or specialized craft glue pens. Avoid liquid polyvinyl acetate (PVA) school glues entirely. Liquid glues contain a high water content that immediately saturates the uncoated paper fibers, causing the paper to swell, warp, and wrinkle as it dries, which ruins the clean profile of your gift bag.
For the decorative elements, choose stationery supplies that contrast beautifully with the warm, earthy tone of brown kraft paper. Look for high-opacity pigment ink pads, rubber or photopolymer stamps, and premium ribbons such as jute twine, cotton herringbone, or double-faced satin. When selecting writing instruments, opt for acrylic paint markers, metallic paint pens, or opaque gel pens. These mediums contain suspended pigments that sit on top of the paper fibers rather than dye-based inks, which quickly soak into the porous brown paper and turn dull or invisible.
Step-by-Step Techniques to Decorate Your Kraft Paper Bag
Achieving a professional finish starts with proper surface preparation. Brand-new kraft bags often feature deep creases from storage and transit, which can cause stamps to misprint or markers to skip. To resolve this, lay the bag completely flat on a clean, hard work surface. Use your bone folder to gently press and flatten the gussets and bottom folds. If the creases are exceptionally stubborn, you can use a household iron set to a low, dry heat setting. Always place a clean, dry cotton pressing cloth or a sheet of parchment paper between the iron and the kraft bag to protect the paper from scorching or developing shiny patches.

Once the bag is physically flat, wipe down the entire exterior surface with a dry, lint-free microfiber cloth. This step is essential because kraft paper manufacturing leaves behind microscopic paper dust and loose cellulose fibers. Removing this debris ensures that washi tape, double-sided adhesives, and ink pigments adhere directly to the paper surface, preventing premature peeling or uneven ink transfer.
With your clean, flat canvas ready, you can choose from three distinct design approaches depending on the occasion and your personal style. You can opt for a clean, repetitive stamped pattern, a tactile textile wrap, or a highly personalized hand-lettered illustration. Each method leverages different stationery techniques to work harmoniously with the unique texture of kraft paper.
The Minimalist Stamp and Stencil Method
The minimalist stamp technique uses repeating geometric patterns, botanical motifs, or seasonal icons to create a sophisticated, hand-printed wrapping paper effect. The secret to success lies in choosing the correct ink pad. Standard dye-based ink pads, which are common in office settings, are transparent and will soak deep into the brown fibers, resulting in a dark, muddy, and poorly defined print. Instead, select a rich pigment ink pad, a chalk-based ink, or a hybrid solvent ink. Pigment inks are formulated with finely ground solid colorants suspended in a thick binder, allowing the color to sit proudly on top of the kraft paper for maximum opacity and vibrant contrast.
To begin, place a thick piece of scrap cardboard or a cutting mat inside the bag. This provides a completely solid, level stamping surface directly beneath the paper layer, preventing the bag’s internal seams or handle attachments from creating uneven pressure points. Ink your rubber or photopolymer stamp by gently tapping the ink pad onto the raised design rather than pressing the stamp hard into the pad, which can overload the recessed areas and cause smudging.
Position the stamp directly above the bag, lower it vertically, and press firmly down with even, downward pressure across the entire back of the block. Do not rock the stamp from side to side, as this squeezes excess ink over the edges, creating blurred outlines. Lift the stamp straight up in a single, clean motion. Because pigment ink sits on the surface of the porous paper, it requires a longer drying time than dye ink. Always test your stamp, ink opacity, and drying time on a scrap piece of matching kraft paper first to determine if you need to wait several minutes before handling the bag.
The Rustic Ribbon and Twine Wrap
For a tactile, three-dimensional aesthetic, wrapping the bag with natural fibers and woven ribbons adds immediate warmth and structural interest. This method works exceptionally well for rustic weddings, festive holidays, or artisanal gifts. Start by selecting your textiles. A combination of a wide, structured ribbon—such as a 25mm cotton herringbone or a linen band—paired with a thin, contrasting cord like natural jute twine or polished baker’s twine creates a beautiful layered look.
To decorate the upper third of the bag without interfering with the functional handles, measure the circumference of the bag and add approximately two centimeters for overlap. Cut your wide ribbon to this length using sharp fabric scissors to ensure clean, unfrayed edges. Wrap the ribbon around the body of the bag, keeping it parallel to the top rim. Secure the overlapping ends at the back of the bag using a strip of high-tack double-sided tape. By hiding the adhesive seam at the back, the front of the bag remains perfectly clean.
Next, take your jute twine and wrap it around the center of the wide ribbon two or three times to create a layered band. To secure the twine and tie a structured bow, thread the ends through the bag’s existing handle loops if they are constructed from twisted paper or cord. If the bag has flat paper handles, wrap the twine entirely around the bag and tie a neat double knot on the front face. Trim the twine tails at an angle to prevent unravelling, or apply a microscopic dot of clear craft glue to the very tips of the cord to seal the fibers.
The Hand-Lettering and Doodle Approach
Hand-lettering allows you to turn the gift bag itself into a personalized card, featuring the recipient’s name, a custom message, or intricate botanical illustrations. Because kraft paper is dark and absorbent, your choice of writing instrument is paramount. Standard ballpoint pens, water-based school markers, and classic calligraphy inks will either bleed rapidly along the paper fibers (a phenomenon known as feathering) or sink into the brown background and lose their color. To achieve crisp, vibrant lines, use acrylic paint pens, metallic paint markers, or high-quality opaque gel pens in white, gold, silver, or black.
Before applying any permanent ink, use a soft graphite pencil (such as a 2B or 4B pencil) to sketch your layout very lightly onto the bag. Avoid pressing hard with the pencil, as heavy pressure will indent the soft kraft fibers, leaving permanent grooves that cannot be erased. To ensure your lettering remains perfectly straight and level, apply a strip of low-tack masking tape or painter’s tape to act as a temporary horizontal guideline.
Once your pencil draft is complete, trace over the lines with your chosen paint pen. If you are using an acrylic paint marker, prime the nib on a scrap piece of paper first by gently pressing it down until the ink flows smoothly to the tip. Write with a slow, steady hand to allow the opaque paint to flow evenly onto the paper. Keep your hand raised off the bag as you work from left to right (or right to left if you are left-handed) to avoid smudging the wet paint. Allow the paint to dry completely for at least ten minutes before using a soft vinyl eraser to gently remove any visible pencil guidelines.
Reinforcing and Lining the Bag for a Premium Feel
A beautifully decorated exterior should be matched by a sturdy, high-quality interior. Standard single-layer kraft paper bags can feel thin and flimsy, especially when holding gifts that have sharp corners or moderate weight. Adding structural reinforcements and an elegant lining not only protects the contents but also elevates the entire unboxing experience, giving the bag the premium feel of a luxury boutique purchase.
To create an inner lining, you can use high-quality tissue paper, crinkle-cut paper filler, or a lightweight fabric liner. For a tailored tissue paper lining, select two or three sheets of tissue paper that complement your exterior design colors. Fold the sheets together and insert them into the bag so that the crisp, pointed corners of the tissue paper flare out elegantly from the top rim. If you prefer a permanent, clean look, cut a piece of lightweight fabric or decorative wrapping paper to match the inner dimensions of the bag’s front and back panels. Apply thin strips of double-sided tape along the inside top rim of the bag, then carefully press the lining material against the tape, hiding the raw, unfinished paper edges of the bag’s interior.
Base reinforcement is essential to prevent the bottom of the bag from sagging, distorting, or tearing when lifted. Measure the exact interior dimensions of the bag’s bottom panel when it is fully expanded. Using a utility knife and a metal ruler, cut a piece of thick, rigid corrugated cardboard or chipboard to these precise dimensions. Slide this cardboard insert flat into the bottom of the bag. This simple addition distributes the weight of the gift evenly across the entire base, maintaining the bag’s clean, rectangular shape even when carrying heavier items.
Finally, reinforce the handles to prevent them from tearing away from the paper body under tension. If your bag features punched holes with threaded cord handles, apply a small, clear adhesive reinforcement patch (similar to those used for binder paper) or a thin metal washer around the interior side of each hole. If the bag has glued flat-paper handles, you can strengthen the attachment point by cutting a strip of sturdy kraft cardstock, applying high-tack double-sided tape to it, and pasting it directly over the internal handle tabs. This reinforces the shear strength of the adhesive joint, ensuring the handles remain secure during transport.
Common Mistakes to Avoid When Decorating Paper Bags
Decorating paper bags is an enjoyable craft, but working with uncoated wood-pulp fibers requires adhering to specific material limitations. Being aware of common pitfalls will save you time and prevent ruined projects.
The most frequent mistake is introducing moisture damage to the paper. Kraft paper is highly hydrophilic, meaning it readily absorbs water from its environment. Using wet liquid glues, heavy water-based acrylic paints, or damp stamping sponges will saturate the cellulose bonds. As the water evaporates, the fibers shrink unevenly, resulting in permanent warping, wrinkling, and a significant reduction in the paper’s tear resistance. Always opt for dry adhesives and highly pigmented, low-solvent markers to preserve the flat, crisp structure of the bag.
Another critical error is overloading the bag’s physical capacity. While decorating and reinforcing a bag improves its appearance and base stability, it does not transform a single-layer paper bag into a heavy-duty shipping carton. Avoid placing heavy, dense items such as large books, thick glass candle jars, or bottles of liquid into a standard kraft bag without verifying the manufacturer’s weight rating. If you must carry moderately heavy items, ensure you have implemented both base and handle reinforcements, and always support the bottom of the bag with your hand when carrying it over long distances.
Lastly, underestimate the drying time of inks and paints on porous surfaces at your peril. Because pigment inks and acrylic paint pens are designed to sit on top of the paper to maintain their opacity, they dry through evaporation rather than absorption. In humid climates, such as Singapore’s tropical environment, this evaporation process can take significantly longer. Resting your hand on a freshly decorated section while working on another part of the bag will cause instant smudging and ruin hours of work. To prevent this, work systematically from the top-left corner down to the bottom-right (for right-handed crafters), and consider using a clean sheet of scrap paper under your hand to protect completed areas.
Frequently Asked Questions (FAQ)
What is the best glue to use on kraft paper bags?
The best adhesives for kraft paper are dry or low-moisture options that do not compromise the paper’s structure. High-tack double-sided tape, acid-free glue sticks, and specialized dry-mount adhesive rollers are ideal. These options provide strong adhesion without introducing water to the paper fibers. You should avoid liquid PVA glues, school glues, or runny hot glues, as their water content will cause the uncoated kraft paper to swell, warp, and wrinkle upon drying.
How do I stop ink from bleeding through the paper bag?
To prevent ink from bleeding through or feathering along the paper fibers, use highly opaque paint markers, acrylic paint pens, or gel pens rather than standard water-based markers or dye-based calligraphy inks. These specialized pens contain solid pigments that sit on the paper’s surface. Additionally, always insert a thick piece of scrap cardboard or a plastic sheet inside the bag directly behind your working surface. This barrier catches any accidental bleed-through and protects the opposite side of the bag.
Can I use a decorated kraft paper bag for heavy gifts?
Standard single-layer kraft paper bags are designed primarily for lightweight to medium-weight gifts, such as clothing, small stationery items, or lightweight treats. If you plan to package a heavier gift, you must select a heavy-duty, multi-layered, or laminated kraft bag. You should also reinforce the base with a custom-cut piece of thick, rigid cardboard, strengthen the handle attachment points with adhesive patches, and verify the manufacturer’s maximum weight rating before use.
Community discussion
Share your experience or ask a question. Comments are reviewed before publication.