
Decorating a drawstring bag for gift wrapping is an elegant, sustainable alternative to traditional paper wrapping. By using ribbons, tags, and thoughtful embellishments, you can transform a simple fabric pouch into a personalized keepsake that enhances the gifting experience. The key lies in selecting materials that complement the bag’s weight, mastering simple tying techniques, and securing decorations in a way that preserves the bag’s functionality and reusability. Whether you are preparing a small jewelry gift or a larger present, customizing the packaging shows a high level of care and attention to detail.
Materials and Tools Needed for Drawstring Bag Decoration
Before beginning your project, gathering the right materials and verifying their compatibility is essential for a polished finish. The base bag serves as your canvas; common options include cotton, canvas, velvet, and organza. Lightweight fabrics like organza or thin satin require delicate ribbons and minimal embellishments to avoid sagging, while sturdy canvas or denim can support heavier decorative elements. Always measure the dimensions of your bag and ensure the gift fits comfortably inside without stretching the seams or distorting the overall shape before you begin decorating.
When selecting ribbons, consider how their texture and width interact with the bag’s fabric. Satin ribbons offer a smooth, glossy finish that slides easily, making them excellent for elegant designs. Grosgrain ribbons provide a ribbed, structured texture that holds knots securely, while velvet ribbons add a luxurious, heavy drape suitable for festive occasions. Ensure the ribbon width is proportional to the bag; a 1-centimeter ribbon works well for small jewelry pouches, whereas a 3-centimeter ribbon is better suited for larger gift bags. If you plan to thread a new ribbon directly through the bag’s drawstring channel, verify that the channel opening is wide enough to accommodate the ribbon thickness without jamming.
Products mentioned in this guide

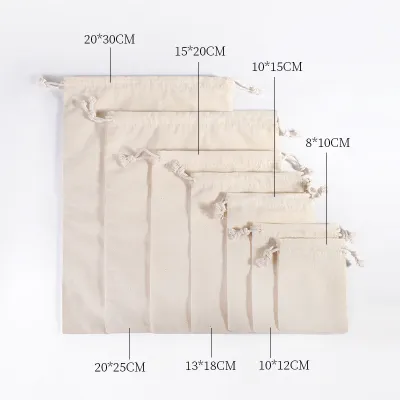
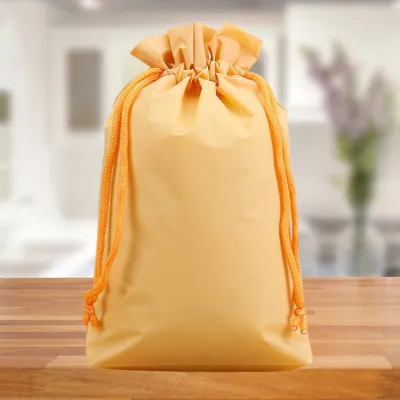
Prices are valid at publication and may change. Please refer to the product page for the latest price.
Embellishments and stationery elements add a personalized touch to your gift package. Gift tags should be crafted from sturdy cardstock, typically between 250 to 300 gsm, to prevent bending or tearing when attached. When writing your message, verify that your pen ink is compatible with the tag’s paper texture; glossy tags may cause gel pens to smudge, so a quick test on the back of the tag is recommended to check drying speed and bleed resistance. For physical embellishments, collect items like wooden beads, metal charms, mini clothespins, or dried botanicals such as lavender sprigs or eucalyptus leaves.
To assemble your decorations, keep a few essential tools on hand. Sharp fabric scissors are crucial for achieving clean, professional cuts on ribbons and cords without causing immediate fraying. For securing flat elements or delicate trims, select a fabric-safe adhesive. Because the drying speed, bleed resistance, and bond strength of glues depend entirely on the exact combination of fabric and adhesive, always perform a trial on a fabric scrap or an inconspicuous area of the bag first. This test allows you to observe if the glue stains the fabric, stiffens excessively, or fails to hold. For safety, ensure your workspace is well-ventilated when working with adhesives, and handle sharp scissors with care.
Step-by-Step Guide to Tying and Styling Ribbons
Styling the ribbons and drawstrings is the core step in transforming your gift bag. Begin by placing your gift inside the bag and pulling the built-in drawstrings evenly from both sides to cinch the opening closed. Smooth out the gathered fabric at the neck of the bag with your fingers to ensure the collar looks neat and symmetrical. If the built-in drawstrings are simple cotton cords, you can style them directly by tying them into a balanced bow or a secure square knot. To add a decorative touch to the cord ends, slide a wooden bead onto each side, tie a tight knot at the very tip to secure the bead, and gently fray the remaining cord ends for a tassel effect.

If you want to elevate the presentation, you can layer supplementary decorative ribbons around the cinched neck of the bag. Cut a length of your chosen ribbon that is approximately three times the width of the cinched bag neck to ensure you have enough material to tie a full bow. Wrap the ribbon around the collar, covering the built-in drawstrings entirely if desired. For a multi-textured look, layer a thinner satin ribbon directly over a wider grosgrain ribbon before tying. Hold the layers flat against each other as you wrap them around the neck to prevent twisting.
To tie a classic, balanced bow, cross the left ribbon end over the right end and pull it under and through to create a single knot. Form a loop with the left end, then wrap the right end around the base of the loop and push it through the opening to create the second loop. Pull both loops gently to tighten the knot, adjusting the loop sizes and tail lengths until they are perfectly symmetrical and proportional to the bag. If the bow feels loose, hold the center knot firmly while pulling the loops to lock the tension in place.
Once the bow is styled, use sharp fabric scissors to trim the ribbon ends. Cutting the ends at a 45-degree angle or making a swallowtail cut (a V-shape cut inward) provides a clean, professional finish that elevates the overall look. Trimming at an angle also helps distribute the tension on the fabric threads, reducing the likelihood of immediate fraying. Ensure both tails are cut to equal lengths, extending slightly past the bottom of the bow loops but not dragging below the base of the bag.
Adding Embellishments and Personalized Tags
Attaching tags and physical embellishments allows you to customize the gift for the recipient while adding visual depth. To attach a personalized cardstock tag, thread the drawstring cord or a secondary piece of thin jute twine directly through the tag’s eyelet before tying the final bow. This keeps the tag securely centered on the front of the bag. Alternatively, for a modern and casual aesthetic, write your message on the tag and clip it directly to the gathered collar of the bag using a mini wooden clothespin. This method keeps the tag highly visible and prevents it from twisting or flipping over.
Physical embellishments like charms, beads, or dried botanicals require careful attachment to ensure they stay in place during transport. Slide lightweight metal charms or decorative glass beads onto the ribbon tails before tying the final knots, securing them in place so they dangle elegantly. If you are incorporating natural elements like dried lavender or eucalyptus, tuck the stems gently behind the center knot of your ribbon bow. You can secure the stems with a small piece of double-sided tape or tie them down with a thin piece of natural twine to prevent them from slipping out.
When deciding how to attach these decorative elements, always evaluate whether the recipient is expected to reuse the bag. If the drawstring bag is a high-quality fabric meant to be repurposed for travel, storage, or future gifting, avoid using permanent fabric glues or sewing embellishments directly onto the bag body. Instead, rely entirely on removable attachment methods, such as tying ribbons, using clips, or threading charms onto the cords. This allows the recipient to easily strip away the holiday-specific decorations and enjoy a clean, reusable fabric pouch, extending the life of your gift packaging.
Design Ideas for Different Gift Occasions
Adapting your decoration style to the specific occasion ensures your gift feels thoughtful and appropriate. For a minimalist and elegant look, select a neutral-colored bag, such as unbleached linen or soft cream cotton. Pair it with a single, high-quality monochrome ribbon in a rich tone like forest green, slate grey, or deep navy satin. Add a simple, clean-cut kraft paper tag written with a fine-liner black ink pen, and finish with a subtle metallic eyelet. This understated style is perfect for weddings, corporate gifts, or sophisticated birthdays.
For festive and vibrant celebrations, such as holidays or children’s birthdays, embrace bright colors and playful textures. Use a vibrant red, yellow, or patterned drawstring bag as your base. Layer a glittering gold or silver metallic ribbon over a wide, textured grosgrain ribbon in a contrasting color. Attach a colorful charm, such as a small painted wooden star, a brass bell, or a bright acrylic bead, and pair it with a tag featuring a bold, festive pattern. The combination of contrasting textures and cheerful colors creates an exciting, celebratory presentation.
If you prefer an eco-friendly and rustic aesthetic, focus on natural, unrefined materials. Use a plain burlap, jute, or unbleached cotton canvas bag as the foundation. Tie the bag closed using rough jute twine or a soft, unbleached cotton ribbon. Tuck a small sprig of dried rosemary, a dried flower bud, or a pressed leaf under the twine to bring a touch of nature to the package. Complete the look with a hand-stamped tag made from recycled paper, using earth-toned inks to maintain the organic, rustic theme.
Common Mistakes to Avoid When Decorating Fabric Bags
To ensure your decorated gift bag looks professional and functions perfectly, there are several common pitfalls to avoid. First, avoid using inappropriate adhesives like hot glue guns or standard super glue on delicate fabrics such as silk, organza, or thin polyester. These glues can easily melt synthetic fibers, leave unsightly dark stains that bleed through the fabric, or dry into hard, sharp lumps that ruin the soft drape of the bag. Always stick to specialized fabric-safe glues, and always conduct a spot test on a scrap piece of fabric first to verify compatibility.
Another frequent mistake is overcrowding the drawstring area with excessive knots, heavy layers of ribbon, or bulky charms. While layering adds visual interest, packing too many elements around the neck of the bag can make it incredibly difficult for the recipient to open. If they have to struggle or use scissors to cut through your decorations just to access the gift, the packaging loses its charm and reusability. Keep the opening mechanism clear, functional, and easy to untie.
Finally, be mindful of mismatched material weights. Placing heavy metal charms, large wooden beads, or thick, stiff velvet ribbons on a lightweight organza or thin cotton pouch will cause the fabric to sag and distort. This weight imbalance pulls the collar down, making the package look sloppy and unstructured. Always match the weight of your decorations to the structural integrity of the bag, reserving heavier embellishments for sturdy canvas, denim, or thick velvet pouches.
Frequently Asked Questions (FAQ)
Can I wash a decorated drawstring bag after gifting? (FAQ)
Yes, but the washability of the bag depends entirely on the decoration methods you chose. If you used removable elements like tied ribbons, cardstock tags, and clipped charms, simply remove these decorations before laundering the bag. For bags with glued embellishments, check the adhesive manufacturer’s label to verify if the glue is water-resistant and machine-washable. To preserve the shape of the fabric and protect any delicate glue bonds, it is generally safest to hand-wash the bag in cool water with a mild detergent and lay it flat to air dry.
How do I keep the drawstrings and ribbon ends from fraying? (FAQ)
The best method to prevent fraying depends on whether your ribbons and cords are made from synthetic or natural fibers. For synthetic materials like polyester satin, nylon, or organza, you can carefully seal the freshly cut edges by passing them near a small flame, such as a lighter or match, for a fraction of a second; the heat melts the plastic fibers together to form a clean, sealed edge. For natural fibers like cotton, linen, or jute, do not use heat as they will burn rather than melt. Instead, apply a tiny drop of clear nail polish or specialized fabric sealant along the cut edge and allow it to dry completely to lock the threads in place.
Community discussion
Share your experience or ask a question. Comments are reviewed before publication.