
Creating an interactive learning space at home starts with choosing a method that matches your wall type, your child’s educational toys, and your DIY comfort level. In homes with concrete walls, such as typical apartments in Singapore, and where high humidity is a constant factor, the installation process requires specific adjustments to ensure durability and safety. By selecting between magnetic paint, adhesive whiteboard sheets, or rigid steel boards, you can transform a plain wall into a dynamic canvas for magnetic letters, numbers, and interactive puzzles.
To build a successful magnetic wall, you must evaluate the weight of the learning accessories your child will use and prepare the surface to withstand daily play. This guide covers the essential materials, step-by-step installation techniques, and safety checks needed to create a reliable, long-lasting educational station in your home.
Choosing the Best Magnetic Wall Method for Educational Play
Selecting the right magnetic surface depends on your wall’s structural material, your budget, and the specific learning toys you plan to use. Each method offers distinct trade-offs in terms of magnetic strength, installation effort, and aesthetic integration with your home decor.
Products mentioned in this guide
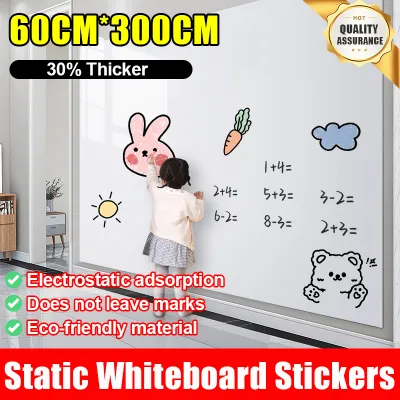
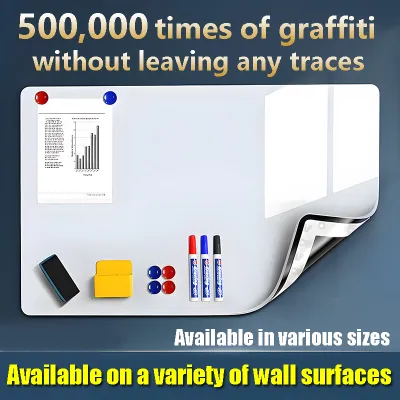
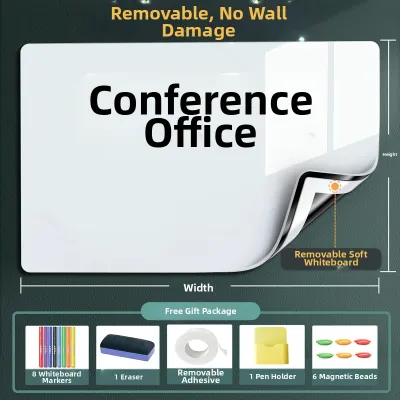
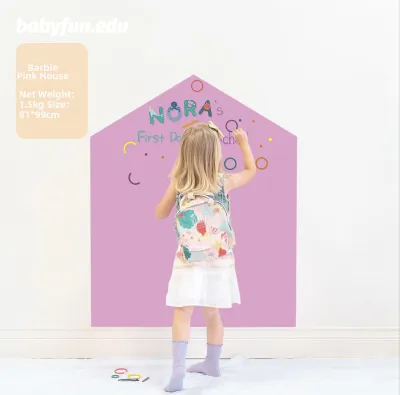
Prices are valid at publication and may change. Please refer to the product page for the latest price.
Magnetic paint is an appealing option for parents who want a seamless look. It allows you to turn an entire wall section into a magnetic area that can be painted over with standard wall paint to match the room’s color scheme. However, because magnetic paint relies on suspended iron particles rather than a solid metal sheet, its magnetic pull is relatively light. It is best suited for lightweight plastic letters with flat, wide magnetic backings rather than heavy wooden educational toys.
Adhesive magnetic whiteboard sheets or rolls offer a dual-purpose solution, combining a magnetic surface with a dry-erase writing area. These sheets are easier to install than paint and provide a smoother finish, but they require a perfectly flat wall surface to adhere correctly. In humid climates, the adhesive backing must be of high quality to prevent the edges from peeling or curling over time. They generally offer a moderate magnetic hold, making them compatible with standard educational magnets and lightweight flashcards.
Rigid magnetic boards, typically made of steel, provide the strongest and most reliable magnetic hold. They do not rely on adhesives or paint layers, meaning they can easily support heavier wooden magnetic toys, magnetic gears, and complex learning kits. The trade-off is that they require physical mounting. In homes with concrete walls, this means drilling holes and using wall plugs, which is a more permanent and labor-intensive installation process compared to peel-and-stick options.
When deciding on a method, weigh a sample of your child’s learning toys on a kitchen scale. If the toys are heavier than standard plastic letters, or if they use small, recessed button magnets, a rigid steel board is the safest choice. For lightweight, flat-backed magnetic sheets and basic alphabet letters, magnetic paint or adhesive rolls will suffice.
Essential Tools and Materials Checklist
Before beginning your project, gather all necessary tools and materials to ensure a smooth installation process. Having the right supplies on hand prevents delays and helps you achieve a professional, durable finish.

If you choose the magnetic paint method, you will need magnetic primer, a high-quality foam roller, a paint tray, and a sturdy stirring stick. The foam roller is crucial because it helps distribute the heavy iron particles evenly across the wall surface without creating excessive texture.
For the adhesive roll method, prepare the magnetic whiteboard sheet, a utility knife, a plastic squeegee or felt-edged scraper, a measuring tape, and a spirit level. The squeegee is essential for smoothing out air bubbles during application to ensure a flat, secure bond.
If you opt for a rigid steel board, ensure you have the board itself, a spirit level, a pencil, and appropriate mounting hardware. For concrete walls, you will need a hammer drill, masonry drill bits, plastic wall plugs, and heavy-duty screws. For drywall, use toggle bolts or heavy-duty drywall anchors.
Regardless of the method, prepare your workspace with fine-grit sandpaper (120 to 220 grit), painter’s tape, drop cloths, a mild detergent, and microfiber cloths. Safety gear is also essential: wear a dust mask when sanding the wall and protective gloves when handling adhesives or chemical primers.
Step-by-Step Guide to Building Your Magnetic Wall
Creating a magnetic wall requires a systematic approach to ensure the surface is stable, safe, and functional. Following a logical sequence from preparation to finishing will prevent common installation failures, such as peeling paint or falling boards.
Before starting, inspect the wall surface thoroughly. If you detect signs of rising damp, peeling paint, or crumbling plaster, stop immediately. Moisture trapped behind adhesive sheets or paint layers will cause the installation to fail and can lead to mold growth, which poses a health risk to your child. Address any underlying structural or moisture issues before proceeding.
Always read and follow the specific manufacturer’s instructions for the products you purchase. Pay close attention to recommended drying times, temperature ranges, and application thicknesses, as these factors directly influence the final magnetic strength and surface durability.
Preparing and Priming the Surface
Begin by cleaning the designated wall area thoroughly with a mild detergent solution to remove grease, dust, and fingerprints. Allow the wall to dry completely before moving to the next step, as any remaining moisture can compromise adhesion.
Once dry, use fine-grit sandpaper to lightly sand the area. This process removes minor imperfections and creates a slightly rough texture, or ‘key’, which helps the paint or adhesive bond securely to the wall. Wipe away all sanding dust with a damp microfiber cloth and let the surface dry.
Protect the surrounding area by applying painter’s tape along the edges of your workspace. Lay down drop cloths to protect your flooring and nearby furniture from paint splatters, dust, or adhesive residue. If you are painting a highly porous wall or bare plaster, apply a standard water-based wall primer first to seal the surface and ensure even absorption of the magnetic paint.
Installing the Magnetic Layer
If you are using magnetic paint, stir the can thoroughly for several minutes before application. The iron particles are heavy and naturally settle to the bottom; failing to mix them completely will result in a weak, uneven magnetic pull. Use a foam roller to apply thin, even coats. Avoid applying thick layers, which can sag and create an uneven surface. Apply at least three to four coats, allowing the paint to dry completely between each layer. In humid environments, extend the drying time between coats by at least 50% beyond the manufacturer’s recommendation to ensure each layer is fully cured.
For adhesive rolls, measure the wall and mark your guidelines using a spirit level to ensure a straight alignment. Peel back about 10 centimeters of the backing paper from the top of the sheet and align it with your pencil marks. Press the exposed adhesive firmly to the wall, then slowly peel away the remaining backing paper with one hand while using a squeegee with the other to smooth the sheet downward. Work from the center outward to push out any trapped air bubbles and ensure a flat, secure bond.
If you are mounting a rigid steel board, hold the board against the wall and use a spirit level to verify it is perfectly level. Mark the mounting holes on the wall with a pencil. For concrete walls, drill holes using a hammer drill and masonry bit, insert the plastic wall plugs flush with the surface, and secure the board tightly with screws. Ensure there is no play or wobble in the mount, as the board must remain completely stable under the weight of educational toys.
Adding the Topcoat or Finish
If you have used magnetic paint, you can apply a compatible dry-erase topcoat or a standard latex wall paint to match your room’s decor. Keep this topcoat as thin as possible, as every additional layer of non-magnetic paint increases the distance between the magnet and the iron particles, reducing the overall magnetic hold.
For adhesive sheets, use a sharp utility knife and a metal ruler to trim any excess material along the edges. This creates a clean, professional border and prevents children from peeling the edges of the sheet.
Allow the entire installation to cure completely before use. While the surface may feel dry to the touch within a few hours, full curing of adhesives and specialized topcoats can take up to seven days, especially in humid climates. Do not place any magnets on the wall during this curing period to avoid denting or tearing the fresh finish.
Verifying Magnet Strength for Learning Toys
Once the wall is fully cured, you must verify its magnetic strength using the actual educational toys and accessories your child will use. Do not rely solely on theoretical product ratings, as the real-world hold depends heavily on the thickness of your topcoats and the quality of the magnets.
Conduct a simple slide test by placing your child’s magnetic letters on the wall. If the letters slide down, spin, or fall off, the magnetic attraction is too weak. This is a common issue with painted magnetic walls when the paint layers are too thin or the topcoat is too thick.
To improve the magnetic hold on a painted wall, you can apply additional coats of magnetic paint, provided you have not yet applied a permanent topcoat. Alternatively, you can upgrade the magnets on the back of the learning toys. Glue stronger, lightweight magnets to the back of the toys using a heavy-duty, child-safe adhesive. Ensure the glue cures completely and check regularly to make sure the magnets remain securely attached, as loose magnets pose a severe choking hazard.
Avoid using excessively strong industrial magnets, such as large neodymium magnets, on your child’s learning wall. These magnets can pinch small fingers, make it difficult for young children to remove toys independently, and scratch or chip the painted surface during play.
Child Safety and Wall Maintenance
Ensuring the magnetic wall remains safe and functional requires ongoing maintenance and careful material selection. Regular checks will help preserve the surface and protect your child during educational activities.
If you installed a rigid steel board, inspect the edges to ensure they are smooth and free of sharp metal burrs. Apply a protective plastic or rubber edge trim around the perimeter of the board to prevent cuts or scrapes during active play.
Verify the chemical safety of all materials used in the project. Ensure that all paints, primers, and adhesives are fully cured and dry before allowing your child to use the wall. When purchasing materials, check the product labels for low-VOC (volatile organic compounds) and non-toxic certifications to maintain healthy indoor air quality in your child’s bedroom or play area.
Maintain the wall’s surface by cleaning it regularly with mild, non-abrasive cleaners. For dry-erase magnetic walls, use a microfiber cloth and a dedicated whiteboard cleaning spray to remove marker residue. Avoid using harsh chemical solvents, abrasive scrubbing pads, or rough cloths, as these can strip away the writable topcoat or scratch the adhesive vinyl, permanently degrading both the appearance and the erasability of the surface.
Before letting your child write on a newly finished dry-erase surface, perform an erasability test. Draw a small line with a dry-erase marker in an inconspicuous corner, wait five minutes, and attempt to wipe it away. This test verifies that the marker ink is compatible with the surface material, dries properly, and can be erased cleanly without leaving permanent stains or ghosting.
Frequently Asked Questions (FAQ)
Can I use regular fridge magnets with magnetic paint?
Regular fridge magnets, especially heavy ceramic magnets or thick rubber promotional magnets, often do not hold well on magnetic paint. Because magnetic paint contains dispersed iron particles rather than a solid sheet of steel, the magnetic attraction is naturally lighter. For the best results on painted surfaces, use lightweight plastic educational letters with flat, wide magnetic backings. If you want to use standard, heavier fridge magnets, installing a rigid steel board or a high-performance magnetic whiteboard sheet is recommended.
Is magnetic paint safe for a child's bedroom?
Yes, magnetic paint is safe for a child’s bedroom provided you choose a water-based, low-VOC formulation specifically designed for indoor residential use. Always ensure the room is well-ventilated during the application and drying process by opening windows and using fans. Keep children out of the room until the paint has fully cured and any paint odor has completely dissipated. Check the manufacturer’s safety data sheet (SDS) before purchasing to confirm the product meets safety standards for children’s spaces.
Community discussion
Share your experience or ask a question. Comments are reviewed before publication.