
Starting your first punch needle project is an exciting entry into the world of textile art, but the key to a frustration-free experience lies in the compatibility of your tools. A beginner should look for a punch needle set that prioritizes matched components—specifically, a needle size that perfectly fits the included yarn weight, a high-grip hoop that maintains drum-tight tension, and a forgiving foundation fabric like monk’s cloth. Choosing a well-coordinated starter kit prevents the common pitfalls of slipping loops, torn fabric, and hand fatigue, allowing you to focus on mastering the basic rhythm of the craft.
Identifying the Core Components of a Starter Kit
When browsing for your first punch needle set, it is easy to get distracted by beautiful patterns and vibrant yarn colors. However, the success of your first project depends entirely on the mechanical harmony of the core tools included in the box. A complete, beginner-friendly set must contain four essential elements: the punch needle tool, a dedicated foundation fabric, a high-tension hoop, and a matching supply of yarn or thread.
The punch needle tool itself is the heart of the craft, acting as a hollow wand that guides yarn through the fabric to create loops. For beginners, these tools generally fall into two categories: fixed-length needles and adjustable models. Fixed-length needles are excellent for simplicity, as they have no moving parts to slip during use, while adjustable needles feature a sliding gauge that allows you to alter the loop height, offering more texture options as your skills grow.
Products mentioned in this guide
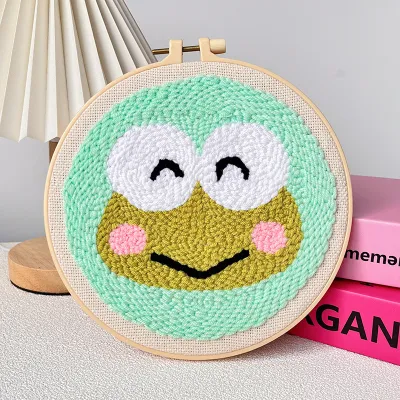
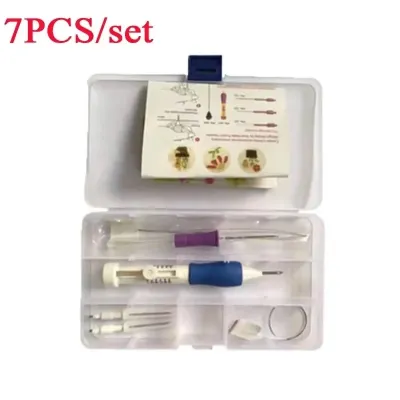
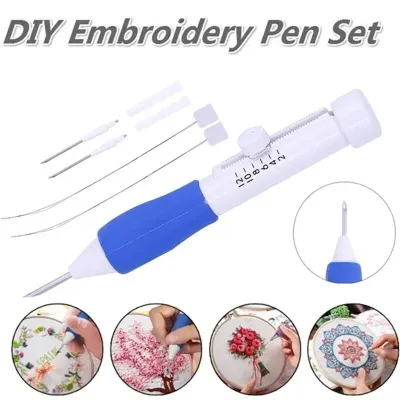
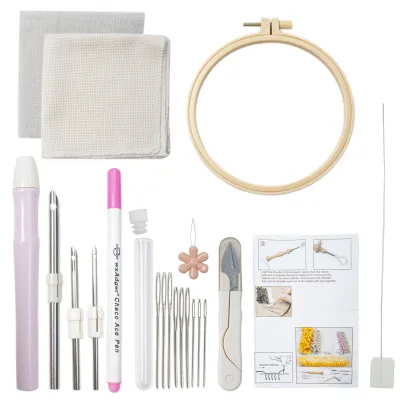
Prices are valid at publication and may change. Please refer to the product page for the latest price.
The foundation fabric is another critical component that is frequently misunderstood by beginners. Standard cross-stitch fabric, such as Aida cloth, is too stiff and has pre-woven holes that are too large, which will cause your loops to fall out instantly. A proper starter kit should include a specialized foundation fabric, such as monk’s cloth or a linen blend, which features a flexible, even-weave structure that grips the yarn securely.
To hold this fabric in place, you need an embroidery hoop or frame designed specifically to maintain high tension. Standard lightweight plastic hoops often slip under the repetitive downward pressure of the needle, so look for kits that feature non-slip hoops with a locking lip or a sturdy wooden frame with secure tightening screws.
Finally, the kit must include yarn or embroidery thread that is explicitly matched to the needle’s inner diameter. If the yarn is too thick, it will jam inside the needle shaft; if it is too thin, it will slide right out of the fabric instead of forming a stable loop.
Matching the Needle Size to Your Yarn Weight
Achieving a smooth, rhythmic stitching motion requires a precise match between the thickness of your needle and the weight of your yarn. When evaluating a punch needle set, look closely at the needle’s shaft diameter and compare it to the yarn provided. A mismatched pair is the primary reason beginners experience snagging, yarn splitting, or loops that refuse to stay in the fabric.

To verify compatibility, check the needle eye—the small hole at the tip of the needle. The yarn must slide through this eye and the main shaft with absolutely zero resistance. If you have to pull hard to move the yarn through the needle, the friction will prevent the yarn from feeding smoothly as you punch, resulting in flat, uneven stitches or frayed fibers.
Adjustable needles are highly recommended for beginners who want to experiment without buying multiple tools. These models allow you to change the length of the exposed needle shaft, which directly controls the height of the loops on the reverse side of your fabric. By adjusting the depth, you can create dimensional, high-pile textures for elements like flower petals or clouds, while keeping background elements flat and tight.
Additionally, always check that the kit includes a reliable threading tool, usually a long, flexible wire threader. Because the yarn must travel through the entire length of the hollow needle handle and out through the eye, a sturdy threader is indispensable. Ensure the threader is long enough to pass completely through the needle shaft with room to spare, and consider sets that include a spare threader, as these delicate wires can easily bend or break over time.
Selecting the Right Foundation Fabric and Hoop
The foundation fabric acts as the canvas for your punch needle art, and its quality determines how forgiving the project will be to early mistakes. As a beginner, you will inevitably make errors, punch in the wrong spot, or need to pull out stitches to start over. A high-quality foundation fabric, such as 100% cotton monk’s cloth with a 12-to-14-thread-per-inch count, offers excellent hole recovery. This means that when you pull out a mistake, the woven threads can be easily massaged back into place with the tip of your needle, leaving no permanent holes.
Maintaining a drum-tight fabric tension is absolutely non-negotiable in punch needle embroidery. If the fabric sags even slightly, the needle will push the fabric downward instead of piercing it cleanly, preventing the loops from forming at a consistent height. Look for hoops that feature a grooved inner ring or a lip-and-groove design, which locks the fabric tightly in place and prevents it from slipping as you apply downward pressure.
For your very first project, size matters. A hoop diameter of 15 to 20 centimeters is the ideal sweet spot. This size is small enough to hold comfortably in one hand while punching with the other, and it ensures you can complete the project within a few hours, providing a satisfying sense of accomplishment without causing hand fatigue.
Before you begin punching, the edges of your foundation fabric must be prepared to prevent fraying. Monk’s cloth and linen are loosely woven and can quickly unravel around the edges of the hoop during handling. Check if the kit instructions recommend binding the edges with masking tape, overcasting them with a sewing machine, or applying a thin layer of fabric glue to keep the workspace clean and secure.
Evaluating Kit Completeness and Hidden Costs
While many punch needle sets are marketed as “all-in-one” kits, their actual completeness can vary significantly. To avoid unexpected trips to a local craft store or additional online orders, carefully review the contents list before making a purchase. A truly complete beginner set should provide everything needed from the first punch to the final display.
Look for kits that include essential finishing supplies. Once your stitching is complete, you will need a way to secure the loops on the back of the project so they do not pull out during handling. This typically requires a flexible fabric glue or backing felt. Additionally, check if the kit includes a pair of sharp trimming scissors, which are vital for cutting yarn tails cleanly and shaping the pile of your finished piece.
The quality and quantity of the included yarn are also major factors in the overall value of the set. Ensure the kit provides a generous margin of yarn for each color—ideally 20% to 30% more than the pattern strictly requires. Beginners often stitch too closely together or make mistakes that require discarding some yarn, and running out of a specific color halfway through a project can be incredibly frustrating, especially if the dye lot is hard to match.
When comparing costs, a well-curated starter kit priced around S$20 to S$40 often provides better value than buying individual components. Purchasing a high-quality adjustable needle, a sturdy non-slip hoop, premium monk’s cloth, and multiple skeins of yarn separately can quickly add up to a much higher cost. However, ensure the kit does not compromise on the quality of the needle and hoop, as these are reusable tools that you can carry forward to future projects.
Setting Up and Testing Your Punch Needle Tools
Once you have selected your punch needle set, taking the time to set up and test your tools on a scrap piece of fabric will save you hours of troubleshooting later. Begin by mounting your foundation fabric into the hoop. Loosen the outer ring screw, drape the fabric over the inner ring, and press the outer ring down. Tighten the screw while gently pulling the fabric edges outward until the surface is as tight as a drum head; tapping the fabric should produce a clear, hollow sound.
Next, thread your needle by passing the wire threader through the tip of the needle, down the shaft, and out through the handle. Insert your yarn into the loop of the threader, then pull the threader back up through the needle. Finally, pass the threader through the eye of the needle from the back to the front, insert the yarn, and pull it through. Leave a tail of about 5 centimeters hanging from the eye.
Before starting on your main design, practice on an unused corner or a scrap piece of fabric. Hold the punch needle like a pen, with the open bevel of the needle facing the direction you are moving. Push the needle straight down into the fabric until the handle or depth stopper gently touches the surface. This step is crucial: if you do not push the needle all the way down, your loops will be uneven.
Slowly lift the needle back up, keeping the tip as close to the fabric surface as possible. Slide the needle forward by about one stitch length and punch down again. If you lift the needle too high off the fabric between stitches, you will pull the previous loop right out. After a few rows, flip the hoop over to inspect the reverse side; the loops should be uniform, dense, and securely held by the fabric weave. If the yarn shreds or the fabric tears, stop immediately to check that your needle is free of burrs and that your yarn is feeding freely without tension.
Frequently Asked Questions (FAQ)
Can left-handed crafters use standard punch needle sets?
Yes, left-handed crafters can easily use standard punch needle sets without any specialized modifications. The primary adjustment is the direction of your movement: you will hold the needle in your left hand and punch from right to left, ensuring the open bevel of the needle always faces the direction you are stitching. Because most punch needles have symmetrical, round handles, they are naturally ambidextrous. If you are following a printed pattern with text or directional designs, you may want to mirror the pattern on the back of your fabric before you begin.
Is punch needle embroidery safe for young children?
Punch needle embroidery can be a wonderful craft for older children, but standard sets require close adult supervision due to the sharp metal tips of the needles. The needle must be sharp enough to pierce tightly woven fabric, which presents a minor puncture risk for younger kids. For children under the age of ten, look for modified punch needle sets that feature blunt plastic needles paired with open-mesh plastic canvas and thick yarn. These child-friendly alternatives eliminate the sharp points while teaching the basic coordination and rhythm of the craft.
How do I secure loose loops on my first project?
If you notice loops pulling out or looking uneven on the finished side of your project, the issue is usually caused by insufficient fabric tension or lifting the needle too high between stitches. To fix a loose loop, gently pull the yarn tail from the back to tension the stitch, or use a tapestry needle to manually adjust the loop height from the front. Once your project is complete, apply a thin, even layer of flexible fabric glue or fabric adhesive to the flat stitch side (the back of the work) to lock all the loops permanently in place before removing the fabric from the hoop.
Community discussion
Share your experience or ask a question. Comments are reviewed before publication.