
A well-chosen leather stitching kit sets the foundation for your craft, but entry-level bundles often mix essential tools with unnecessary filler. For a beginner, the goal is not to acquire the highest number of pieces, but to secure reliable core components that allow you to practice proper saddle stitching techniques. Selecting a kit with durable basics prevents early frustration and ensures your first projects, such as cardholders or key fobs, hold together securely. By focusing on tool quality rather than sheer quantity, you can establish a clean, efficient workflow right from your home workspace.
Essential Components to Verify in a Beginner Leather Stitching Kit
To begin leatherworking successfully, your kit must contain tools that cover four fundamental stages: marking, cutting, punching, and stitching. For marking and cutting, a basic utility knife with replaceable blades and a heavy steel ruler are indispensable. A scratch awl is also necessary for tracing patterns onto the leather surface without leaving permanent ink stains. An edge beveler, which rounds off the sharp corners of the leather edges, is a valuable addition that elevates the finished look of your project from amateur to polished.
Hole punching requires a reliable set of pricking irons, also known as diamond chisels. These tools feature multiple teeth aligned in a row to pierce consistent, angled holes through the leather layers. A standard beginner set should include at least a 4-prong iron for straight lines and a 2-prong iron for navigating tight corners and curves. To drive these irons through the leather, you will need a dedicated striking mallet; using a standard household metal hammer will quickly destroy the tops of your chisels.
Products mentioned in this guide
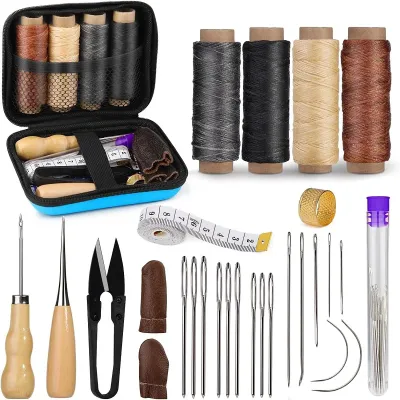
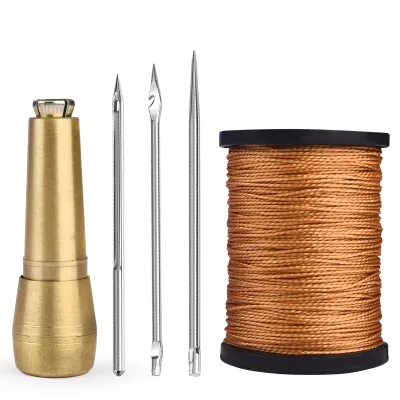
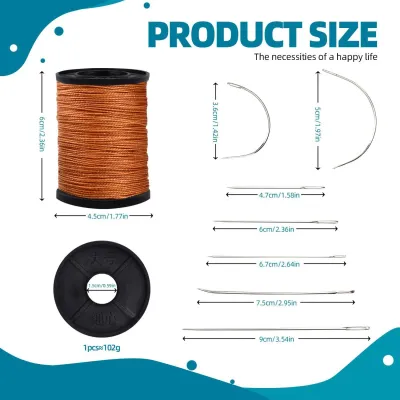
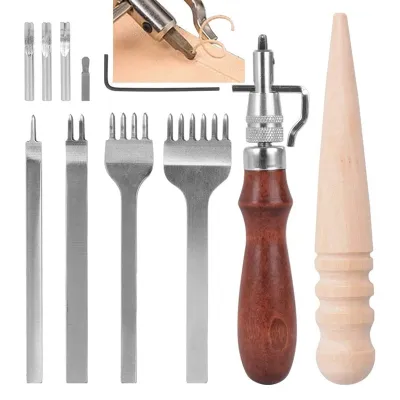
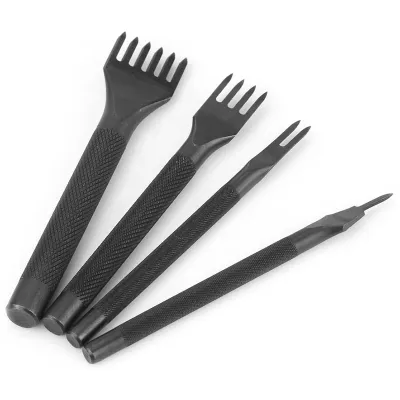
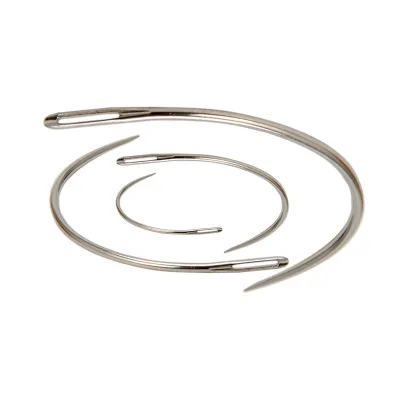
Prices are valid at publication and may change. Please refer to the product page for the latest price.
For the actual stitching process, the kit must provide specialized harness needles and pre-waxed thread. Unlike standard sewing needles, harness needles feature blunt tips to prevent them from piercing the leather fibers or splitting the thread as they pass through pre-punched holes. The thread should be pre-waxed polyester or linen, which provides the necessary friction to lock each stitch in place and resists fraying under tension.
Finally, workspace protection is critical, especially when working in shared living spaces or on dining tables. A self-healing cutting mat protects your tabletop from blade slips, while a high-density polyurethane punching pad is essential for absorbing the impact of your pricking irons. The punching pad not only preserves the sharp tips of your chisels but also significantly dampens the noise of your mallet strikes, making your practice sessions much quieter.
Quality Checks: How to Evaluate Kit Tools Before Buying
Evaluating the build quality of your tools before purchasing prevents the headache of dealing with bent needles or dull chisels. When inspecting metal tools like pricking irons and scratch awls, look for high-carbon steel or stainless steel construction. The teeth of the pricking irons must be perfectly parallel, evenly spaced, and sharply defined; any misalignment or bluntness will force you to strike harder, increasing the risk of slipping and damaging your leather.

The needles and thread in the kit require close examination to ensure smooth stitching. Verify that the needle eyes are large enough to accommodate the thread thickness without forcing you to struggle during threading, yet slim enough to pass through the punched holes without resistance. The wax coating on the thread should feel slightly tacky but smooth; avoid kits where the thread is dry and fuzzy, or conversely, coated in thick, clumpy wax that leaves residue on the leather surface.
Your striking tool is another component where quality directly affects safety and tool longevity. A proper leatherworking mallet should be constructed from nylon, dense wood, or rawhide. These materials absorb the shock of the blow and distribute the force evenly across the top of the pricking iron. Never use a hard steel hammer, as the metal-on-metal contact will mushroom the ends of your chisels, rendering them useless and potentially sending dangerous metal shards flying.
Warning Signs: What to Avoid in Entry-Level Leather Kits
Many entry-level kits advertised on online marketplaces use high piece counts as a marketing gimmick to attract beginners. A kit boasting dozens of pieces often consists of low-grade rivets, snaps, and cheap stamping tools that you will rarely use, alongside a handful of poorly made core tools. Focus on kits that prioritize a few high-quality, essential items over a mountain of low-cost plastic and metal filler.
Material compromises are common in budget bundles and should be avoided. Be cautious of kits that include thin, flexible plastic cutting boards instead of thick, self-healing mats, or those that substitute a proper mallet with a lightweight plastic toy hammer. Additionally, unmarked thread spools with no indication of fiber content or thickness are difficult to match with replacement needles once you run out.
Vague product specifications are a major red flag when shopping for a kit. Reputable manufacturers clearly state the stitch spacing of their chisels in millimeters (typically 3.85mm or 4mm for beginners) and specify the needle sizes and thread weights. If a listing only offers generic descriptions like “stitching tool” or “sewing thread” without precise measurements, it is highly likely the components are inconsistent and difficult to use.
Pre-Packaged Kit vs. Individual Tools: Making the Right Choice
Deciding between a pre-packaged kit and assembling your own toolset depends on your budget and long-term commitment. A pre-packaged kit offers excellent cost efficiency, often priced between S$30 and S$60, providing a low-risk entry point to see if you enjoy the craft. However, the trade-off is that you will likely need to replace several low-tier components as your skills progress and your demands on tool performance increase.
An alternative upgrade strategy is to buy a very basic, inexpensive kit for the secondary accessories, while purchasing your primary tools individually from reputable brands. Investing early in a high-quality set of pricking irons and a premium utility knife blade will immediately improve your stitching alignment and cutting precision. This hybrid approach saves money on consumables while ensuring your most critical hands-on tools are comfortable and durable.
Before purchasing any kit, assess its consumable readiness to ensure you can start practicing immediately. A good beginner bundle should include at least two full spools of thread in neutral colors, a pack of five to ten harness needles, and a few scraps of practice leather. If a kit requires you to immediately purchase additional materials just to complete your first practice stitch, the initial convenience of the bundle is lost.
Frequently Asked Questions (FAQ)
Do I need a stitching pony in my first leather stitching kit?
While a stitching pony is incredibly helpful for holding your leather pieces securely while leaving both hands free to manage the needles, it is not strictly necessary for your very first project. For small items like keychains or simple cardholders, you can easily practice the saddle stitch by clamping the leather between two heavy books or using a simple table clamp lined with scrap leather to prevent marking. If you decide to pursue the craft beyond your first few projects, investing in a compact wooden stitching pony will greatly improve your speed and stitching consistency.
What thickness of leather should a beginner practice with?
Beginners should look for medium-weight vegetable-tanned leather, ideally between 1.2mm and 1.6mm in thickness. This weight is sturdy enough to hold its shape during cutting and punching, yet thin enough that your pricking irons can easily pierce through two layers without requiring excessive force. Avoid very soft, stretchy chrome-tanned leathers or extremely thick sole leathers for your initial practice, as they can easily warp or damage your entry-level tools.
Community discussion
Share your experience or ask a question. Comments are reviewed before publication.