
Choosing the correct zip for a sewing project is the difference between a garment that drapes beautifully and one that puckers, bulges, or fails during wear. Whether you are crafting a lightweight linen dress for warm weather, tailoring a pair of structured denim jeans, or assembling a heavy-duty canvas bag, the zipper you select must match your fabric’s weight, the garment’s function, and the stress the closure will undergo. Understanding how to navigate the vast array of zipper types, lengths, and materials ensures your finished project looks professional and functions flawlessly. Selecting the wrong size or style can ruin the drape of your fabric or force you to alter your pattern mid-construction. By learning the standard industry measurements and matching the physical properties of different zipper designs to your specific fabric, you can approach the haberdashery counter with complete confidence.
Understanding Zipper Anatomy and How to Measure
Before selecting a zip for your project, understanding its anatomical components is essential. The teeth, or elements, are the individual physical units that interlock to close the opening. These teeth are attached to the zipper tape, which is the fabric strip on either side that you sew directly onto your garment. The movement of the zipper is controlled by the slider, which joins or separates the teeth as it moves, operated by the pull tab. At the top of the zipper tape, small metal or plastic barriers called top stops prevent the slider from sliding off the track. At the opposite end, the bottom stop limits the slider’s downward travel and, in closed-end zippers, keeps the two halves of the tape joined together.
To determine the correct length for your project, you must follow the industry standard for zipper measurement. The official length of a zipper is measured strictly from the top stop to the bottom stop. This means the measurement only covers the functional interlocking teeth section of the zipper. A common mistake is measuring the entire physical length of the zipper tape from end to end. Zipper manufacturers always leave extra tape extensions at both the top and bottom ends to allow space for folding and sewing the zipper into the seam allowances. If you include these fabric extensions or the pull tab in your measurement, you will end up buying a zipper that is too short for your garment opening, resulting in an incomplete closure.
Products mentioned in this guide
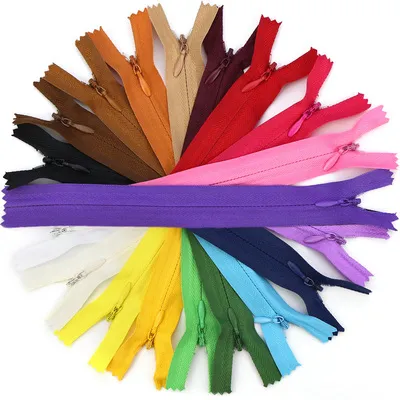
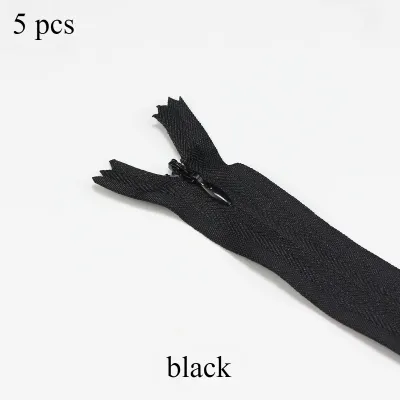
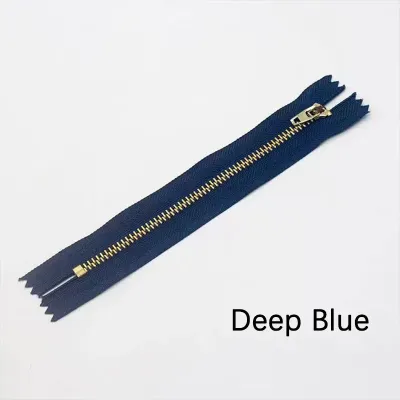
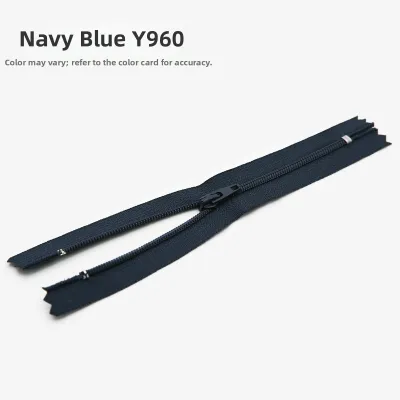
Prices are valid at publication and may change. Please refer to the product page for the latest price.
Matching Zipper Types to Your Sewing Project
The construction of a zipper directly dictates its flexibility, weight, durability, and how it behaves when sewn into a seam. Using a heavy, rigid zipper on a delicate fabric will cause the seam to sag and ripple, while a lightweight zipper on heavy-duty gear will quickly burst under tension. To achieve a professional finish, you must match the zipper type to the specific demands of your project.

Coil (Nylon) Zippers
Coil zippers feature continuous coiled synthetic fibers that form the interlocking teeth. This construction makes them incredibly flexible, lightweight, and soft against the skin. Because the teeth are not individual blocks, the zipper can bend easily along curved seams without buckling or creating sharp corners. These zippers are the ideal choice for lightweight garments, such as blouses, knitwear, and casual summer dresses. They are also widely used for interior pockets in bags, cushions, and lightweight pouches. A major advantage of nylon coil zippers is that they are highly forgiving; if you accidentally sew over the teeth with a sewing machine, the needle will usually slip between the coils without breaking, making them excellent for beginners.
Molded Plastic (Vislon) Zippers
Molded plastic zippers, commonly known as Vislon, consist of individual plastic teeth molded directly onto the polyester tape. These teeth are typically chunky, square, and highly defined. Molded plastic zippers are exceptionally strong, lightweight, and highly resistant to moisture, chemicals, and outdoor elements. These characteristics make molded plastic zippers the standard choice for sportswear, fleece jackets, winter coats, and outdoor gear like backpacks or tents. Because the plastic teeth do not rust or corrode, they are also highly suited for marine gear or garments exposed to frequent washing and humid conditions. They offer a sporty, modern aesthetic and are available in a wide array of contrast colors to serve as a design feature.
Metal Zippers
Metal zippers feature individual metal teeth—usually made of brass, aluminum, nickel, or antique bronze—clamped at regular intervals along the fabric tape. These zippers are highly durable, robust, and offer a classic, premium look that synthetic zippers cannot replicate. However, they are also the heaviest and least flexible zipper type available. You should reserve metal zippers for heavy-duty, structured fabrics that can support their weight. They are the industry standard for denim jeans, leather jackets, heavy canvas bags, workwear, and upholstery. In Singapore’s humid climate, it is wise to choose high-quality, corrosion-resistant metal zippers, such as brass or treated aluminum, to prevent the teeth from tarnishing or stiffening over time when exposed to atmospheric moisture.
Invisible Zippers
Invisible zippers are uniquely designed so that the nylon coil teeth are located on the back of the zipper tape, facing inward toward the garment. When installed correctly, the zipper teeth are completely hidden within the seam line, leaving only a tiny, unobtrusive pull tab visible at the top of the opening. This creates a clean, uninterrupted line along the garment’s exterior. These zippers are essential for formal wear, evening gowns, tailored skirts, and fitted dresses where a visible zipper track would disrupt the design lines. Because the teeth are hidden on the reverse side, installing an invisible zipper requires a specialized sewing technique and a dedicated presser foot. The fabric must be rolled back during sewing to ensure the stitches run directly alongside the coil without piercing it.
Determining the Correct Zipper Length
Selecting the proper zipper length requires careful planning before you cut your fabric or visit the haberdashery. If you are working from a commercial sewing pattern, the envelope will specify the exact zipper length required. However, if you are drafting your own design, altering a pattern, or replacing a broken zipper, you must calculate the length yourself. To determine the correct length, measure the physical opening of the garment where the zipper will be installed, accounting for the seam allowances at the top and bottom. For example, if a skirt has a waistband, the top stop of the zipper should sit just below the waistband seam line, while the bottom stop should sit at least 1.5 to 2 centimeters above the end of the seam opening to allow the fabric to transition smoothly without puckering.
Standard zippers are sold in fixed increments, typically ranging from 10 to 60 centimeters. If your measured opening does not match a standard size, or if the exact length you need is out of stock, the best strategy is to purchase a zipper that is longer than required and shorten it to fit. Shortening a zipper is a simple, safe process, but the technique depends entirely on the type of zipper you are using.
To shorten a nylon coil zipper, measure down from the top stop to your desired length and mark the new bottom stop with a fabric marker. Using a sewing machine or hand needle, sew a secure bar tack (a series of wide zigzag stitches in the same position) directly over the coils at your mark to create a new bottom stop. Once the bar tack is securely in place, use scissors to cut through the zipper tape and coils approximately 2 centimeters below the new stop, discarding the excess.
For metal or molded plastic zippers, you must shorten the zipper from the top to preserve the separating mechanism at the bottom if you are making a jacket. Mark your desired length from the bottom up. Using a pair of needle-nose pliers, carefully pull off the individual metal or plastic teeth above your mark until you have cleared about 2 centimeters of the tape. Slide the top stops onto the bare tape directly above the highest remaining tooth and crimp them tightly into place with your pliers before cutting away the excess tape.
Selecting Zipper Materials and Tape Fabrics
The performance, longevity, and appearance of your zipper depend heavily on the materials used for both the teeth and the tape. When selecting these components, you must evaluate how they will interact with your garment fabric during wear, washing, and ironing.
Teeth materials vary significantly in weight and thermal resistance. Nylon and plastic teeth are lightweight, highly flexible, and completely rust-proof, making them highly compatible with washable, everyday garments. Metal teeth offer unparalleled strength but add noticeable weight and rigidity. If you install a heavy metal zipper on a lightweight fabric like silk or linen, the weight of the metal will pull the fabric downward, distorting the silhouette of the garment.
The zipper tape fabric is equally important. Most modern zippers feature tapes made from 100% polyester, which is strong, mildew-resistant, shrink-proof, and quick-drying. However, some specialty or vintage zippers feature cotton or cotton-polyester blend tapes. If you use a cotton-blend tape, you must pre-wash and pre-shrink the zipper before sewing it into your project; otherwise, the tape may shrink during its first wash, causing the surrounding fabric to pucker permanently.
Always match the weight of the zipper tape to the weight of your garment fabric. Lightweight fabrics like chiffon, silk, and voile require fine, supple zipper tapes that will not create bulk inside the seam. Conversely, heavy fabrics like canvas, denim, and upholstery materials require thick, heavy-duty polyester tapes that can withstand high tension and abrasion without tearing.
Finally, verify the care compatibility of all zipper components. If your garment fabric requires high-heat washing or frequent ironing, ensure the zipper can withstand those conditions. Nylon and plastic teeth can melt or warp if they come into direct contact with a hot iron. When pressing a garment with a synthetic zipper, always use a medium iron setting and place a clean pressing cloth over the zipper area to protect the teeth from heat damage.
Pre-Purchase Checklist and Installation Preparation
Before finalizing your purchase at the haberdashery, running through a quick physical checklist will save you time and prevent costly mistakes. Taking a few moments to inspect the zipper in the shop ensures that your installation process goes smoothly once you return to your sewing table.
First, verify that you are purchasing the correct category of zipper for your garment design. Zippers are divided into closed-end and separating (open-end) types. Closed-end zippers open at the top but remain joined at the bottom, making them suitable for trousers, skirts, dresses, and pockets. Separating zippers feature a box-and-pin mechanism at the bottom that allows the two halves of the tape to separate completely, which is mandatory for jackets, coats, and cardigans that open fully at the front.
Second, physically test the zipper’s quality in the store. Gently slide the pull tab up and down the track several times to ensure the movement is completely smooth, fluid, and free of catches or resistance. Inspect the teeth to ensure there are no missing, bent, or misaligned elements that could cause the slider to jam later.
Third, verify the color match under natural light if possible. Retail store lighting, particularly fluorescent bulbs, can distort colors significantly. A zipper tape that appears to match your fabric perfectly under shop lights may reveal a jarringly different undertone when viewed in daylight. If you are buying a separating zipper for a jacket, also check the insertion hand; some zippers insert from the left, while others insert from the right, which can affect ease of use depending on your preference.
Once you have purchased the correct zipper, proper fabric preparation is the secret to a wave-free, professional installation. Before pinning the zipper to your fabric, use an iron on a low-to-medium setting to press the zipper tape flat, smoothing out any folds or kinks caused by packaging. Next, always apply a narrow strip of lightweight fusible interfacing to the wrong side of the fabric along the seam allowances where the zipper will be sewn. This simple step stabilizes the fabric, prevents the seam from stretching out of shape under the machine’s presser foot, and eliminates the unsightly puckers and waves that often plague home-sewn zippers.
Frequently Asked Questions (FAQ)
Can I use a regular zipper foot for an invisible zip?
While you can technically install an invisible zipper using a standard adjustable zipper foot, it is highly recommended to use a specialized invisible zipper foot. A standard zipper foot can only stitch alongside the outer edge of the folded zipper tape, which prevents the needle from getting close enough to the teeth. This results in the zipper tape remaining visible from the outside of the garment, defeating the purpose of an invisible closure.
A specialized invisible zipper foot features deep grooves on its underside. These grooves physically unroll and hold the coiled nylon teeth upright as you sew, allowing the machine needle to stitch precisely in the groove directly next to the coil. This specialized tool ensures the stitches are placed in the perfect position, allowing the zipper to roll back and disappear completely into the seam once zipped.
How do I fix a zip that separates after zipping?
If a zipper separates or bursts open behind the slider after you zip it up, the issue is typically caused by a loss of tension in the slider or misaligned teeth. First, perform a basic diagnostic check: clear any loose threads or fabric caught in the teeth, and ensure the slider is fully engaged at the bottom stop before pulling it up. If the teeth are visibly misaligned or missing, the zipper has structural damage and must be completely replaced.
If the teeth are intact but fail to lock, the slider body has likely stretched open slightly over time due to wear and tension. You can attempt a temporary fix by using a small pair of pliers to gently squeeze the sides of the slider back together, restoring its original narrow profile. However, if this does not resolve the issue, or if the slider continues to loosen, the metal has fatigued, and you will need to replace either the slider itself or the entire zipper assembly to ensure a reliable closure.
Community discussion
Share your experience or ask a question. Comments are reviewed before publication.