
Selecting the right whiteboard board size for a student is a balance between academic utility and available home study space. For lower primary students, a compact board measuring roughly 30 by 40 centimeters is often sufficient for early spelling and handwriting practice. As academic demands increase in upper primary, students benefit from medium-sized boards around 60 by 90 centimeters to map out complex math models and science diagrams. By the time a student reaches secondary school, a larger board of at least 90 by 120 centimeters becomes highly valuable for managing multi-step algebraic equations and extensive exam revision.
Matching Whiteboard Sizes to Primary and Secondary School Needs
Lower primary students are developing fundamental motor skills, letter formation, and basic phonics. At this stage, a massive wall-mounted board is rarely necessary and can even be intimidating. A small, portable whiteboard board—often around A4 size or up to 30 by 40 centimeters—allows young learners to practice writing letters and numbers comfortably at their desks or on their laps. These smaller dimensions keep the writing surface within their natural field of vision and physical reach, making learning feel like an interactive game.
Upper primary students face more demanding coursework, including multi-step mathematics, structured science concepts, and longer vocabulary lists. Students frequently use visual bar models to solve complex math heuristics. A medium-sized whiteboard board, such as 45 by 60 centimeters or 60 by 90 centimeters, provides the necessary canvas to draw these models alongside calculations without running out of space. This size is also ideal for drafting basic mind maps, organizing weekly study schedules, or practicing spelling words.
Products mentioned in this guide
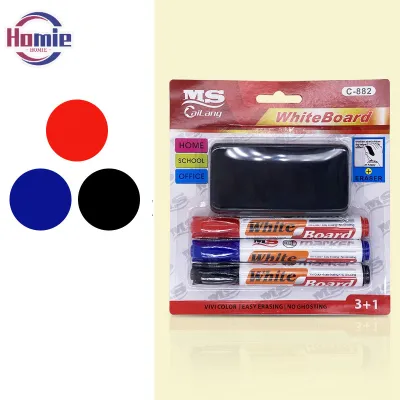
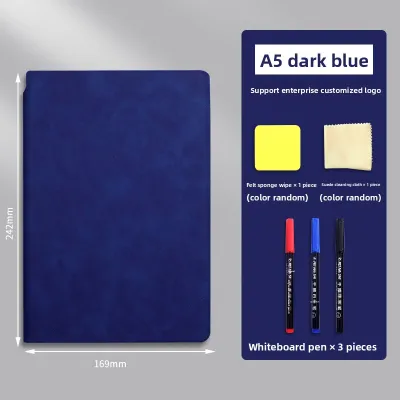
Prices are valid at publication and may change. Please refer to the product page for the latest price.
Secondary school students deal with highly abstract concepts, extensive essay outlines, and long, multi-line equations in subjects like advanced mathematics, physics, and chemistry. A small board quickly becomes frustrating at this level, as constant erasing disrupts the cognitive flow of problem-solving. A large whiteboard board measuring 90 by 120 centimeters or more allows secondary students to keep entire processes visible at once. This spatial layout helps them identify logical connections, track errors in long calculations, and synthesize large volumes of information during exam preparation.
Rather than relying solely on rigid grade-level guidelines, parents should observe their child’s actual study habits and workflow. Some students are highly visual learners who prefer mapping out entire chapters in colorful diagrams, requiring a much larger board than their peers. Others may only use a board for quick, temporary calculations before transferring the final answers to paper, meaning a smaller, desk-friendly option is more appropriate. Assessing how your child naturally interacts with study materials ensures the board serves as an active learning tool.
Assessing Room Layout and Installation Options
Before purchasing any whiteboard board, carefully measure the physical dimensions of the intended study area. In compact residential layouts, wall space must be managed efficiently. Take precise measurements of the wall where the board will hang, accounting for nearby furniture clearance, desk depth, and the swing paths of doors or wardrobe panels. A board that overlaps with a window frame or blocks a closet door will quickly become a daily inconvenience.

Wall-mounted boards are the most space-efficient option for permanent, dedicated study corners. By utilizing vertical wall space, they keep the study desk and floor completely clear of clutter. This setup creates a structured, classroom-like environment that can help students transition into a focused study mindset. However, wall-mounted units require a permanent spot and cannot be easily relocated if you decide to rearrange the bedroom furniture later.
Freestanding or rolling easel boards offer excellent flexibility for homes with limited wall space or shared study areas. These boards can be rolled into a corner when not in use or moved between rooms for collaborative study sessions. The trade-off is their physical footprint; easel frames and wheeled bases extend outward and occupy valuable floor space. In smaller bedrooms, a freestanding board can make the room feel cramped and may present a tripping hazard if placed in high-traffic pathways.
For highly restricted spaces or multi-purpose rooms, compact desktop whiteboards or double-sided lapboards are an excellent alternative. These small boards can be propped up on a desk during study sessions and easily tucked away in a drawer, bookshelf, or wardrobe when the schoolwork is finished. They provide the benefits of a dry-erase surface without permanently altering the room’s decor or occupying any floor space.
Avoiding Common Whiteboard Sizing and Placement Mistakes
One of the most common mistakes parents make is choosing a whiteboard board that is too small for secondary-level study. While a compact board seems practical for a small desk, it forces older students to write in cramped, tiny handwriting. This restriction makes it difficult to review complex, multi-step work, often leading to avoidable calculation errors. If a student has to erase the top half of an equation just to write the final steps, the cognitive continuity of the exercise is lost.
Another frequent error is ignoring the optimal viewing distance and mounting height. A wall-mounted board must be positioned ergonomically to prevent physical strain. If the board is mounted too high, the child will have to stretch their arms and neck, leading to fatigue during longer study sessions. Conversely, mounting it too low forces them to hunch over. The board should be positioned so that the most frequently used writing zone sits comfortably between the student’s chest and eye level, with room to adjust as they grow.
Parents also tend to overlook the physical footprint and base width of easel-style boards. While the writing panel itself might seem compact, the supporting legs or wheeled base often require significant floor clearance. Always check the manufacturer’s specifications for the base depth to ensure it will not block walkways or prevent desk chairs from sliding in comfortably.
Finally, failing to verify wall material compatibility and weight limits before installation can lead to structural damage or safety hazards. Large whiteboards, especially those with heavy magnetic steel backings or wooden frames, can be surprisingly heavy. Standard drywall or partition walls require specialized hollow-wall anchors to hold the weight safely, whereas concrete or brick walls require masonry plugs and a hammer drill for secure installation. Ensuring the mounting hardware matches your wall type prevents the board from sagging or falling over time.
Checking Surface Materials and Practical Features
The durability and longevity of a whiteboard board depend heavily on its surface material. Standard melamine boards are lightweight and highly affordable, making them popular for temporary or light use. However, melamine is a porous material that tends to absorb ink over time, leading to “ghosting”—the faint, permanent stains left behind by old marker lines. For daily schoolwork, ceramic or porcelain surfaces are highly recommended. These non-porous materials are extremely resistant to scratching, staining, and ghosting, ensuring the board remains clean and easy to erase even after years of heavy use.
A magnetic surface is another highly practical feature to consider. Magnetic whiteboards allow students to attach flashcards, study timetables, formula sheets, or educational diagrams directly to the board using small magnets. This multi-functional capability turns the whiteboard into a dynamic study hub, combining writing space with a bulletin board.
When evaluating different models, inspect the overall build quality, including the sturdiness of the frame and the corner joints. Aluminum frames offer a lightweight yet durable structure, while rounded plastic corner caps help prevent accidental scratches or cuts, which is an important safety consideration for younger children. Additionally, ensure the board features a deep, secure marker tray to keep dry-erase markers, cleaning sprays, and erasers organized and within easy reach.
To ensure the surface remains in optimal condition, always verify that the markers and erasers used are compatible with the specific board material. Before committing to heavy daily use, parents can perform a simple erasability test: write a small mark in an inconspicuous corner of the board, leave it for 24 hours, and then wipe it away. A high-quality surface should erase completely clean without requiring heavy scrubbing or specialized chemical solvents, indicating it is ready to handle the rigors of daily school revision.
Frequently Asked Questions (FAQ)
Can I use a glass whiteboard for heavy daily schoolwork?
Tempered glass whiteboards are exceptionally durable and offer the highest resistance to ghosting, staining, and scratching, making them an excellent premium option for daily study. However, because glass is highly reflective, standard dry-erase markers can sometimes appear faint or difficult to read under direct room lighting. To ensure clear visibility, you will need to use high-contrast markers specifically formulated for glass surfaces. Additionally, glass boards are significantly heavier than traditional steel or melamine boards, requiring specialized mounting hardware and solid wall anchoring to ensure they remain safely secured in a child’s bedroom.
How high should I mount a wall whiteboard for a growing child?
To maintain proper ergonomics, a wall-mounted whiteboard board should be positioned so that the primary writing area aligns with the child’s natural arm reach without requiring them to stretch upward or bend downward excessively. A highly effective strategy is to center the board at the child’s current eye level, or mount it slightly lower so they can easily access the bottom half now while leaving room to utilize the upper sections as they grow taller. Always ensure the bottom edge of the frame clears the top of the study desk and any surrounding chairs by at least 10 to 15 centimeters to prevent painful bumps and allow comfortable seating.

Community discussion
Share your experience or ask a question. Comments are reviewed before publication.