
Selecting your first model painting setup can feel overwhelming given the sheer variety of paints, tools, and accessories available. Tamiya, a benchmark brand in the hobby world, offers several starter configurations designed to ease beginners into the craft. To find the right option, you must match your immediate project goals with your physical workspace, preferred application method, and budget.
Rather than buying individual items at random, starting with a curated set ensures that your paints, thinners, and tools are chemically compatible and physically suited to your skill level. Whether you want to paint a single historical miniature or dive into building highly detailed scale automobiles, understanding how these starter sets are structured will help you make a practical, cost-effective decision.
Core Criteria for Evaluating Tamiya Starter Sets
Your choice of a starter set should align with your preferred painting method, as hand brushing and airbrushing require entirely different skill sets and physical environments. Hand brushing is highly accessible, requiring minimal setup and a small workspace, making it excellent for fine details and small figures. Airbrushing, on the other hand, offers incredibly smooth, thin, and uniform coats, but it introduces a steeper learning curve, higher initial costs, and more demanding maintenance routines.
Products mentioned in this guide
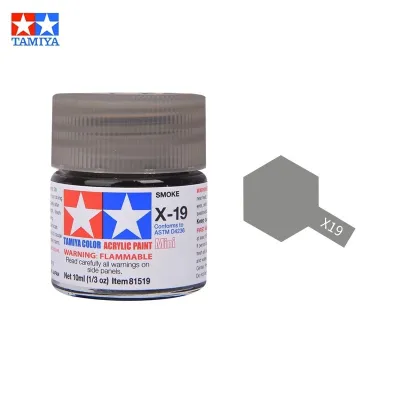
Prices are valid at publication and may change. Please refer to the product page for the latest price.
Paint chemistry is another critical factor to verify before purchasing any starter kit. Tamiya produces three primary paint lines: water-soluble acrylics, enamels, and lacquers. Acrylics are highly popular among beginners because they dry quickly, are relatively low-odor, and can be thinned with water or alcohol-based thinners. Enamels dry slowly, which allows the paint to self-level and minimize brush strokes, but they require mineral spirit thinners. Lacquers provide an exceptionally durable finish and dry almost instantly, but they emit strong fumes that require robust ventilation.
Evaluating the overall value of a bundled starter set requires comparing its cost against purchasing the components individually. A pre-packaged kit often provides excellent convenience by grouping essential colors and basic tools together. However, if you already own high-quality hobby tools, or if the kit includes colors you do not plan to use, buying a standalone model kit along with a few targeted paint jars and a premium brush may offer better long-term value.
Common Types of Tamiya Beginner Sets
Tamiya starter configurations generally fall into three distinct categories, each tailored to different workspace limitations, budgets, and hobby goals. Understanding these categories allows you to select a set that matches your current comfort level without leaving you with redundant tools or overly complex equipment.

Basic Hand-Brush and Marker Kits
These entry-level kits are designed for straightforward, out-of-the-box detailing without requiring a dedicated workshop or expensive machinery. They typically include a small selection of essential paint colors, a couple of synthetic hobby brushes, or specialized paint markers designed for direct application.
These sets are highly suited for small-scale models, quick touch-ups, and hobbyists working in limited spaces, such as a shared desk or kitchen table. Because the paints are applied directly with a brush or marker, cleanup is fast and requires only a small bottle of compatible thinner.
However, hand-brushing kits have distinct limitations when it comes to covering large, flat surfaces like car bodies or airplane wings. Achieving a perfectly smooth, streak-free finish on glossy surfaces is exceptionally difficult with a hand brush, as the paint can dry unevenly and preserve visible brush strokes.
Airbrush Starter Systems
For beginners aiming for a professional, factory-smooth finish, entry-level airbrush bundles offer a complete introduction to sprayed mediums. These systems typically package a compact, low-pressure compressor with a basic dual-action airbrush, air hoses, and a small selection of compatible acrylic paints.
While airbrushing delivers unmatched finish quality, it demands a commitment to learning proper paint thinning ratios and mastering air pressure control. You must also be prepared for rigorous cleaning routines, as even a tiny speck of dried paint can clog the delicate nozzle and disrupt the spray pattern.
Operating an airbrush also requires careful environmental planning. Even compact compressors produce a low humming noise, and spraying atomized paint releases fine airborne particles that necessitate a dedicated spray booth, protective masks, and active ventilation to keep your living space safe.
Model-Specific Tool and Paint Bundles
These project-focused bundles package a specific model kit—such as a historical military vehicle or a classic sports car—alongside the exact paint colors and basic tools required to complete that specific build. This eliminates the guesswork of matching historical paint codes or searching for obscure color shades.
Before purchasing, it is vital to verify that the assembly complexity of the included model matches your current skill level. A highly detailed model with dozens of tiny parts, intricate suspension systems, or complex water-slide decals can quickly frustrate a beginner, regardless of how convenient the paint bundle is.
You should also evaluate whether the tools included in these bundles are durable enough to be reused on future projects. While the leftover paints can often be saved for detailing other models, basic plastic nippers or low-cost brushes included in budget bundles may need to be upgraded as you transition to more advanced builds.
Essential Supplies to Verify Before Purchasing
To avoid mid-project interruptions, always check the contents of your chosen starter set against a checklist of fundamental supplies. Many beginner kits require a few supplementary items to complete a model successfully.
- Paint Series and Volumes: Check whether the set includes Tamiya's "X" series (gloss finish) or "XF" series (flat/matte finish) bottles. Verify the bottle sizes, which typically range from 10ml to 23ml, to ensure you have enough volume for your project.
- Thinner Compatibility: Ensure the kit includes or specifies the correct thinner. Tamiya acrylics require X-20A acrylic thinner, while their lacquer and enamel lines require their respective dedicated thinners to prevent the paint from clumping or curdling.
- Brush Selection: Look for at least two brush shapes: a medium flat brush for applying base coats over wider areas, and a fine round brush (such as a #0 or #00) for painting small details and raised relief.
- Masking Tape: Sharp, clean color separation requires high-quality, low-tack masking tape. Verify if the kit includes hobby-grade tape that can seal edges without lifting underlying paint layers when peeled away.
- Precision Tweezers: Essential for handling tiny plastic parts and positioning delicate water-slide decals accurately without tearing them.
- Sprue Nippers: A dedicated pair of single-blade or double-blade nippers is crucial for cutting plastic parts cleanly from the runner frames without stressing or cracking the plastic.
- Sanding and Finishing Tools: Verify the presence of fine-grit sanding sticks or hobby files (ranging from 400 to 1000 grit) to smooth down attachment points and mold lines before applying paint.
- Mixing and Cleanup Accessories: Ensure you have a reusable mixing palette, paint stirrers, and a stable cleaning jar to rinse your brushes safely during and after your painting session.
Workspace and Safety Considerations for Model Painting
Setting up a safe and organized workspace is essential when working with hobby paints, thinners, and chemical solvents. Even water-soluble acrylics contain mild solvents that should not be inhaled in concentrated amounts over long periods.
In humid climates, such as Singapore, managing your painting environment is particularly important. High humidity can trap moisture under drying paint layers, causing a cloudy finish known as “blushing,” especially when using lacquer-based paints or clear topcoats. Working in an air-conditioned room or using a dehumidifier can help stabilize drying times and ensure a clean, durable finish.
Always prioritize active ventilation by working near an open window or using a dedicated hobby spray booth equipped with a particulate filter. Protect your work surface with a self-healing cutting mat or a solvent-resistant silicone sheet to prevent permanent stains and chemical damage to your furniture.
Keep your workspace organized by using stable bottle holders to prevent accidental spills of highly fluid thinners and liquid cements. Store all flammable chemicals, aerosol cans, and solvents in a cool, dry place away from direct sunlight, and dispose of paint-soaked paper towels in accordance with local waste disposal guidelines.
Frequently Asked Questions (FAQ)
Can I use Tamiya acrylic paints straight from the bottle?
While you can technically apply Tamiya acrylics straight from the bottle for tiny touch-ups, they are generally too thick for smooth, even coverage. For hand brushing, adding a few drops of Tamiya X-20A thinner or Paint Retarder helps the paint flow smoothly and minimizes visible brush strokes. For airbrushing, thinning is mandatory; you must dilute the paint to a milk-like consistency, typically using a ratio of one part paint to one part thinner, to prevent the airbrush nozzle from clogging.
Do I need to buy a separate primer if it is not in the starter set?
Yes, purchasing a separate primer is highly recommended if your starter set does not include one. Bare model plastic is very slick, making it difficult for water-based acrylic paints to adhere durably. A dedicated primer, such as Tamiya Surface Primer, bites into the plastic surface and leaves a micro-textured matte finish that helps subsequent paint layers bond securely, preventing the paint from peeling or scratching off during handling.
How do I clean Tamiya brushes and airbrushes after use?
You must clean your application tools immediately after use before the paint has a chance to cure. For wet acrylic paints, rinsing thoroughly with water or Tamiya X-20A thinner is usually sufficient. If the paint has already dried or if you are using enamel or lacquer paints, you will need a stronger solvent, such as Tamiya Airbrush Cleaner or dedicated lacquer thinner, to dissolve the cured resin. Always follow the manufacturer’s instructions for disassembling your airbrush to avoid damaging delicate internal seals and needles.
Community discussion
Share your experience or ask a question. Comments are reviewed before publication.