
Choosing the correct stainless steel needle is one of the most critical decisions you will make before starting an embroidery project. The right needle ensures your thread glides effortlessly through the fabric, preventing fraying, puckering, and hand fatigue. Conversely, using an incorrect size or type can quickly ruin delicate base fabrics and shred expensive specialty threads, turning a relaxing craft into a frustrating ordeal.
To select the perfect needle, you must match the needle type to your specific embroidery technique, and then match the needle size to both your fabric weave and thread thickness. High-quality stainless steel is the preferred material for modern embroiderers because it offers a smooth, polished finish that reduces friction, resists bending under tension, and stands up to the natural oils on your hands. By understanding how different needle designs and sizes interact with your materials, you can achieve professional, long-lasting results on every project.
Understanding Stainless Steel Embroidery Needle Types
Stainless steel has become the industry standard for embroidery needles due to its exceptional durability and resistance to corrosion. Unlike nickel-plated needles, which can wear down over time and expose base metals that may cause allergic reactions, a solid stainless steel needle maintains its ultra-smooth finish through thousands of stitches. This smooth surface is crucial because it minimizes drag, allowing you to maintain consistent tension and stitch definition. Different embroidery techniques, however, require distinct needle shapes to accommodate various fabric structures and thread behaviors.
Products mentioned in this guide
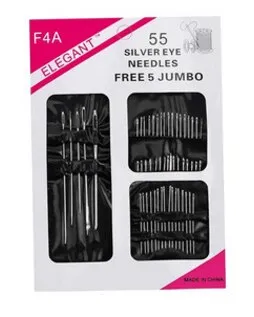
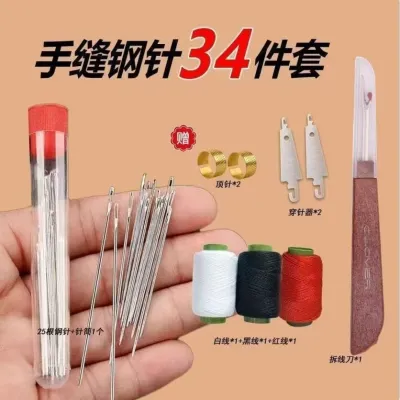
Prices are valid at publication and may change. Please refer to the product page for the latest price.
Crewel (Embroidery) Needles
Crewel needles, often simply labeled as embroidery needles, are the most versatile and widely used option in surface embroidery. They feature a sharp point, a medium-length shaft, and a long, oval eye that is significantly wider than the shaft. This elongated eye is designed to accommodate multiple strands of standard embroidery floss or thicker specialty threads without crowding.
Because they have a sharp tip, crewel needles are ideal for piercing tightly woven fabrics such as linen, cotton calico, and silk. They are the go-to choice for traditional surface embroidery stitches, including satin stitch, stem stitch, and long-and-short stitch, where the needle must pierce the fabric cleanly to create precise outlines and fills.
Chenille Needles
Chenille needles share many physical characteristics with crewel needles, including a sharp point and a long, elongated eye. However, they are designed with a much thicker, heavier shaft and a noticeably wider eye. This robust construction is engineered to handle heavy, bulky threads that would easily shred or clog in a standard embroidery needle.
If you are working with thick crewel wool, silk ribbons, or chunky novelty yarns, a chenille needle is essential. The thick shaft creates a hole in the fabric that is large enough for these heavy threads to pass through without friction, making them perfect for stitching on heavy-duty fabrics like denim, canvas, wool felt, and soft home furnishings.
Tapestry Needles
Tapestry needles are easily distinguished by their blunt, rounded tips and large, elongated eyes. Unlike crewel or chenille needles, they are not designed to pierce fabric fibers. Instead, the blunt point is engineered to slip gently between the threads of open-weave or evenweave fabrics without splitting or damaging them.
This makes tapestry needles indispensable for counted-thread techniques such as cross-stitch, hardanger, and blackwork, which are typically worked on Aida, linen, or canvas. The large eye easily accommodates multiple strands of cotton floss or pearl cotton, while the blunt tip ensures your stitches land precisely in the designated holes of the fabric grid.
Milliners (Straw) Needles
Milliners needles, historically used in hat-making and also known as straw needles, have a unique geometry that sets them apart from other embroidery needles. They feature a sharp point and an exceptionally long, slender shaft. Crucially, the eye of a milliners needle is the exact same width as the shaft, creating a perfectly uniform cylinder from the tip to the eye.
This uniform thickness is highly advantageous for executing wrapped and dimensional stitches, such as French knots, bullion knots, and cast-on stitches. Because the eye does not bulge outward, the wrapped loops of thread can slide off the needle and onto the fabric smoothly without catching, snagging, or distorting the shape of the knot.
Decoding Needle Sizes: Matching Your Stainless Steel Needle to Fabric and Thread
Understanding the sizing convention of embroidery needles is essential for achieving clean, professional results. Embroidery needles follow an inverse sizing system: the higher the size number, the finer and thinner the needle. For example, a size 10 crewel needle is exceptionally fine and thin, whereas a size 3 crewel needle is much thicker and sturdier. Choosing the correct size requires balancing the physical properties of your fabric weave with the thickness of your embroidery thread.

Your needle must create a hole in the fabric that is just large enough for the thread to pass through without friction, but not so large that it leaves a permanent, unsightly gap. If the needle is too thin, the thread will rub against the fabric fibers as you pull it through, leading to fraying, fuzzing, and eventual breakage. If the needle is too thick, it will force the fabric fibers apart permanently, leaving visible holes around your stitches and ruining the overall texture of your work.
To help you select the right starting point for your next project, refer to this general reference guide mapping common stainless steel needle sizes to typical fabric weights and thread plies:
| Needle Sizes | Fabric Weight & Type | Thread Type & Ply |
|---|---|---|
| Sizes 1 to 3 (Thick) | Heavy fabrics (canvas, heavy denim, wool felt, upholstery) | Thick threads (crewel wool, heavy silk ribbon, 6+ strands of cotton floss) |
| Sizes 4 to 6 (Medium) | Medium-weight fabrics (linen, cotton calico, twill) | Standard embroidery floss (2 to 6 strands), pearl cotton size 8 or 12 |
| Sizes 7 to 10 (Fine) | Fine fabrics (silk, organza, lightweight cotton, lawn) | Fine threads (1 to 2 strands of cotton floss, fine silk thread, single-strand filament) |
Always check the manufacturer’s label on your specific thread and fabric before starting. Some specialty threads, such as metallic or hand-dyed fibers, may require a slightly larger needle size than standard cotton floss of the same thickness to protect their delicate coatings from friction.
Step-by-Step Guide to Selecting Your Needle
Selecting the perfect needle does not have to be a guessing game. By following a logical, step-by-step workflow, you can confidently choose and verify the correct tool for any embroidery project.
Step 1: Identify Your Fabric and Technique Begin by analyzing the structure of your base fabric. If you are working on a tightly woven material like linen or cotton, you will need a sharp needle to pierce the fibers cleanly. If you are working on an open-grid fabric like Aida or evenweave, you will need a blunt needle to navigate between the threads. Additionally, consider your technique: are you doing flat surface embroidery, counted cross-stitch, or dimensional wrapped knots?
Step 2: Select the Needle Type Based on your fabric and technique, select the appropriate needle category. Choose a Crewel needle for general surface embroidery on woven fabrics. Opt for a Chenille needle if you are using thick, heavy threads on sturdy materials. Select a Tapestry needle for counted-thread work on grids, or a Milliners needle if your design features a high volume of wrapped bullion knots.
Step 3: Estimate the Starting Needle Size Look at the thickness of your chosen thread and the weight of your fabric, then consult the sizing reference table. For instance, if you plan to stitch with 3 strands of standard cotton embroidery floss on a medium-weight linen fabric, a size 5 or 6 Crewel needle is an excellent starting point.
Step 4: Perform a Test Stitch Before working on your main project, take a small scrap of your exact fabric and thread. Secure the fabric in a hoop and make five to ten test stitches using your chosen needle. This step is crucial because it provides immediate, tactile feedback on how the needle, thread, and fabric interact in real-world conditions.
Step 5: Evaluate and Adjust Pay close attention to how the needle feels and sounds as you pull it through the fabric during your test. Adjust your needle size up or down based on these three observable signals:
- Listen for friction: If you hear a distinct "popping" or "snapping" sound as the needle eye passes through the fabric, the needle is too thick. Switch to a finer needle (a higher size number).
- Check for thread wear: If your thread begins to fray, fuzz, or break after just a few stitches, the needle eye is too small or the shaft is too thin to clear a safe path. Switch to a larger needle (a lower size number) or a needle type with a wider eye.
- Inspect the finished stitch: If the needle slides through with a gentle, barely audible whisper and the thread lies completely flat without leaving an oversized hole in the fabric, your needle size is perfect.
Common Needle Selection Mistakes and Troubleshooting
Even experienced embroiderers occasionally encounter issues caused by an incorrect needle choice. Recognizing these common problems and knowing how to troubleshoot them will save you time and protect your materials.
Thread Fraying or Breaking If your embroidery thread repeatedly shreds or breaks near the eye of the needle, it is a clear sign of excessive friction. This happens when the needle eye is too small for the thread thickness, causing the fibers to rub intensely against the fabric edges. To resolve this, move to a larger needle size (a lower number) or switch to a needle type designed for thicker threads, such as a Chenille needle.
Visible Holes or Distorted Fabric If you notice permanent, gaping holes in your fabric where the needle has entered, or if the fabric puckers around your stitches, your needle is too thick. The heavy shaft is forcing the fabric fibers apart beyond their elastic limit. Switch to a finer needle (a higher number) that can gently part the fibers without stretching them permanently.
Difficulty Pulling the Needle Through If you find yourself straining or using pliers to pull the needle through the fabric, your needle point does not match your fabric structure. This typically occurs when trying to force a blunt tapestry needle through a tightly woven fabric, or when using a sharp needle on stiff, heavily sized canvas. Double-check your fabric type and ensure you are using a sharp tip for woven materials and a blunt tip for open grids.
Stitches Looking Uneven or Snagging If your thread catches unexpectedly or your stitches look messy and uneven, your needle may be damaged. Stainless steel needles are highly durable, but they can still develop bent shafts, dull points, or microscopic burrs inside the eye over time. Inspect your needle visually and run the tip lightly over your fingernail; if you feel any roughness, snagging, or resistance, discard the needle immediately and replace it with a fresh one.
Frequently Asked Questions (FAQ)
Do stainless steel embroidery needles rust in humid climates?
While stainless steel is highly resistant to rust due to its chromium content, it is not entirely rust-proof. In high-humidity environments like Singapore, persistent moisture in the air and acidic sweat from your hands can cause surface oxidation over time. To protect your needles, store them in a dry, enclosed needle case with a silica gel packet to absorb excess moisture. Avoid leaving needles parked in your fabric for extended periods, as trapped humidity can cause rust spots that stain both the needle and your project.
How do I know when it is time to replace my needle?
You should replace your needle based on observable wear rather than a strict calendar schedule. Look for physical signs of degradation, such as a dull point that struggles to pierce the fabric, a rough or burred eye that constantly shreds your thread, or any slight bending in the shaft. If you feel increased resistance or hear a clicking sound as you stitch, it is time to discard the old needle. Frequent stitching on abrasive fabrics like heavy canvas or denim will dull a needle much faster than working on soft silk or fine cotton.
Community discussion
Share your experience or ask a question. Comments are reviewed before publication.