
Selecting the perfect snap fastener is the key to creating durable, functional closures on garments, bags, and household items. The ideal choice depends on matching the fastener’s attachment mechanism and physical size directly to your fabric’s weight, thickness, and stretch. Choosing incorrectly can lead to torn fabrics, distorted seams, or closures that constantly pop open under tension.
To make the right selection, you must evaluate the total compressed thickness of your fabric layers and understand how different snap materials behave under stress. By aligning the mechanical grip of the fastener with the structural integrity of your material, you can achieve a clean, professional finish that lasts through repeated use and laundering.
Understanding Snap Fastener Components and Types
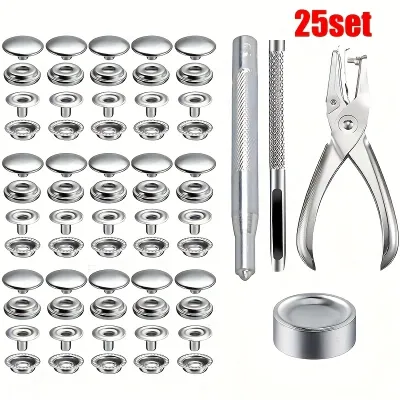
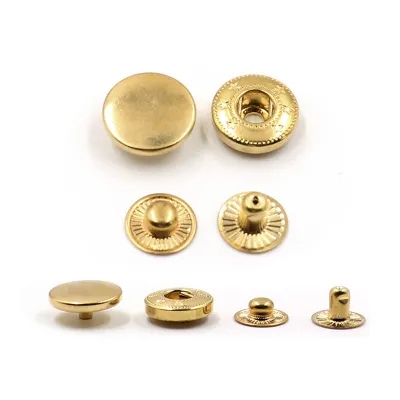
A standard no-sew snap fastener consists of four distinct components that work in pairs to create a secure closure. The top half of the assembly comprises the cap (the visible decorative button on the outside of the fabric) and the socket (the female receiving part). The bottom half consists of the stud (the male projecting part) and either a prong ring or a post that secures the stud to the underside of the fabric.
Products mentioned in this guide
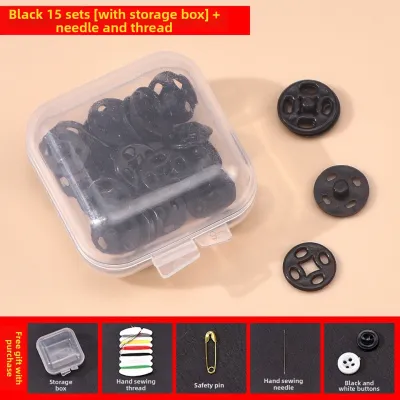
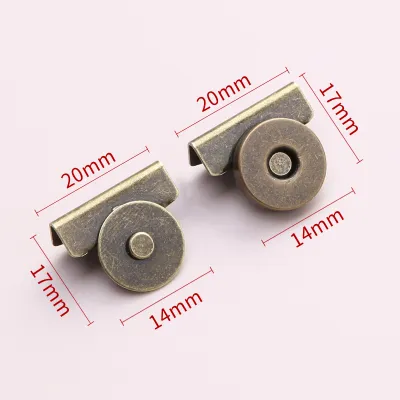
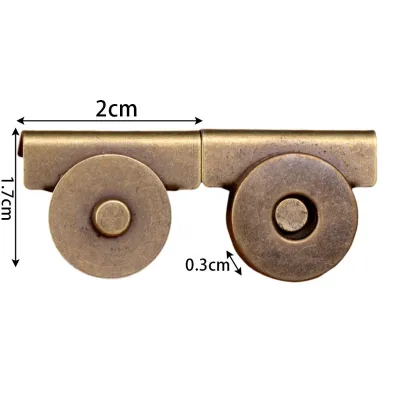
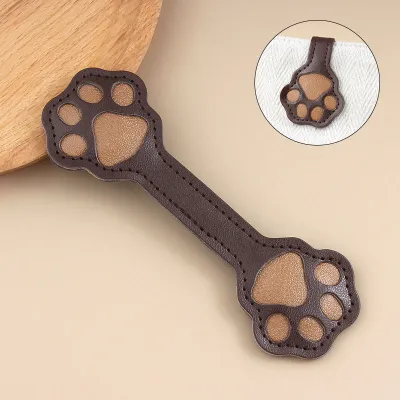
Prices are valid at publication and may change. Please refer to the product page for the latest price.
During installation, the cap and socket are squeezed together with the fabric sandwiched in between, while the stud and its backing piece are joined in the same manner on the opposing fabric flap. When pressed together, the stud snaps firmly into the socket, creating a mechanical lock.
It is essential to differentiate between no-sew (prong or post) snaps and sew-on snaps. No-sew snaps require mechanical tools to pierce the fabric and crimp the metal or plastic components together permanently. In contrast, sew-on snaps feature small holes around their perimeter, allowing you to stitch them directly to the fabric surface using standard sewing thread. Sew-on snaps are highly reversible, require no specialized installation tools, and place less mechanical stress on delicate fibers.
Clarifying common terminology variations prevents confusion when purchasing haberdashery supplies. For instance, the terms “post” and “stud” are sometimes used interchangeably, but technical guides distinguish the stud as the male closure element and the post as the shaft that pierces the fabric to hold the stud in place. Similarly, the “socket” is occasionally referred to as the female component or the “receiver.” Knowing these distinctions helps you read product packaging accurately.
The material of the snap fastener also dictates its performance and suitability for different environments. Brass snaps are highly favored in humid climates because they do not rust when exposed to moisture and frequent laundering. Stainless steel offers exceptional strength for heavy-duty applications, while plastic, resin, and nylon snaps provide a lightweight, rustproof, and hypoallergenic alternative that is gentle on sensitive skin.
Matching Snap Fastener Size to Fabric Weight and Thickness
Snap fastener sizes are typically measured using two different systems: the metric diameter of the cap in millimeters, or “line” sizes (often denoted by “L” or “Line”). Line measurements are a traditional haberdashery standard where one line equals approximately 0.635 millimeters. For example, a Line 16 snap has a cap diameter of roughly 10 millimeters, while a Line 24 snap measures approximately 15 millimeters.

Matching small sizes (7mm to 10mm, or Line 12 to Line 16) to lightweight fabrics is critical for maintaining the drape and flow of the material. Fabrics such as cotton voile, silk, lightweight linen, and thin synthetics do not have the structural density to support heavy hardware. Using a small, lightweight snap ensures the closure remains discreet and does not pull down or distort the fabric surrounding the closure.
Medium to large sizes (12mm to 15mm and above, or Line 20 to Line 24) are engineered for medium and heavy-weight fabrics. Materials like denim, heavy canvas, fleece, wool, and multiple layers of quilting cotton require larger snaps to provide a proportional holding force. The larger cap diameter and stronger internal spring tension of these snaps prevent them from pulling apart under the natural movement of heavier garments or bags.
The physical risks of mismatching snap sizes and fabric weights are significant. If you install a heavy, large-prong metal snap on a thin fabric, the sheer force required to pull the snap open will eventually tear the fabric fibers around the installation point. Conversely, using a small, short-prong snap on thick fabric means the prongs will not be long enough to penetrate all the layers and crimp securely. This results in a snap that either falls off immediately or pops open under minimal tension.
To avoid these issues, always measure the total thickness of all fabric layers at the exact closure point before purchasing your fasteners. This includes the outer fabric, any inner lining, and the interfacing or stabilizer. Compress the layers firmly between your fingers to simulate the pressure the snap tool will apply, and compare this thickness to the manufacturer’s specified prong or post length to ensure a proper fit.
Selecting the Right Snap Fastener for Specific Fabric Projects
Lightweight Garments and Delicate Fabrics
When working with delicate, thin, or sheer fabrics, sew-on snaps are often the safest choice. Because they are hand-stitched through the fabric rather than piercing it with metal prongs, they distribute the pulling force across a wider area of thread. If you prefer the look of no-sew snaps, select small plastic or brass prong snaps with wide, flat caps that help distribute pressure evenly across the delicate fibers.
Regardless of whether you choose sew-on or prong snaps, reinforcing the fabric is an absolute necessity. Always apply a layer of fusible interfacing or a small stabilizer patch directly behind the snap area on the wrong side of the fabric. This hidden layer adds structural integrity, preventing the fabric from stretching, sagging, or tearing when the snap is pulled open and closed.
Avoid using heavy-duty metal snaps on sheer or loosely woven fabrics under any circumstances. The weight of heavy metal hardware will cause the surrounding fabric to drape awkwardly, and the sharp prongs can easily sever the delicate threads of fabrics like silk chiffon or loose linen weaves, causing immediate unraveling.
Heavy-Duty Outerwear, Bags, and Upholstery
Heavy-duty projects like canvas tote bags, denim jackets, utility vests, and light upholstery demand robust closures that can withstand high tension. For these applications, large metal prong snaps or heavy-duty sew-on metal snaps are ideal. These fasteners are designed with stronger springs and thicker metal walls to handle the physical demands of daily use.
When installing snaps on thick materials, the prong or post length is the most critical dimension to verify. The prongs must be long enough to pass entirely through the outer fabric, any internal batting or structure, and the lining, leaving enough exposed metal on the other side to fold over and crimp securely into the cap or stud. If the prongs are too short, the connection will fail under the slightest load.
High-stress areas, such as the main closure of a tightly packed bag or the cuffs of a heavy jacket, benefit from additional structural reinforcement. Stitching a piece of twill tape, heavy cotton webbing, or a small leather patch behind the snap placement helps distribute the pulling force across a larger surface area, protecting the primary fabric from fatigue over time.
Baby Clothes and Sensitive Skin Projects
Baby clothes, rompers, and items worn directly against the skin require special consideration for comfort and safety. Small, smooth-capped plastic or resin snaps are the industry standard for these projects. Plastic snaps are lightweight, do not rust when subjected to frequent hot-water washes, and do not get cold against the skin like metal fasteners.
Safety is paramount when crafting for infants and young children. After installing any snap, carefully inspect the back of the fastener. Run your finger over the installed components to verify there are no sharp edges, exposed prongs, or cracked plastic pieces that could scratch sensitive skin or snag on other garments. Any imperfectly installed snap should be removed and replaced immediately.
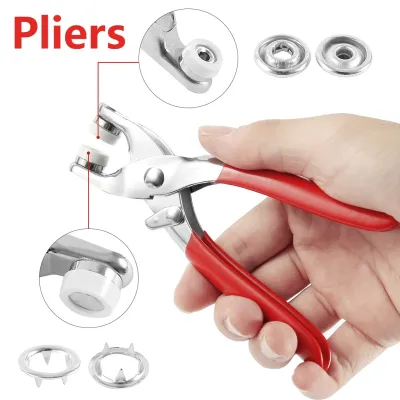
To achieve a safe, professional finish on plastic snaps, use specialized plastic snap pliers or a desktop hand press rather than a hammer. Hammers can easily crush or crack plastic caps, creating sharp shards and weakening the mechanical hold. Snap pliers apply even, controlled pressure that smoothly flattens the central post, locking the components together without damaging the smooth, rounded exterior.
Installation Methods, Tools, and Safety Boundaries
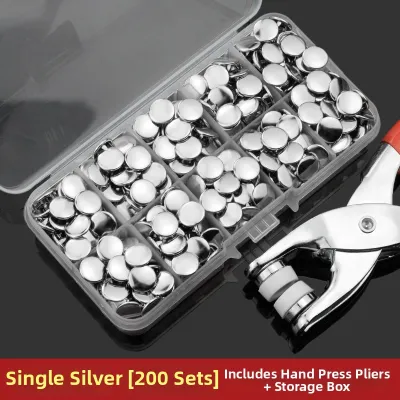
The tools you choose for installing snap fasteners depend on your project volume and the type of snaps you are using. Hand-held snap pliers are affordable, portable, and excellent for occasional home sewing, repairs, and lightweight plastic snaps. For high-volume crafting, heavy-duty outerwear, or thick leather projects, a manual desktop hand press with interchangeable metal dies provides the consistent, vertical leverage needed for a perfect crimp every time.
Installing prong snaps successfully requires a methodical, low-risk approach. Start by marking the exact placement of your snaps on both sides of the closure using a water-soluble fabric marker. If your tool requires pre-piercing, use an awl to make a tiny hole, taking care not to cut the fabric threads. Align the snap components carefully within the tool’s rubber dies, insert the fabric, and apply firm, even pressure to crimp the parts together.
To prevent damage to your project, establish a strict testing routine. Always test your chosen snap and tool combination on fabric scraps that replicate the exact thickness, layers, and interfacing of your final project. This test run allows you to verify that the prong length is correct, the tool is aligned properly, and the fabric can handle the stress of the closure before you make any permanent alterations to your finished garment.
Safety and material preservation go hand in hand during installation. Applying excessive force or using mismatched tool dies can crush the snap components, cut the fabric fibers, or cause the tool to slip, which can lead to pinched fingers or minor hand injuries. Always read the specific manufacturer instructions for both your snap brand and your installation tool, as die sizes and pressure requirements vary significantly between brands.
Frequently Asked Questions (FAQ)
How do I remove a prong snap fastener without ruining the fabric?
To remove a misaligned or broken prong snap without damaging your fabric, you must carefully undo the crimped metal or plastic. Use a small flathead screwdriver, thin needle-nose pliers, or a specialized snap removal tool to gently pry up the folded prongs or the flattened center post. Work slowly around the perimeter, lifting each prong bit by bit until the components separate.
Avoid the temptation to pull the snap components apart forcefully with standard pliers. Doing so will stretch the fabric fibers, enlarge the hole, and likely tear a large gap in your material, making it impossible to install a replacement snap in the same position.
Keep in mind that even a careful removal will leave small puncture marks or a minor hole in the fabric. While these marks may shrink slightly after laundering or steaming, they can remain permanently visible on very fine, tightly woven, or delicate synthetic fabrics.
Can I use metal prong snap fasteners on stretchy knit fabrics?
Using standard metal prong snaps directly on stretchy knit fabrics carries a high risk of fabric damage. Knit fabrics are constructed from continuous, interlocking loops of yarn. When the sharp metal prongs of a no-sew snap pierce these loops, they can cut the yarn, leading to runs, unraveling, and gaping holes around the fastener over time.
The safest and most reliable alternative for knit garments is to use sew-on snaps. Stitching the snaps in place with needle and thread allows the stitches to sit between the knit loops rather than cutting through them, preserving the structural integrity of the fabric.
If your design absolutely requires prong snaps, you must reinforce the knit structure. Apply a stable, non-stretch woven interfacing or a heavy stabilizer patch directly to the wrong side of the fabric where the snap will be installed. This non-stretch layer absorbs the pulling force of the snap and prevents the knit fibers from stretching and tearing around the metal prongs.
Community discussion
Share your experience or ask a question. Comments are reviewed before publication.