
Choosing the right snap button set for your sewing project is the difference between a professional, durable finish and a frustrating failure that damages your fabric. To make the correct choice, you must match the snap button’s physical specifications—such as its material, diameter, and prong length—directly to the weight and thickness of your fabric layers. Selecting the wrong type can lead to snaps that pull clean out of the material, fail to close securely, or rust after washing.
The decision process involves assessing your fabric’s structural limits, determining whether metal or resin suits your project’s environment, and verifying that you have the exact tools required for installation. By measuring your fabric stack and testing your fasteners on scrap pieces, you can ensure a secure, long-lasting hold. This guide outlines the essential steps to evaluate snap button sets before making your purchase.
Identify Your Fabric and Project Requirements
Before browsing any haberdashery collection, you must analyze the weight and structure of the fabric you plan to use. Fabrics generally fall into lightweight, medium-weight, and heavy-duty categories, each requiring a different level of snap tension and grip. Lightweight materials like voile or thin cotton require delicate snaps with low opening tension; otherwise, the force needed to unfasten the button will tear the surrounding fibers. Conversely, heavy-duty fabrics like denim or canvas demand robust fasteners that can withstand high tension without popping open under stress.
Products mentioned in this guide
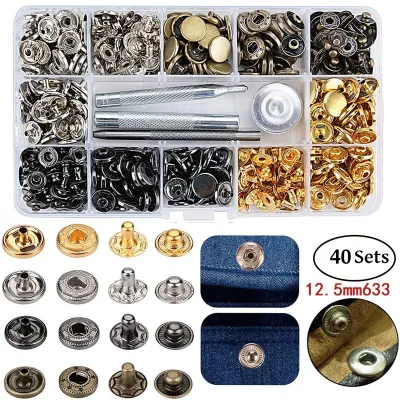
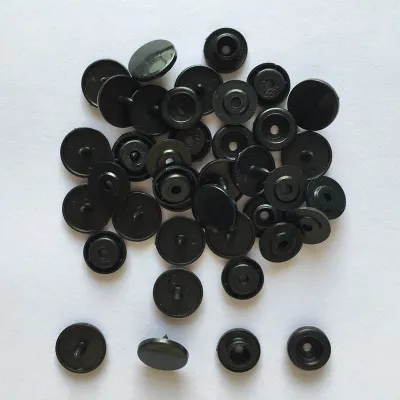
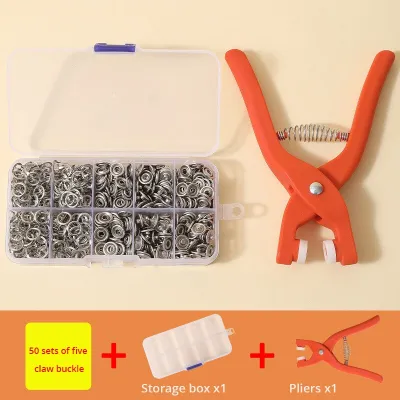
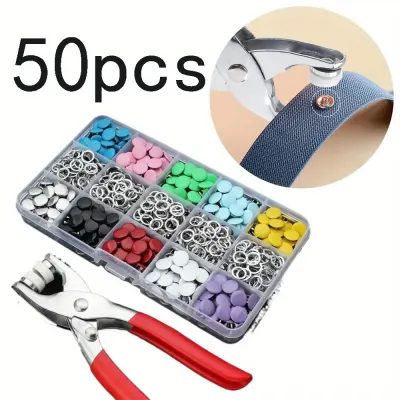
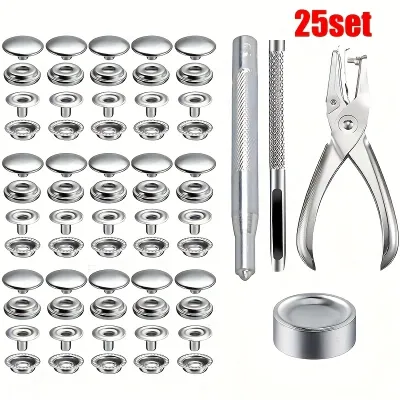
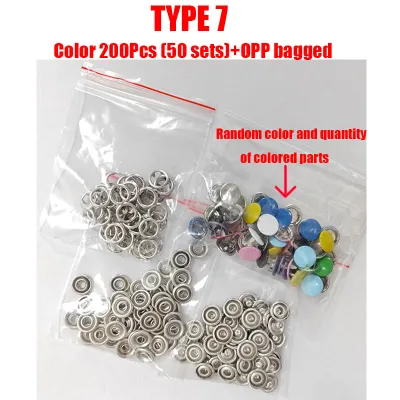
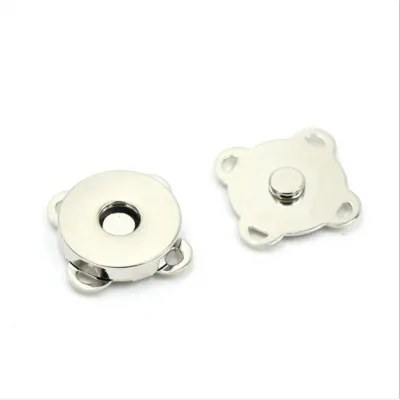
Prices are valid at publication and may change. Please refer to the product page for the latest price.
The intended environment and usage of your project also dictate the type of snap button set you need. For items subjected to frequent washing, such as daily apparel or baby onesies, you need fasteners that can endure constant agitation and moisture without degrading. If you are crafting outdoor gear, bags, or patio cushions exposed to humid climates, the hardware must resist atmospheric moisture. Matching the snap’s structural design to these specific use cases prevents premature wear and ensures the fastener remains functional throughout the garment’s lifespan.
Safety is a paramount consideration when sewing children’s clothing or baby items. When selecting a snap button set for these projects, always check for secure attachment mechanisms that prevent the components from pulling loose. Easily detachable parts pose a serious choking hazard, so the snaps must grip the fabric tightly and resist separation even under repeated pulling. Opt for lightweight, rounded designs that do not have sharp edges.
Compare Snap Button Materials and Finishes
Snap buttons are primarily divided into metal and non-metal options, each offering distinct trade-offs in weight, durability, and aesthetics. Metal snaps, typically made of brass or steel, provide a classic look and exceptional durability for heavy-use items like jackets and bags. Non-metal options, such as polyacetal resin or plastic snaps, are incredibly lightweight, come in a vast array of colors, and are highly flexible. While resin snaps are excellent for baby clothes, activewear, and lightweight crafts, they may lack the extreme holding power required for thick, industrial-grade materials.

Environmental exposure is a critical factor when choosing between materials. Rust resistance and colorfastness are vital for any garment or accessory that will be laundered or exposed to the elements. Rather than assuming all metallic-looking snaps are waterproof, you should carefully verify the manufacturer’s material specifications. Look for solid brass, stainless steel, or specially treated rust-resistant coatings on metal snaps to ensure they will not leave unsightly rust stains on your fabric after washing. Resin snaps are naturally rustproof, making them a highly reliable choice for wet environments or frequent laundering.
For garments worn directly against the skin, material safety is another essential factor to evaluate. Some metal alloys contain nickel, which can trigger skin sensitivities or allergic contact dermatitis in sensitive individuals. To prevent discomfort, check the product labels or packaging for explicit skin-sensitivity claims, such as “nickel-free” or “hypoallergenic” certifications. If you are sewing items for infants, choosing high-quality resin snaps or certified nickel-free metal fasteners ensures the finished piece is safe.
Determine the Correct Size and Prong Length
Selecting the correct snap button diameter is essential for both aesthetic balance and functional security. To determine the size you need, start by checking your sewing pattern’s hardware recommendations, which are typically specified in millimeters or standard Ligne sizes. If you are replacing a missing fastener on an existing garment, use a precise ruler or caliper to measure the outer diameter of the remaining snap cap. Choosing a snap that is too small may not provide enough holding power, while an oversized snap can look bulky and distort the drape of lighter fabrics.
Beyond the diameter, the length of the snap’s prongs or post is the most critical factor in achieving a secure installation. The prongs must be long enough to fully penetrate all layers of your fabric stack—including outer fabrics, linings, and internal interfacing—and still have enough length extending past the fabric to fold over and crimp securely. If the prongs are too short, they will fail to grip the opposing side of the snap, causing the fastener to fall off during use. If they are too long, they may bend out of alignment, crush the fabric, or create a loose, wobbly fit.
To avoid ruining your project, always perform a test installation on a scrap piece of the exact fabric stack you plan to use. Replicate the precise layers, including any fusible interfacing or stabilizers, and install a single snap set using your chosen tools. Once installed, test the grip by opening and closing the snap multiple times, observing whether the fabric distorts, tears, or if the hardware loosens. This simple trial allows you to verify the structural integrity and fit of the snap before committing to the final garment.
Evaluate Tool Compatibility and Installation Method
The success of your snap installation depends heavily on using the correct setting tools for your specific fastener type. Snap button sets utilize different installation mechanisms, ranging from prong snaps that require specialized dies to post snaps that must be flared with a punch, and sew-on snaps that only require a standard hand-sewing needle and thread. Attempting to install press-fit or prong snaps without the proper equipment will inevitably result in bent hardware, damaged fabric, and insecure attachments.
When purchasing a snap button set, carefully check the product description to see if the necessary installation tools are included. Many starter kits come complete with specialized hand pliers, plastic templates, or metal setting dies designed for that exact brand and size of snap. If you are buying bulk refill packs, they often contain only the snap components, assuming you already own the compatible setting equipment. Always verify that the snaps you are buying are fully compatible with the tools you have at home, as even minor differences in millimeter sizing can prevent a snap from crimping correctly.
If your chosen snap button set requires separate tools, confirm their compatibility before finalizing your purchase from online craft retailers or local haberdashery stores. Some heavy-duty snaps require a dedicated hand press machine or specific hammer-and-anvil setting tools that must be matched to the exact line size of the fastener. Investing in high-quality, compatible tools ensures clean, professional results and prevents the frustration of wasted hardware and ruined fabric layers.
Calculate Quantity and Plan for Spares
Accurately estimating the number of snaps required for your project is essential to avoid mid-project delays. Begin by reviewing your sewing pattern to identify the exact placement and spacing guidelines for the fasteners. For custom designs, lay your garment flat and use a sewing gauge to mark the desired intervals along the closure placket. Count the total number of marked positions to determine the baseline quantity of snap pairs needed to complete the project.
It is highly recommended to purchase a set that includes a generous buffer of spare parts rather than buying the exact number needed. A buffer of 15% to 20% extra is ideal to account for potential installation mistakes, bent prongs during crimping, or lost components. Having extra matching snaps on hand also ensures you can easily perform future repairs if a fastener eventually wears out or becomes damaged over years of use.
When reading product listings, pay close attention to how the quantity is described on the packaging. A single functional snap button consists of four distinct parts: the cap, the socket, the stud, and the post or prong. Ensure the product description specifies “complete sets” or “pairs” rather than listing the total count of individual metal pieces.
Pre-Purchase Verification Checklist
Before adding a snap button set to your cart, run through this final checklist to ensure a successful purchase:
- Fabric Weight Match: Confirm the snap's holding power matches your fabric's weight (light, medium, or heavy).
- Material Suitability: Verify rust-resistance for washable items and nickel-free specifications for close-to-skin wear.
- Size and Prong Length: Ensure the diameter fits your pattern and the prong length accommodates your total fabric thickness.
- Tool Inclusion: Check if the set includes the required setting pliers, dies, or if you need to purchase compatible tools separately.
- Quantity and Spares: Confirm the package contains enough complete four-part sets, including a few spares for testing and mistakes.
Always review the seller’s detailed product specifications for exact measurements and check their return policies in case of unexpected incompatibility. If you are still unsure about fabric compatibility or tool requirements, stop and consult the pattern maker or a qualified professional at your local haberdashery store before proceeding.
Frequently Asked Questions (FAQ)
Can I use standard prong snaps on stretchy or knit fabrics?
Standard prong snaps can be used on stretchy or knit fabrics, but they carry a high risk of tearing the fabric or pulling through the knit loops if installed without reinforcement. Because knit fabrics stretch and distort easily, the localized stress of pulling a snap open can quickly damage the surrounding fibers. To prevent this, always apply a stable, non-stretch fusible interfacing or a small scrap of woven fabric to the wrong side of the knit material where the snap will be placed. This stabilizes the area, distributes the pulling force, and ensures a secure, long-lasting attachment.
What should I do if the snap prongs are too short for my fabric layers?
If you discover that the snap prongs are too short to fully penetrate your fabric layers and crimp securely, stop the installation immediately. Forcing a short prong to close will result in a weak, unsafe hold that will inevitably fail and could ruin your garment. To resolve this, you should either switch to a snap button set designed with longer prongs or reduce the thickness of the fabric stack at the attachment point. You can reduce thickness by trimming away excess seam allowances inside the placket or opting for a thinner interfacing material.
Community discussion
Share your experience or ask a question. Comments are reviewed before publication.