
Choosing the right silicone soap mold is not just a matter of selecting an appealing shape; it is a critical decision that directly impacts the success of your soap-making process. The ideal mold type depends heavily on whether you practice melt-and-pour, cold process, or hot process soap making. Each of these methods subjects the mold to different physical demands, chemical environments, and temperature ranges. By aligning the structural design and material properties of your silicone mold with your specific soap-making technique, you can prevent common issues such as warped bars, trapped air pockets, and torn molds.
Silicone has become a popular standard for craft soap making due to its natural flexibility, non-stick surface, and durability. However, not all silicone molds are created equal. Some are thin and highly pliable, designed for delicate individual shapes, while others are thick, heavy-duty, and reinforced with external frames to support large batches of dense soap batter. Understanding how these physical characteristics interact with your soap base will help you select the most efficient tools for your craft space, ensuring clean unmolding and consistent results.
Core Silicone Properties to Evaluate for Soap Making
Before diving into specific soap-making methods, it is essential to understand the baseline material qualities of silicone. Silicone molds range from highly flexible, thin-walled sheets to semi-rigid, thick-walled structures. Flexible silicone is excellent for individual, intricate designs because it allows you to peel the mold away from the cured soap without damaging fine details. However, this high flexibility can become a liability when working with large volumes of liquid soap, as the weight can cause the walls to bow outward, resulting in distorted, uneven bars. For larger batches or loaf designs, a semi-rigid silicone grade or a mold supported by an external wooden or plastic box is necessary to maintain straight, clean lines.
Products mentioned in this guide
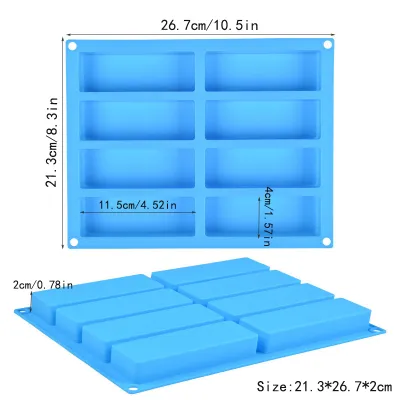
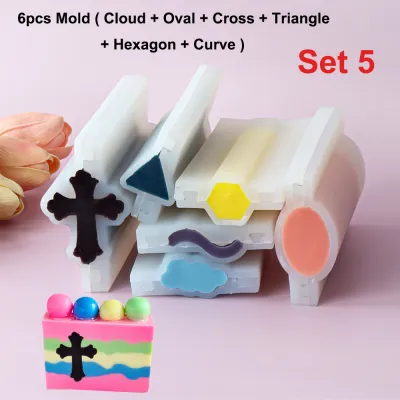
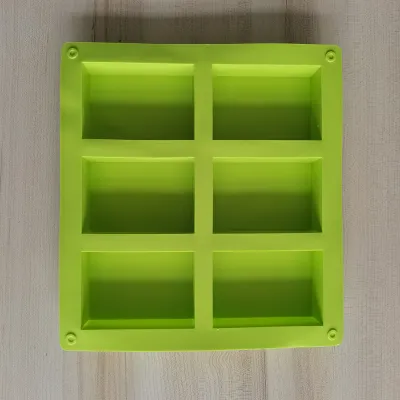
Prices are valid at publication and may change. Please refer to the product page for the latest price.
Temperature tolerance is another critical specification to verify. Soap making involves thermal changes, whether from melting pre-made bases, the natural exothermic reaction of saponification, or the high heat of hot process cooking. You should check the manufacturer’s specifications to ensure the silicone can withstand temperatures ranging from below freezing up to at least 100 degrees Celsius. High-quality silicone maintains its structural integrity and flexibility across this entire range without releasing chemical odors or degrading over time.
Finally, evaluate the cavity depth and wall thickness of any mold you consider. Deep cavities require thicker walls to prevent the liquid soap from pushing the sides outward. If a mold feels flimsy or stretches too easily when dry, it will likely bulge when filled with heavy soap batter. Look for molds with reinforced rims or thicker base structures, which distribute the weight more evenly and help ensure that your finished soap bars have uniform dimensions from top to bottom.
Mold Designs That Suit Melt-and-Pour Soap
Melt-and-pour soap making is an accessible method that involves melting a pre-made glycerin soap base, adding colors and fragrances, and pouring the liquid into molds to cool and harden. Because this method does not involve active chemical reactions or prolonged heat generation, it allows for a wide variety of mold designs. Melt-and-pour bases cool relatively quickly and do not require insulation to cure, making them ideal for highly detailed, intricate, and shallow mold designs.

When selecting molds for melt-and-pour soap, look for designs with fine details, such as floral patterns, geometric textures, or embossed logos. Glycerin soap base has a low viscosity when melted, allowing it to flow easily into the tiniest crevices of a detailed mold. To successfully unmold these intricate designs without chipping the delicate edges, you need highly flexible silicone. A pliable mold allows you to gently break the vacuum seal around the edges of the soap and push from the bottom, popping the finished bar out cleanly without tearing the soap or stretching the mold out of shape.
However, the low viscosity of melted glycerin base also means that stability is paramount during the pouring and cooling stages. Multi-cavity silicone sheets can be prone to sagging in the middle when filled with liquid soap. To prevent spills and uneven fill levels, verify that the mold base is flat and stable. Placing the silicone mold on a rigid tray or cutting board before pouring is a practical way to ensure you can move the filled mold to a cooling area without spilling the hot liquid or flexing the cavities, which can create ripples on the surface of the setting soap.
Structural Features for Cold Process Soap Molds
Cold process soap making involves mixing sodium hydroxide (lye) with oils, initiating a chemical reaction called saponification. This reaction is exothermic, meaning it generates its own heat within the mold. To achieve vibrant colors and a smooth, translucent texture, many soap makers aim to push their soap through the gel phase, which requires retaining this internal heat. Therefore, cold process soap molds require thicker silicone walls that act as natural insulators, keeping the batch warm during the initial hours of curing.
When choosing between loaf molds and individual cavity molds for cold process soap, consider your batch size and cutting preferences. Loaf molds are highly popular because they allow you to pour a single large block of soap, create beautiful top swirls, and cut the loaf into individual bars using a soap slicer. However, because a loaf mold holds a large volume of heavy batter, it is highly susceptible to bulging. To prevent this, look for loaf molds that feature straight, reinforced edges, rigid outer rims, or those that come nested inside a sturdy wooden or acrylic support box. This external support ensures your loaf cures with flat sides and uniform dimensions.
If you prefer to skip the cutting step, individual cavity molds can also be used for cold process soap, but they require a different approach. Because individual cavities hold less volume, they dissipate heat quickly and rarely go through a full gel phase unless insulated externally. Ensure that any individual cavity molds used for cold process soap are made of thick, durable silicone that can withstand the alkaline environment of unsaponified soap batter without degrading or becoming brittle over time.
Choosing the Right Cavities for Hot Process Soap
Hot process soap making involves cooking the soap batter in a slow cooker or double boiler until saponification is complete before transferring it to the mold. By the time the soap is ready to be molded, it has a thick, hot, and sticky consistency similar to mashed potatoes. Because the batter is not fluid, it cannot easily flow into intricate details or narrow spaces, which completely changes the type of silicone mold you should select.
For hot process soap, simple cavity shapes with wide openings and minimal tight corners are highly recommended. Rectangular loaf molds or basic square cavities allow you to easily scoop, pack, and smooth the thick batter into place. When filling the mold, you must actively press the soap down to eliminate air pockets. Molds with delicate details or narrow necks will trap air, resulting in large voids, uneven edges, and a rustic appearance that may not be desired. A wide, open mold design allows you to use a spatula or scraper to pack the soap firmly into every corner.
Silicone flexibility remains important for hot process soap, but for a different reason than melt-and-pour. Hot process soap is dense and can be quite sticky when first cured. A flexible silicone mold allows you to peel the sides away from the soap block gradually, breaking the suction before pushing the dense bar out from the bottom. Avoid extremely rigid plastic molds for this method, as the sticky nature of hot process soap makes it difficult to release without a flexible silicone barrier.
Pre-Purchase Checklist for Silicone Soap Molds
Before purchasing a new silicone soap mold, it is important to run through a quick checklist to ensure the product meets your specific crafting needs and budget. First, inspect the product labels and descriptions for material safety claims. While soap making does not require food-grade silicone, high-quality, 100% silicone molds are less likely to contain cheap plastic fillers. You can verify this by performing a simple twist test: pinch and twist a flat section of the mold. If white shows through the silicone, it likely contains fillers that may degrade when exposed to essential oils, fragrance oils, or the high heat of soap making.
Next, calculate the total cavity volume of the mold to ensure it matches your standard recipe batch sizes. Most soap-making calculators measure recipes by weight, so knowing the fluid volume of your mold cavities helps prevent leftover batter waste or half-filled molds. You can easily measure this by filling a candidate mold with water on a kitchen scale to determine the exact capacity of each cavity in grams or milliliters.
Finally, evaluate the cost-effectiveness of the mold by comparing the price in S$ against the usable cavity volume and expected durability. While budget-friendly molds are widely available on online marketplaces, investing slightly more in a mold with thicker walls or an included wooden support box often saves money in the long run. High-quality silicone molds resist warping, tearing, and chemical degradation, allowing you to pour hundreds of batches without losing the clean lines of your finished soap bars.
Frequently Asked Questions (FAQ)
Do I need to line or grease a silicone soap mold?
The natural non-stick properties of silicone generally eliminate the need for lining or greasing your molds. Unlike traditional wooden or cardboard molds, which require parchment paper or freezer paper liners, cured soap will release cleanly from high-quality silicone once it has fully set. However, there are specific scenarios where a very light application of mineral oil or a specialized mold release agent can be helpful. For example, if you are using a highly textured mold with deep, intricate patterns, or if you are working with a sticky hot process recipe, a light wipe of mineral oil inside the cavities can ensure a clean release without leaving a greasy residue on your finished soap.
How do I clean silicone molds after removing cured soap?
Cleaning silicone soap molds is a straightforward process, but it must be done gently to preserve the integrity of the material. The most effective method is to wash the molds in warm water using a mild dish soap to break down any leftover oils or fragrance residues. Avoid using abrasive scrubbing sponges, steel wool, or harsh chemical solvents, as these can scratch the smooth inner surface of the silicone. Scratches not only dull the finish of future soap batches but can also create micro-tears that weaken the mold over time. After washing, rinse the molds thoroughly and allow them to air dry completely before storing them flat in a dust-free environment.
Can I put silicone soap molds in the freezer to speed up unmolding?
Yes, placing your filled silicone mold in the freezer for a brief period is an effective technique to assist with releasing stubborn soap. The cold temperature causes the soap to contract slightly, breaking the vacuum seal between the soap and the silicone walls. Usually, thirty minutes to an hour in the freezer is sufficient to make the soap firm enough to pop out cleanly. However, you should avoid leaving silicone molds in the freezer for extended periods. Prolonged exposure to extreme cold can make the silicone temporarily brittle, increasing the risk of the mold tearing or cracking when you bend it to release the soap. Always let the mold return to room temperature before washing or storing it.
Community discussion
Share your experience or ask a question. Comments are reviewed before publication.