
Embarking on your first embroidery project is an exciting creative step, but standing in front of a wall of thread spools can quickly feel overwhelming. For beginners, the most reliable and forgiving option to start with is a medium-weight polyester or mercerized cotton sewing thread, typically labeled as 40-weight or 50-weight. These threads are strong, widely available, and glide smoothly through standard fabrics, allowing you to practice basic stitches without the frustration of constant fraying or knotting. While specialized embroidery floss is the standard for advanced designs, standard sewing thread serves as an excellent, cost-effective training tool for mastering tension and stitch placement.
Understanding the Difference Between Sewing and Embroidery Thread
To make an informed choice, it is essential to understand how standard sewing thread differs from specialized embroidery thread. Standard sewing thread is engineered primarily for structural integrity, holding fabric layers together securely under tension with a tight, compact twist. Designed to sit flat within seams, it typically features a matte finish and a low-profile structure.
In contrast, dedicated embroidery thread is manufactured for visual impact and surface coverage. It features a looser twist that allows the individual fibers to spread out slightly when stitched, filling in shapes more efficiently. Embroidery threads also typically boast a high-sheen finish—often achieved through mercerization of cotton or the use of rayon and trilobal polyester fibers—which reflects light beautifully across the surface of your design.
Products mentioned in this guide
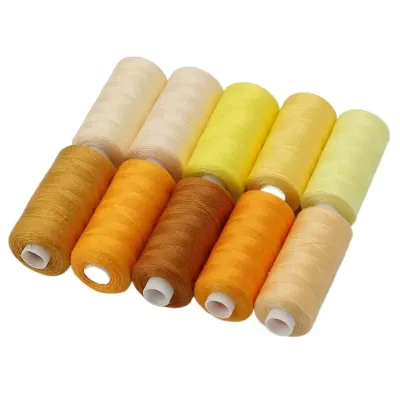
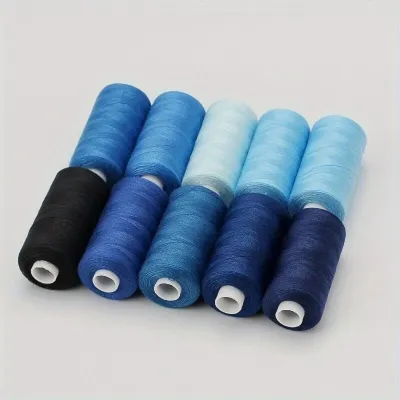
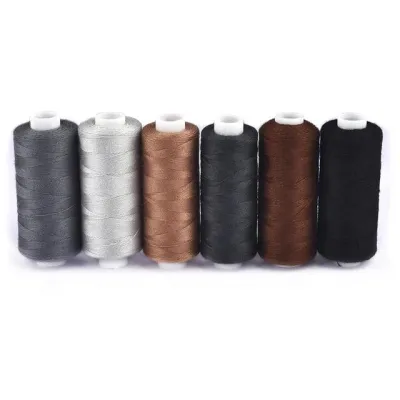
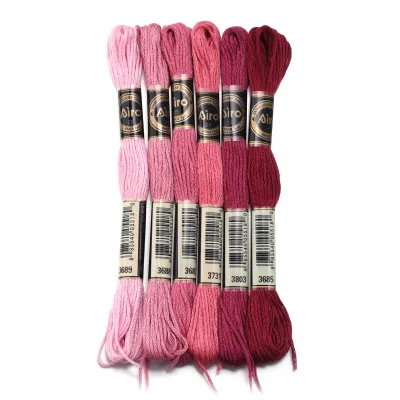
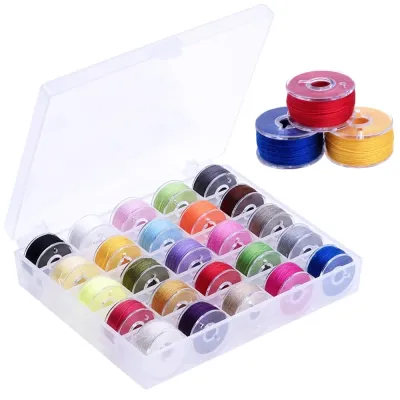
Prices are valid at publication and may change. Please refer to the product page for the latest price.
When reading thread labels at your local craft shop, you will encounter several key terms. The “weight” (often abbreviated as “wt”) indicates the thickness of the thread; confusingly, a higher number represents a thinner thread. For example, a 50-weight thread is finer than a 30-weight thread. The “ply” refers to the number of individual strands twisted together to form the single thread, such as a 2-ply or 3-ply. For beginner embroidery, a 2-ply, 40-weight or 50-weight thread provides a balanced starting point that is thick enough to show your stitches clearly without overcrowding the fabric weave.
Key Dimensions for Matching Thread to Your Fabric and Design
Selecting the right thread requires analyzing how the fiber properties interact with your chosen fabric and the visual goals of your design.

Fiber Content and Handling Characteristics The three most common fiber types you will encounter are cotton, polyester, and silk. Cotton thread offers a classic, matte finish that blends seamlessly with natural fabrics like linen. It is soft and easy to manipulate, though lower-quality cotton can produce lint. Polyester thread is strong, abrasion-resistant, and has a slight stretch that is highly forgiving for beginners practicing tension. Silk thread is exceptionally lustrous, but its slippery nature and higher cost make it challenging for a first-time stitcher.
Thread Weight and Fabric Density A fundamental rule of embroidery is to match the weight of your thread to the density of your fabric. Lightweight fabrics, such as fine linen or batiste, require thin threads (50-weight or higher) to prevent the needle and thread from punching large, permanent holes or causing the fabric to pucker. Conversely, heavier fabrics like denim, canvas, or thick cotton twill can easily support thicker threads (30-weight or 40-weight), which are necessary to ensure the stitches do not get lost in the texture of the material.
Sheen, Texture, and Visual Effects Consider the final look you want to achieve. If you are stitching a rustic, botanical design, the matte texture of cotton thread will enhance the organic feel. If you want your design to pop with a modern, glossy finish, a polyester thread with a high-sheen finish is more appropriate. Mixing different thread weights within a single project can also create depth, using thicker threads for bold outlines and thinner threads for delicate internal details.
Reading Labels for Care and Longevity Before purchasing, always check the spool label for care instructions, especially if your embroidered item will be washed frequently, such as on clothing or tea towels. Look for terms like “colorfast” to ensure the dyes will not bleed when wet. In warm, humid climates like Singapore, choosing high-quality polyester threads can prevent mold and degradation over time, as synthetic fibers resist moisture-related damage much better than untreated natural fibers.
Step-by-Step Workflow for Selecting and Testing Your Thread
Follow this practical workflow to select and verify your thread setup before stitching your main project.
Step 1: Analyze Your Base Fabric and Design Examine your fabric’s weight, weave tightness, and stretch. A stable, non-stretch woven fabric like medium-weight cotton calico is ideal for beginners. Next, look at your design: does it consist of delicate line work, or does it require dense satin stitches to fill in large shapes? Line work is highly compatible with standard sewing thread, while dense fills may require multiple passes or a slightly thicker thread.
Step 2: Cross-Reference the Thread and Needle Labels Select a thread that matches your fabric’s weight and fiber characteristics. Once you have chosen a thread, check its label for recommended needle sizes. For a standard 40-weight or 50-weight sewing thread, an embroidery needle (size 75/11 or 80/12) is typically recommended. The needle eye must be large enough for the thread to pass through freely without friction, yet small enough that the needle does not leave a gaping hole in the fabric.
Step 3: Conduct a Scrap Fabric Test Cut a small scrap of your project fabric and secure it in your embroidery hoop. Thread your needle and stitch a small sample of the actual stitches you plan to use—such as backstitch, satin stitch, or French knots. Pay close attention to how the thread behaves as you pull it through the fabric. It should glide smoothly without catching, shredding, or twisting into tight loops.
Step 4: Evaluate the Stitched Sample Remove the hoop and inspect your test stitches under good lighting. Look closely for signs of puckering, which indicates your thread tension is too tight or the thread is too heavy for the fabric. Check for thread fraying, which suggests your needle eye is too small or the thread quality is too low for the fabric’s weave. Finally, ensure the coverage is adequate; if too much background fabric shows through, you may need to use a thicker thread or stitch your lines closer together.
Common Beginner Thread Mistakes and How to Troubleshoot Them
Knowing how to identify and resolve common thread issues quickly will save you time and materials.
Mismatching Needle and Thread Sizes If the thread repeatedly shreds and breaks at the eye, your needle eye is likely too small for the thread thickness. This mismatch creates excessive friction, wearing down the fibers. Switch to a needle with a larger eye or drop down to a finer thread weight.
Ignoring Thread Twist and Tangling Hand sewing threads are manufactured with a specific twist direction (usually a “Z-twist” for machine sewing, which also works for hand sewing). As you stitch by hand, the natural motion of your hand can slowly untwist or over-twist the thread, leading to sudden knots and loops on the back of your fabric. To prevent this, let your needle hang freely every few stitches to allow the thread to untwist itself naturally.
Improper Tension Management Pulling your stitches too tightly is a classic beginner mistake. It distorts the fabric weave and leaves unsightly gaps. Keep your fabric taut in the hoop, but pull your thread only until it sits flat against the surface of the fabric—do not yank it. If you are using a sewing machine for free-motion embroidery, ensure your upper tension is slightly loosened so the bobbin thread does not pull through to the top.
When to Stop and Reset If you experience repeated thread breakage, do not keep forcing the stitch. Stop immediately if you observe the thread shredding consistently in the same spot, which indicates a burr on the needle eye or a damaged needle plate. Discard the damaged section of thread, replace your needle with a fresh one, and re-thread your setup from scratch.
Essential Tools for Thread Handling and Storage
The right supporting tools make handling, stitching, and preserving your thread significantly easier.
Selecting the Right Needle For embroidery using sewing thread, always use dedicated embroidery or crewel needles. These needles feature a medium-length eye that is slightly larger than the shaft, which helps open a temporary path in the fabric for the thread to pass through without friction. Keep a variety pack of sizes 5 to 10 on hand so you can easily match the needle to your thread weight.
Thread Conditioners and Wax Running cotton sewing thread lightly over a block of beeswax or a synthetic thread conditioner reduces friction. This simple step coats the outer fibers, keeping your stitches smooth and preventing annoying tangles.
Proper Storage Solutions Direct sunlight can fade colors and weaken fibers, while dust can accumulate in the twists and clog your needles. Store spools in clear, lidded plastic boxes or on a rack inside a closed cabinet. In Singapore’s humid climate, storing threads with silica gel packets inside an airtight container prevents moisture buildup and mold.
Frequently Asked Questions (FAQ)
Can I use regular sewing thread for hand embroidery?
Yes, you can absolutely use regular sewing thread for hand embroidery, especially for delicate line work, fine details, or practicing basic stitches. However, keep in mind that standard sewing thread is thinner and less lustrous than specialized embroidery floss. To achieve the same level of coverage or thickness as standard embroidery floss, you may need to double or triple your sewing thread strands, or accept a more delicate, subtle finish in your final design.
How do I prevent embroidery thread from tangling or knotting?
To minimize tangling, keep your working thread length to a manageable size—ideally no longer than the distance from your fingertips to your elbow (about 45 to 50 centimeters). Regularly let your needle hang down freely from your hoop to release any built-up twist. Additionally, pulling the thread through the fabric at a steady, moderate pace rather than jerking it quickly will significantly reduce the occurrence of accidental knots.
Does the thread color change or bleed after washing?
Whether a thread bleeds depends entirely on its fiber type and dye quality. High-quality polyester sewing threads are highly colorfast and rarely bleed. Cotton threads, particularly in vibrant shades like red, blue, or black, carry a higher risk of dye transfer. To prevent ruining your hard work, always perform a quick bleed test: wet a small scrap of your thread, press it firmly between two pieces of white paper towel, and check for any color transfer before starting your project.
Community discussion
Share your experience or ask a question. Comments are reviewed before publication.