
Complete beginners should start with sewing patterns that feature simple, boxy silhouettes, low pattern piece counts, and straight, structural seams. The ideal first pattern uses stable, non-stretch woven fabrics and relies on simple closures like elastic waistbands or ties rather than complex zippers or buttonholes. Starting with these forgiving designs allows you to master basic machine control, straight stitching, and seam allowances without the frustration of complex fitting or fabric handling. By focusing on patterns designed specifically to build confidence, you can establish a solid foundation of skills that will make transitioning to advanced projects much smoother.
Key Features of Beginner-Friendly Sewing Patterns
When evaluating sewing patterns, the number of pattern pieces is one of the most reliable indicators of difficulty. For your very first project, aim for patterns that contain between two and four pieces. Fewer pieces mean less time spent cutting, fewer seams to align, and a significantly lower chance of assembling parts incorrectly. Simple, boxy silhouettes or A-line shapes are highly forgiving because they do not require precise, millimeter-precise fitting to look flattering and feel comfortable.
The geometry of the seams also plays a critical role in how easily you can complete a project. Straight seams are the easiest to guide through a sewing machine, allowing you to focus entirely on maintaining a consistent seam allowance and controlling your machine’s speed. Curved seams, such as those found on contoured necklines or set-in sleeves, require you to gently manipulate the fabric as it feeds under the presser foot. Minimizing these curves in your initial projects prevents puckering and uneven stitching.
Products mentioned in this guide
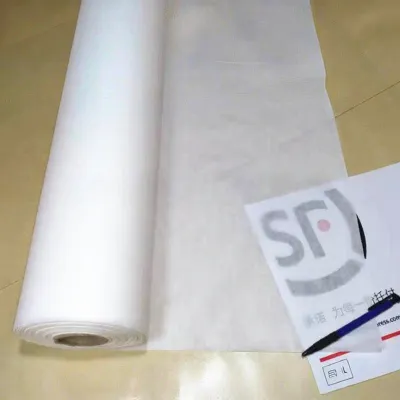
Prices are valid at publication and may change. Please refer to the product page for the latest price.
Fabric stability and simple closures are equally essential. Beginner-friendly patterns recommend stable, medium-weight woven fabrics like quilting cotton or linen that lie flat on your cutting table and feed smoothly through the machine without stretching. Additionally, look for patterns that utilize simple closures or eliminate them entirely. Designs that use elastic casings or simple fabric ties teach you how to create functional openings using basic folding and straight stitching techniques, keeping the process highly accessible.
Ideal First Projects to Build Core Skills
Starting with home decor and simple accessories is an excellent way to practice fundamental techniques without the pressure of garment fitting. An envelope pillow cover, a basic tote bag, or a simple drawstring pouch consists almost entirely of straight lines and right angles. These projects allow you to practice cutting fabric accurately, pressing seams open with an iron, and turning clean, sharp corners. Because these items do not need to fit a human body, any minor deviations in your seam allowance will not affect the usability of the finished product.

Once you feel comfortable controlling your machine and sewing straight lines, you can transition to basic garments. An elastic-waist skirt or a simple boxy tunic is an excellent entry point into garment construction. An elastic-waist skirt teaches you how to sew a clean casing, thread elastic through a channel, and finish a basic hem. These garments are highly adjustable, meaning that even if your measurements are slightly off, the finished piece will still fit comfortably and look great.
As you progress, look for patterns that introduce basic shaping techniques in a low-stakes format. Simple gathered waists, patch pockets, and basic facings are excellent ways to learn how fabric behaves when manipulated. A patch pocket, for example, teaches you how to fold edges precisely, press them into shape, and topstitch close to the edge. These techniques introduce the concepts of volume and structure without requiring the precision of complex darts, pleats, or tailored panels.
When selecting your pattern, always verify the consumable requirements and notions listed on the back of the envelope. Ensure you match your thread type—typically a high-quality all-purpose polyester thread—and your machine needle to the fabric weight. For the recommended medium-weight cottons, a universal machine needle in size 80/12 is standard. Having the correct tools prepared beforehand ensures a smooth sewing experience and prevents skipped stitches or fabric damage.
Red Flags: Pattern Features to Avoid Initially
To prevent early frustration and keep your sewing journey enjoyable, it is helpful to recognize complex construction elements that are best avoided on your first few projects. Invisible zippers, tailored buttonholes, and structured collars are common culprits that can quickly overwhelm a beginner. These features require precise alignment and specialized machine attachments. A single millimeter of misalignment on a collar or zipper can cause the entire garment to look lopsided, which can be highly discouraging when you are still learning the basics.
Set-in sleeves and precise armhole shaping are other advanced features to avoid initially. A set-in sleeve requires you to “ease” a larger, curved sleeve cap into a smaller, curved armhole opening. This technique demands careful pinning, manual fabric manipulation under the needle, and a high degree of speed control to avoid sewing accidental pleats or puckers into the seam. Instead, look for patterns with grown-on sleeves, dolman sleeves, or drop-shoulder designs, which are cut as part of the main body pieces and require only simple, straight seams.
Intricate finishing details like bias binding, piping, and extensive topstitching should also be saved for later. Applying bias tape to curved edges requires precise stretching and folding, while piping requires a zipper foot and very close stitching. Topstitching is highly visible on the outside of a garment, meaning any slight wobble or unevenness in your stitching line will stand out immediately. Choosing clean, simple finishes allows you to build confidence before tackling these highly visible details.
Finally, steer clear of challenging fabrics like chiffon, silk, satin, or heavy, stretchy knits. Slippery fabrics shift constantly during the cutting process, making it difficult to cut out accurate pattern pieces, and they can easily get sucked down into your machine’s needle plate. Heavy knits or highly elastic activewear fabrics require specialized stretch needles, specific machine stitches, or a serger to prevent wavy, stretched-out seams. Stick to stable wovens until you have mastered basic machine tension and fabric guiding.
How to Verify Pattern Difficulty Before Starting
Before purchasing a sewing pattern, take the time to interpret the manufacturer’s skill-level ratings. Most commercial and independent pattern designers label their products with terms like “Easy,” “Beginner,” or “Novice.” However, because these ratings are not standardized across the industry, always read the detailed description on the back of the envelope or the digital product page. Look for explicit statements indicating that the pattern is suitable for absolute beginners or designed as a teaching tool.
Next, review the instruction format and layout. If you are purchasing a digital PDF pattern, many designers allow you to view the instruction booklet or a preview online before buying. High-quality beginner patterns feature clear, step-by-step illustrations or high-resolution photographs for every single step of the construction process. They should also include a comprehensive glossary explaining common sewing terms, a clear layout guide showing you how to place your pattern pieces on the fabric, and detailed sizing charts.
It is also highly beneficial to check for supplementary resources and community support. Many modern independent pattern designers host official sew-alongs on their blogs or provide step-by-step video tutorials on video-sharing platforms. Watching someone else complete the exact same steps can clarify confusing written instructions and show you exactly how to handle the fabric at difficult points. Active online communities, social media hashtags, and forums dedicated to the specific pattern can also be invaluable resources for troubleshooting.
When working with fabric marking tools to transfer pattern markings, always perform an erasability test on a scrap piece of your project fabric first. Different marking tools, such as water-soluble pens, tailor’s chalk, or heat-erasable pens, react differently depending on the fiber content and dye of your fabric. Verifying that the marks will wash out or disappear completely without bleeding or leaving permanent stains ensures your finished project looks clean and professional.
Frequently Asked Questions (FAQ)
Can I use free printable patterns for my first project?
Yes, free printable PDF patterns are a popular and budget-friendly way to start, but they require careful preparation. You must print the files at 100% scale on standard A4 or Letter paper and immediately verify the scale using a physical ruler on the printed test square, which is typically 1 inch or 5 centimeters. Once verified, you must accurately cut and tape the pages together to form the full-size pattern pieces. Keep in mind that free patterns can vary widely in instruction quality and may omit essential details like clear seam allowances, so always check the instructions carefully before cutting your fabric.
What is the most forgiving fabric for a beginner sewing pattern?
Medium-weight cotton, such as quilting cotton, linen-cotton blends, or lightweight cotton canvas, is the most forgiving fabric for beginner sewing patterns. These textiles press flat easily with a standard household iron, do not slip or slide on your cutting table, and feed smoothly through the sewing machine without stretching out of shape. They are highly cooperative during both the cutting and sewing phases, allowing you to focus entirely on mastering machine control, maintaining straight lines, and learning basic construction techniques. Avoid highly slippery, sheer, or stretchy fabrics until you have built solid foundational skills.
Community discussion
Share your experience or ask a question. Comments are reviewed before publication.