
Choosing the right sewing machine needle is the single most important decision you can make before starting any sewing project. Matching the needle’s point design to your fabric’s construction and its size to your fabric’s weight ensures clean stitches and prevents skipped stitches, fabric damage, or broken needles. By understanding how different needles interact with various textiles, you can achieve professional results and protect your sewing machine from unnecessary wear.
Every fabric behaves differently under the needle. Woven fabrics require a needle that can cleanly pierce the threads, while knit fabrics need a needle that can slip between the loops without cutting them. Taking a few moments to analyze your fabric and select the corresponding needle will save you hours of frustration and preserve the quality of your materials.
Understand Sewing Machine Needle Anatomy and Sizing
To make an informed selection, you must first understand the anatomy of a sewing machine needle. Every needle consists of several key parts, each engineered for a specific function during the stitch-formation process. Recognizing these parts helps you understand how the needle interacts with both your machine and your fabric.
Products mentioned in this guide
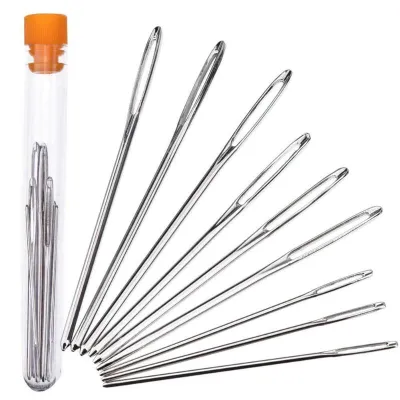
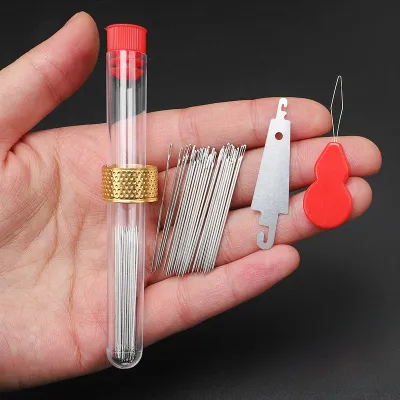
Prices are valid at publication and may change. Please refer to the product page for the latest price.
The Shank The shank is the thick upper portion of the needle that inserts directly into the needle bar of your sewing machine. For domestic sewing machines, the shank features a flat back and a rounded front. This design ensures the needle can only be inserted in the correct orientation, preventing timing issues and mechanical damage.
The Shaft The shaft is the main body of the needle extending from the shank down to the point. The thickness of the shaft determines the needle’s size and strength. A thicker shaft resists bending when penetrating heavy fabrics, while a thinner shaft minimizes fabric displacement in delicate materials.
The Groove Running along the front of the shaft is a narrow channel called the groove. This channel cradles the thread as the needle penetrates the fabric, reducing friction and protecting the thread from shredding or snapping during high-speed stitching.
The Eye The eye is the hole near the tip of the needle through which the thread passes. The size of the eye is proportional to the shaft size, though specialty needles may feature enlarged eyes to accommodate thicker or more fragile threads.
The Scarf The scarf is a small indentation on the back of the needle just above the eye. This indentation allows the bobbin hook to pass incredibly close to the needle, catching the upper thread loop to form a secure lockstitch.
The Point The point is the very tip of the needle, engineered in various shapes to either pierce or slip between fabric fibers. The shape of the point determines how the needle enters the fabric and is the primary factor in matching a needle to a specific fabric type.
Understanding the sizing numbers on needle packaging is equally crucial. Most manufacturers use a dual sizing system that includes both European (Metric/Nm) and American (Singer) measurements, typically written as a fraction like 90/14. The first, larger number represents the European size, which is the shaft diameter in hundredths of a millimeter; a size 90 needle has a shaft diameter of exactly 0.9 millimeters. The second, smaller number is the American size, which uses an arbitrary scale where lower numbers indicate finer needles. Always check the manufacturer’s packaging or label to verify the exact size and type before starting your project.
Match Needle Types to Fabric Categories
Matching the needle point to your fabric category is essential for maintaining fabric integrity and stitch quality. Using the wrong point style can result in punctured knit fibers, snagged threads, or skipped stitches. Fabric categories generally fall into wovens, knits, or specialty materials, each requiring a specific needle point.

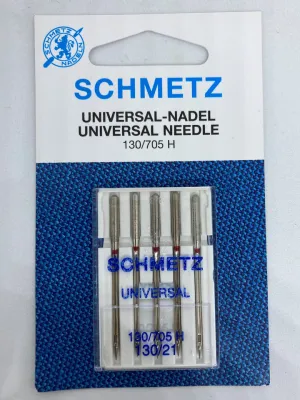
Universal needles are the most common type and feature a slightly rounded point that is sharp enough to pierce woven fabrics but forgiving enough to handle some stable knits. They are the standard choice for everyday projects using cotton, linen, and polyester blends. However, because they are a compromise between sharp and rounded, they may not perform perfectly on highly specialized fabrics.
Ballpoint needles are designed with a distinctly rounded tip engineered specifically for knit fabrics like jersey and interlock. Instead of cutting through the yarns, the rounded point slips between the fibers, preserving the integrity of the knit and preventing runs, holes, or unraveling. If you are working with standard t-shirt fabrics or lightweight knits, a ballpoint needle is the correct choice.
Stretch needles are similar to ballpoint needles but feature a specially designed scarf and a slightly flatter point. This unique geometry prevents skipped stitches on highly elastic materials, such as spandex, Lycra, and activewear knits. The modified scarf ensures the bobbin hook reliably catches the thread loop even when the highly elastic fabric tries to pull or distort the stitch.
Specialty needles are required for heavy, non-woven, or highly delicate fabrics. Denim needles possess a sharp, reinforced shaft and a slender point designed to penetrate dense, tightly woven fabrics like canvas, heavy twill, and multiple layers of denim without bending or breaking. Microtex needles feature an exceptionally sharp, slim point designed for precise stitching on delicate or high-density fabrics like silk, chiffon, microfibers, and coated materials. Leather needles feature a cutting point shaped like a small wedge or chisel, allowing them to cut clean holes through non-woven materials like genuine leather and heavy suede.
Before making your final needle selection, perform visual and tactile checks on your fabric. Stretch the fabric horizontally and vertically to determine if it is a knit or a woven, and feel its density and thickness. This quick assessment will guide you to the correct needle category and prevent costly mistakes on your project.
Select the Correct Needle Size for Fabric Weight
Once you have identified the correct needle type, you must select the appropriate needle size based on the weight of your fabric. Pairing needle thickness with fabric weight prevents fabric damage, puckering, or needle breakage. The general rule of thumb is to pair fine needles with lightweight fabrics and thicker needles with heavy or multiple layers.
Lightweight fabrics, such as silk, chiffon, organza, voile, and lace, require the thinnest needles, typically sizes 60/8 to 70/10. A fine needle prevents the fabric from being pulled down into the needle plate hole and avoids leaving permanent, unsightly punctures in delicate fibers.
Medium-weight fabrics, including quilting cotton, linen, poplin, flannel, and light wool, are best paired with medium-sized needles, such as sizes 80/12 to 90/14. These sizes offer the perfect balance of strength and precision for everyday sewing, providing enough stability to pierce the fabric without leaving excessively large holes.
Heavyweight fabrics, such as denim, canvas, heavy wool, corduroy, and upholstery fabrics, demand thick, sturdy needles, typically sizes 100/16 to 110/18. The robust shaft resists bending when penetrating dense layers, ensuring consistent stitch formation and preventing the needle from snapping under pressure.
Using the incorrect needle size produces clear, observable signs of trouble. If the needle is too large for the fabric, you will notice visible holes left in the fabric along the seam line, or the fabric may pucker and gather as you sew. If the needle is too small, the thread may shred, snap, or fail to form stitches, and the needle itself may bend or break when hitting thick seams.
Adjust your needle size considerations when using specialty threads or sewing through thick seams. Thick topstitching threads, heavy-duty buttonhole twist, or delicate metallic threads require a needle with a larger eye to prevent friction and shredding. If your thread struggles to pass smoothly through the needle eye, step up to a larger needle size or select a specialty topstitch needle to accommodate the thread thickness.
Step-by-Step Guide to Changing and Testing Your Needle
Installing your needle correctly and testing it on a scrap piece of fabric is a critical step in the sewing process. This routine ensures your machine operates safely and allows you to verify your needle and thread choices before working on your actual project.
Step 1: Power Down the Machine Always turn off the power switch on your sewing machine before changing the needle. This simple safety step prevents accidental injury if your foot presses the pedal while your hands are near the needle bar.
Step 2: Raise the Needle Bar Turn the handwheel toward you to raise the needle bar to its highest position. Lower the presser foot to give your fingers more room to work around the needle clamp.
Step 3: Loosen the Needle Clamp Screw Hold the needle securely with one hand while using a small screwdriver or your fingers to loosen the needle clamp screw. Carefully slide the old needle downward and out of the clamp.
Step 4: Orient the New Needle Examine your new needle to identify the flat side of the shank. For most modern domestic sewing machines, the flat side of the shank must face toward the back of the machine. Verify this orientation by checking your sewing machine’s manual.
Step 5: Insert and Secure the Needle Push the new needle up into the needle clamp as far as it will go. It must seat completely against the top pin inside the clamp. While holding the needle in this position, tighten the clamp screw securely to prevent the needle from slipping out during sewing.
Step 6: Prepare a Test Swatch Create a test swatch using a scrap piece of the actual project fabric, the same thread you plan to use, and any stabilizer or interfacing required for the project. Fold the scrap to replicate the number of layers you will be sewing.
Step 7: Evaluate Stitch Quality Sew a test line of stitches on your swatch. Inspect the stitches carefully for skipped stitches, uneven tension, puckering, or thread shredding. If you notice any issues, adjust your machine’s tension settings or re-evaluate your needle size and type.
If your machine makes unusual clunking or popping noises during the test, or if the needle fails to seat properly in the clamp, stop sewing immediately. Consult your sewing machine manual or contact a professional technician to resolve the issue before proceeding.
Recognize When to Replace Your Sewing Machine Needle
Sewing machine needles are temporary tools designed to be replaced regularly. Over time, the friction of piercing fabric dulls the point, bends the shaft, and creates microscopic burrs on the metal. Recognizing the wear signals helps you maintain stitch quality and avoid accidental fabric damage.
Auditory signs are often the first indicator of a dull needle. If you hear a distinct “thumping,” “popping,” or “clicking” sound as the needle pierces the fabric, the tip is dull and is forcing its way through the fibers rather than gliding through cleanly. Visual signs include skipped stitches, uneven tension, or visible snags and runs in your fabric caused by a bent shaft or a burred tip.
As a general guideline, replace your sewing machine needle after approximately 6 to 8 hours of active sewing time. You should also start every major new project with a fresh needle, especially when switching to highly abrasive fabrics like denim, canvas, or synthetic materials that wear down metal quickly.
Always follow safe disposal methods for used or broken needles to prevent accidental injury to yourself, your family, or sanitation workers. Place used needles inside a puncture-proof container, such as an empty plastic pill bottle, a small metal tin, or a dedicated needle safe, before throwing them in the household waste.
Frequently Asked Questions (FAQ)
Why is my needle breaking even when using the correct size?
Needle breakage can occur due to mechanical or threading issues even if you have selected the correct needle size. First, check for incorrect installation; if the needle is not pushed fully into the clamp or if the flat side is facing the wrong direction, it will strike the bobbin case or needle plate. A slightly bent needle, incorrect presser foot alignment, or pulling the fabric manually while sewing can also cause the needle to deflect and snap.
Additionally, verify your upper thread tension and bobbin threading. If the upper thread is catching on the spool cap or if the bobbin is wound unevenly, the sudden tension spike can pull the needle out of alignment, leading to breakage. Always allow the feed dogs to pull the fabric through the machine naturally rather than pulling or pushing the material yourself.
Can I use a universal needle for all my sewing projects?
While universal needles are highly versatile and work well for standard woven fabrics like cotton, linen, and polyester blends, they are not suitable for all projects. Using a universal needle on high-stretch knits often results in skipped stitches and runs because the point is too sharp to slip safely between the knit loops. Conversely, using a universal needle on heavy materials like denim or leather can cause the needle to bend, break, or fail to penetrate the dense layers, resulting in poor stitch quality and potential machine damage.
Community discussion
Share your experience or ask a question. Comments are reviewed before publication.