
Selecting the correct sewing machine needle is one of the most critical decisions in any sewing project, yet it is often overlooked. The interaction between your needle, thread, and fabric determines the strength, appearance, and elasticity of your seams. Using the wrong needle can lead to frustrating issues like skipped stitches, shredded thread, puckered fabric, or even damage to your sewing machine’s internal mechanisms. To choose the right needle, you must match the needle’s point style to the structure of your fabric and its size to the weight of the fabric and thread.
Understanding Sewing Needle Anatomy and Sizing Systems
To make an informed selection, it helps to understand the physical anatomy of a sewing machine needle. The top portion is the shank, which inserts into the machine’s needle bar. Most domestic sewing machines use flat-shank needles, where one side of the shank is flat and the other is rounded to ensure correct orientation during installation. Below the shank is the shaft, which determines the needle’s thickness. Running down the front of the shaft is a long groove designed to cradle the thread, protecting it from friction as it passes through the fabric. The eye is the hole near the tip that carries the thread, and just above the eye on the back of the needle is the scarf—a small indentation that allows the bobbin hook to pass close enough to catch the thread loop and form a stitch.
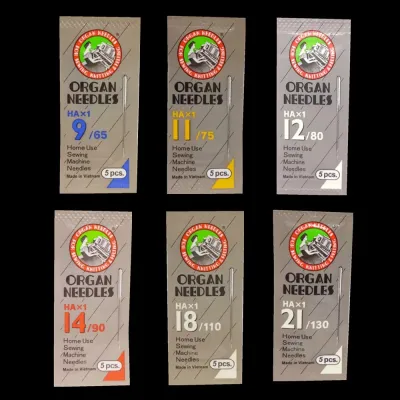
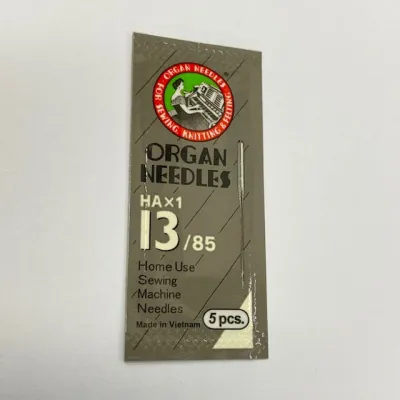
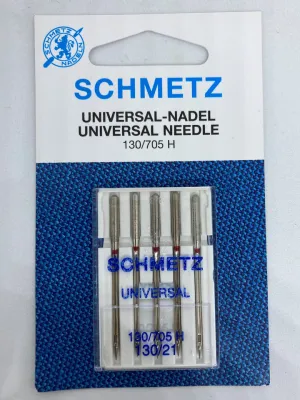
Needle packaging displays a dual numbering system, such as 80/12 or 90/14, which represents both the European (metric) and American (imperial) sizing standards. The first, larger number is the metric size, representing the shaft’s diameter in hundredths of a millimeter; for example, a size 90 needle has a shaft diameter of 0.9 millimeters. The second, smaller number is the American size, which uses an arbitrary scale from 8 to 20. In both systems, a lower number indicates a finer needle, while a higher number indicates a thicker, stronger needle. When reading a needle package, you will also see designations like “130/705 H,” which is the standard code for domestic flat-shank needles, ensuring compatibility with almost all modern home sewing machines.
Products mentioned in this guide
Prices are valid at publication and may change. Please refer to the product page for the latest price.
Matching Needle Types to Fabric Categories
The point of the needle must match the construction of your fabric to prevent structural damage. Woven fabrics, such as cotton lawn, linen, and denim, consist of threads crossed at right angles. For these materials, you need a needle that can pierce directly through the threads. Knit fabrics, such as jersey, ribbing, and French terry, are made of interlocking loops of yarn. Piercing a knit yarn with a sharp needle can cut the fiber, leading to unraveling, runs, or small holes over time.

Universal needles feature a slightly rounded point that is sharp enough to pierce woven fabrics but rounded enough to slip between the fibers of some stable knits. This versatility makes them the default choice for general sewing, particularly on medium-weight cottons and linens. However, for highly specialized fabrics, dedicated needle types are necessary to ensure clean stitching.
Ballpoint needles, sometimes labeled as jersey needles, have a distinctly rounded tip designed specifically for knit fabrics. Instead of cutting through the yarn, the rounded point slides between the loops, preserving the integrity of the knit structure. Stretch needles are similar to ballpoints but feature a specially modified scarf and eye. This unique geometry prevents skipped stitches on highly elastic fabrics like spandex, swimwear knits, and high-stretch sportswear by ensuring the bobbin hook reliably catches the thread loop.
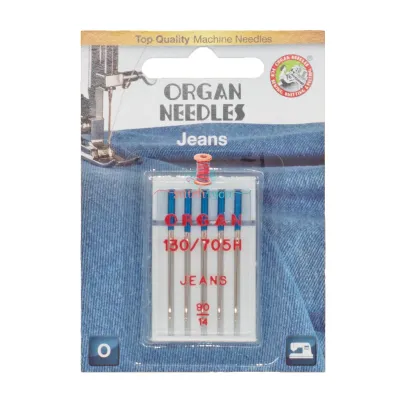
Sharp or Microtex needles have an exceptionally slim, acute point designed to pierce tightly woven fabrics cleanly. They are the ideal choice for delicate silks, microfibers, polyester, and coated materials like oilcloth. Using a universal needle on these fabrics can cause visible puckering or snagging, whereas a Microtex needle leaves tiny, clean punctures. Denim or jeans needles feature a reinforced shaft to resist bending and a very sharp, sturdy point designed to penetrate dense, heavy layers of denim, canvas, or heavy twill without breaking.
Selecting the Correct Needle Size for Fabric Weight
Matching the needle size to the weight of your fabric is essential for maintaining proper tension and preventing fabric damage. Lightweight fabrics like chiffon, organza, and delicate silk require fine needles, typically sizes 60/8 to 70/10. A needle that is too thick will leave permanent, unsightly holes in these delicate weaves. Medium-weight fabrics, including quilting cotton, linen, and flannel, pair best with mid-sized needles ranging from 80/12 to 90/14. Heavyweight fabrics like denim, canvas, and heavy wool require thick, sturdy needles in sizes 100/16 to 110/18 to prevent the needle from bending under the resistance of the dense material.
You must also coordinate your needle size with your thread weight. The thread must fit comfortably within the needle’s front groove and pass freely through the eye. If you use a thick thread with a small needle, the thread will rub against the sides of the eye, leading to friction, shredding, and frequent thread breaks. Conversely, if you use a very fine thread with a large needle, the thread will have too much room to wobble within the eye, which can prevent the bobbin hook from catching the loop, resulting in skipped stitches.
To simplify your selection, refer to this decision matrix mapping common fabric weights to recommended needle sizes and types:
| Fabric Weight | Common Fabric Examples | Recommended Needle Size | Recommended Needle Type |
|---|---|---|---|
| Very Light | Chiffon, organza, lace, voile | 60/8 to 70/10 | Sharp/Microtex or Universal |
| Light | Silk, cotton lawn, lightweight jersey | 70/10 to 80/12 | Sharp (woven) or Ballpoint (knit) |
| Medium | Quilting cotton, linen, chambray, flannel | 80/12 to 90/14 | Universal |
| Medium-Heavy | Fleece, sweatshirt fleece, double knit | 80/12 to 90/14 | Ballpoint or Stretch |
| Heavy | Denim, canvas, heavy twill, corduroy | 90/14 to 100/16 | Denim/Jeans |
| Very Heavy | Heavy canvas, upholstery fabrics, wool coating | 100/16 to 110/18 | Denim or Heavy Duty |
Step-by-Step Guide to Installing and Testing the Needle
Before installing a new needle, always turn off your sewing machine’s power switch to prevent accidental injury or machine damage. To remove the old needle, hold it securely with one hand while using your other hand or a small screwdriver to loosen the needle clamp screw by turning it counter-clockwise. Gently pull the needle straight down out of the needle bar.
To insert the new needle, identify the flat side of the shank. On almost all modern domestic sewing machines, this flat side must face toward the back of the machine. Push the needle shank straight up into the needle bar as far as it will go. While holding the needle firmly in this highest position, tighten the needle clamp screw securely. Avoid over-tightening, but ensure it is snug enough that the needle cannot slip down during sewing.
Never begin sewing your actual project without performing a test stitch on a scrap piece of the same fabric. Fold the scrap fabric to replicate the exact number of layers and seams you will be sewing. Sew a straight line of stitches for a few inches, then inspect the results. Check both the top and bottom of the fabric for skipped stitches, puckering, or uneven tension.
Listen closely to the machine as you sew. If you hear a distinct clicking or thumping sound, or if you observe skipped stitches or fabric bunching, stop sewing immediately. These signs indicate that the needle may be bent, dull, installed incorrectly, or mismatched for the fabric weight. Re-evaluate your needle choice and installation before proceeding.
Troubleshooting Common Needle-Related Stitching Issues
Many common stitching frustrations can be resolved simply by replacing or changing the needle. A dull or bent needle is often difficult to detect with the naked eye, but its effects are immediately apparent. If you notice your fabric puckering along the seam line, or if the machine makes a popping sound as the needle penetrates the fabric, the tip is likely dull or damaged.
Skipped stitches occur when the machine’s bobbin hook fails to catch the upper thread loop. This is frequently caused by using a universal needle on highly elastic synthetic fabrics, where a stretch needle is required to keep the loop open. It can also happen if the needle is slightly bent or not fully pushed up into the needle bar during installation.
Thread shredding and breaking are usually the result of friction. If your thread is stripping or snapping near the needle eye, check if the needle size is too small for the thread thickness. Alternatively, a tiny burr or nick on the needle eye can shred the thread; replacing the needle with a fresh one will quickly resolve this issue.
If your needle breaks entirely, it is often because the needle is too thin for the fabric weight, or because you are pulling or pushing the fabric through the machine. Let the machine’s feed dogs pull the fabric naturally; pulling the fabric bends the needle, causing it to strike the metal needle plate and snap. While a pack of quality sewing machine needles costs only a few S$, using a fresh needle is the most cost-effective way to protect your fabric and ensure a smooth sewing experience.
Frequently Asked Questions (FAQ)
How often should I replace my sewing machine needle?
As a general rule of thumb, you should replace your sewing machine needle after every 8 to 10 hours of actual sewing time, or at the start of every major project. Abrasive fabrics, dense materials like denim, and synthetic fibers accelerate needle wear, dulling the point much faster than natural cotton or linen. If you notice skipped stitches, puckering, or a thumping sound, replace the needle immediately, even if it has not reached the 8-hour mark.
What needle should I use for sewing leather or vinyl?
For sewing genuine leather, faux leather, or heavy vinyl, you should use a specialized leather needle. These needles feature a unique, wedge-shaped cutting point that physically slices a tiny slit through the dense, non-woven material to allow the thread to pass. Avoid using standard universal or sharp needles on leather, as they will struggle to penetrate the material, causing friction, skipped stitches, and potentially tearing the leather or jamming your machine.

Community discussion
Share your experience or ask a question. Comments are reviewed before publication.