
Choosing the right sewing machine needle is the single most effective way to prevent skipped stitches, broken threads, and ruined fabrics. The correct choice depends on matching the needle’s point shape and thickness to the specific weave and weight of your fabric. By understanding how these elements interact, you can ensure smooth stitching and professional results on any sewing project.
Understanding Sewing Machine Needle Anatomy and Sizing
To select the correct needle, you must first understand how its parts function and how manufacturers label their packaging. A standard domestic sewing machine needle consists of a shank, a shaft, a scarf, an eye, and a point. The shank is the thick upper portion that inserts into the needle bar of your machine. For almost all modern domestic machines, this shank has one flat side and one rounded side, ensuring that the needle can only be installed in the correct direction.
The point of the needle is engineered to interact with specific fabric structures. Sharp points are designed to pierce tightly woven threads cleanly, rounded points are made to slide between knit loops, and wedge-shaped points are built to cut through non-woven materials like leather. Using the wrong point shape can lead to immediate fabric damage or stitch failure.
Products mentioned in this guide
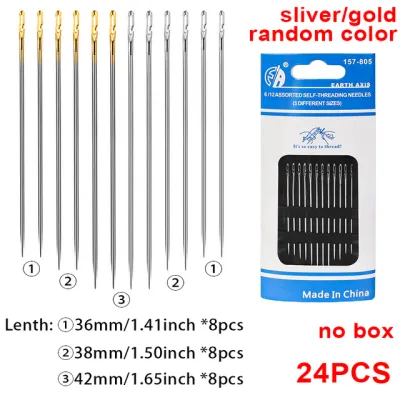
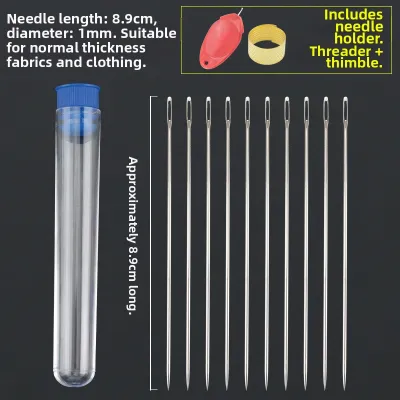
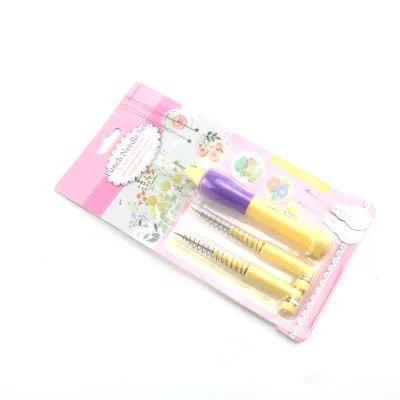
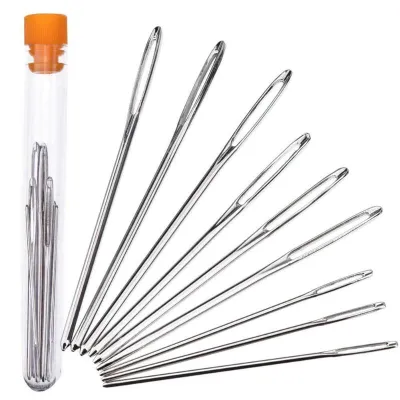
Prices are valid at publication and may change. Please refer to the product page for the latest price.
Needle packaging displays a dual sizing system, typically written as two numbers separated by a slash, such as 80/12 or 90/14. The first number represents the European metric size, which measures the shaft diameter in hundredths of a millimeter. For example, a size 80 needle has a shaft diameter of 0.8 millimeters. The second number represents the American imperial sizing system, which ranges from 8 to 20. In both systems, a lower number indicates a thinner needle for delicate fabrics, while a higher number indicates a thicker needle for heavy materials.
Before purchasing or installing a new needle, always check your sewing machine manual to verify compatibility. While the vast majority of domestic machines use the standard 130/705 H needle system, some specialized, vintage, or heavy-duty machines require specific shank lengths or have maximum needle size limitations. Using a needle that is too long or too thick for your machine’s clearance can damage the bobbin case or throw the machine’s timing out of alignment.
Matching Needle Types to Common Fabric Weaves
Matching the needle point to the weave of your fabric is essential for maintaining the structural integrity of your material. Woven fabrics and knit fabrics behave differently when pierced by a needle, requiring distinct point designs to prevent damage.

Universal needles feature a slightly rounded point that is sharp enough to pierce woven fabrics but gentle enough to handle some light knits. They are the standard choice for general-purpose sewing on woven materials such as quilting cotton, linen, chambray, and polyester blends. Because they represent a compromise between a sharp and a ballpoint, they work exceptionally well for basic utility stitching on stable fabrics.
Knit fabrics, jerseys, and elastane blends require ballpoint or stretch needles to prevent runs and holes. Ballpoint needles have a rounded tip that pushes the knit yarns aside rather than cutting through them, preserving the looped structure of the fabric. Stretch needles feature a medium ballpoint combined with a specially designed scarf that sits closer to the needle eye. This design prevents skipped stitches on highly elastic materials like swimwear, athletic wear, and high-stretch rib knits.
Specialty needles are required when working with dense, heavy, or non-woven materials. Denim or jeans needles have a reinforced shaft and a very sharp, slim point designed to penetrate dense, tightly woven fabrics like canvas, denim, and heavy twill without bending. Leather needles feature a cutting wedge point that slices a tiny opening in genuine leather, suede, and heavy non-woven synthetics, allowing the thread to pass through without tearing the material. Microtex or sharp needles have an exceptionally sharp, slim point that is ideal for microfibers, silk, synthetic leathers, and high-thread-count cottons where clean, straight stitches are required.
Using the wrong point shape can cause severe physical damage to your fabric. If you use a sharp needle on a knit fabric, the sharp tip will cut the individual knit fibers. Over time, these cut fibers will unravel, creating runs or holes along the seam line. Conversely, if you use a rounded ballpoint needle on a dense woven fabric, the needle cannot pierce the material cleanly. Instead of penetrating, it pushes the fabric down into the needle plate hole, causing skipped stitches, puckering, and audible thumping sounds as the machine struggles to sew.
Selecting the Correct Needle Size for Fabric Weight
Once you have identified the correct needle type, you must select the appropriate needle size based on the weight of your fabric. The thickness of the needle shaft must balance smooth stitch formation with the physical strength of the fabric fibers.
Fine needles, ranging from size 60/8 to 70/10, are designed for sheer, lightweight, and delicate fabrics. These include materials such as chiffon, organza, silk, lace, and lightweight voile. Because these fabrics have fine fibers and a delicate structure, a thin needle is necessary to prevent leaving visible holes or causing the fabric to pucker along the seam line.
Medium needles, ranging from size 80/12 to 90/14, are the standard choice for medium-weight fabrics. This category includes standard apparel fabrics, quilting cottons, medium-weight linens, flannel, and lightweight wool. Size 80/12 is the most versatile needle size for everyday garment construction and home decor projects, offering a reliable balance of strength and precision.
Heavy needles, ranging from size 100/16 to 110/18 and above, are engineered for heavy-duty materials. These needles are essential when sewing canvas, upholstery fabrics, denim, wool coating, and multiple thick layers of fabric. The thick shaft of a heavy needle resists bending when piercing dense layers, ensuring that the needle remains straight and forms consistent stitches.
Using an incorrect needle size introduces significant risks to your project. A needle that is too thick for a delicate fabric will leave permanent, unsightly holes in the material and can cause the fabric to pucker. A needle that is too thin for a heavy fabric will bend or snap under the pressure of piercing the material. A bending needle also fails to form a proper loop for the bobbin hook, resulting in skipped stitches, tangled threads, or damage to the needle plate.
How to Install and Test Your Sewing Machine Needle
Proper installation and testing are critical steps to ensure your sewing machine operates smoothly and safely. Even the correct needle will fail to perform if it is not mounted securely or aligned properly.
To install a new needle, turn off your sewing machine’s power to prevent accidental activation. Loosen the needle clamp screw and remove the old needle. Align the flat side of the new needle’s shank according to your machine’s specific threading direction, which is typically facing the back of the machine for most modern front-loading or top-loading models. Insert the needle fully into the needle clamp, pushing it upward as far as it will go. If the needle is not fully inserted, it will strike the bobbin case, causing timing issues or breaking the needle.
Secure the needle clamp screw properly. Use the small screwdriver provided with your machine to ensure the screw is snug, but avoid over-tightening, which can strip the threads of the clamp. Once secured, gently turn the handwheel toward you by hand to verify that the needle clears the presser foot and the needle plate without rubbing or striking any metal parts.
Before starting your actual project, always test your stitch quality on a double-layer scrap of your project fabric. Use the same thread and stabilizer that you plan to use for the final piece. Sew a few inches of straight and zigzag stitches, then inspect the results. Check the stitch tension, penetration, and thread compatibility. Look for skipped stitches, puckering, or uneven tension, and listen to the machine. A smooth, quiet hum indicates a correct match, while a loud popping or thumping sound suggests the needle is too dull or too thick for the fabric.
Troubleshooting Skipped Stitches and Fabric Damage
When sewing issues arise, the needle is often the first component you should investigate. Recognizing the signs of a worn or incorrect needle can save you time and prevent damage to your project.
A dull, bent, or burred needle tip will produce distinct visual and auditory signs. You will often hear a clicking or popping sound as the needle forces its way through the fabric. Visually, a damaged needle can cause fabric pulls, runs, or snagged threads. To check for a burr that is invisible to the eye, run the tip of the needle along the edge of your fingernail; if it catches or scratches, the tip is damaged and must be replaced immediately.
It is important to distinguish needle-related skipped stitches from other machine factors. Skipped stitches can be caused by a bent needle, but they can also result from incorrect threading, poor thread quality, or incorrect tension settings. Before changing your needle, re-thread both the upper thread and the bobbin, ensuring the thread passes through all tension discs. If the issue persists after re-threading, the needle is likely the cause.
Establish a clear stop-and-replace condition when fabric damage or consistent stitch failure occurs. If you notice fabric pulls, runs, or consistent skipped stitches, stop sewing immediately. Continuing to sew with a damaged needle can permanently ruin your project and potentially damage your machine’s needle plate or bobbin hook. Keeping a fresh supply of needles on hand ensures you can make a quick swap as soon as performance declines.
Frequently Asked Questions (FAQ)
How do I know when it is time to replace my sewing machine needle?
You should replace your sewing machine needle if you hear a distinct popping or clicking sound as it pierces the fabric, or if you notice sudden skipped stitches, thread shredding, or fabric pulls. A physical inspection using a magnifying glass or running the tip along your fingernail can reveal invisible burrs or bends. As a general guideline, many sewists replace their needle after every eight hours of active sewing time or at the start of every major new project to ensure optimal stitch quality.
Can I use universal needles for all my sewing projects?
Universal needles are not suitable for all sewing projects because they are a compromise design. While they work well on standard woven fabrics like cotton and linen, they can cause skipped stitches on highly elastic knits and can bend or break when forced through heavy materials like denim or leather. For the best results and to avoid damaging your fabrics, it is highly recommended to build a basic starter kit that includes universal, ballpoint, and jeans needles in various sizes.
Community discussion
Share your experience or ask a question. Comments are reviewed before publication.