
Selecting the correct sewing machine needle is one of the most critical decisions you will make before starting any sewing project. While it is tempting to keep the same needle in your machine for every fabric, doing so often leads to skipped stitches, broken threads, or permanently damaged textiles. The secret to flawless stitching lies in matching the needle’s physical characteristics—specifically its point shape and shaft thickness—to the structure and weight of your chosen fabric. By understanding how different needles interact with woven, knit, and specialty materials, you can ensure smooth machine operation and professional-looking results from your very first stitch.
Understanding Sewing Machine Needle Anatomy and Sizing
To choose the right needle, you must first understand its physical structure and how its various parts function during a stitch cycle. The top portion of the needle is the shank, which inserts into the needle bar of your machine. For domestic sewing machines, the shank features a flat side and a rounded side, ensuring the needle can only be installed in the correct orientation. Below the shank is the shaft, which tapers down to the blade. Along the front of the blade runs a long groove designed to cradle the sewing thread, protecting it from friction as it passes rapidly through the fabric. Just above the needle eye—the opening through which the thread is threaded—is a small indentation called the scarf. This scarf allows the bobbin hook to pass incredibly close to the needle, catching the thread loop to form a secure lockstitch.
The point of the needle is the very tip that penetrates the fabric, and its shape varies significantly depending on the intended material. Standard domestic needles use a dual sizing system printed on the packaging, typically represented by two numbers separated by a slash, such as 80/12 or 90/14. The first number is the European metric size, representing the shaft diameter in hundredths of a millimeter (for example, size 80 is 0.8 millimeters wide). The second number is the traditional American sizing system. In both systems, smaller numbers indicate finer, thinner needles, while larger numbers indicate thicker, more robust needles. When purchasing needles, look for standard flat-shank designations like “130/705 H” on the packaging, which confirms the needle is designed for standard domestic sewing machines rather than industrial models.
Products mentioned in this guide
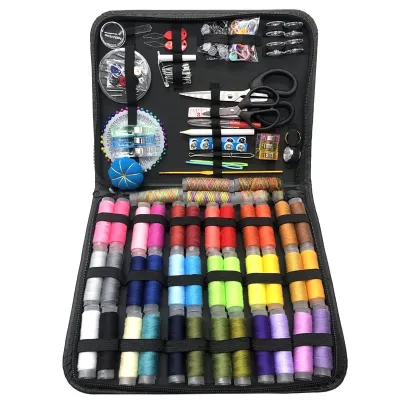
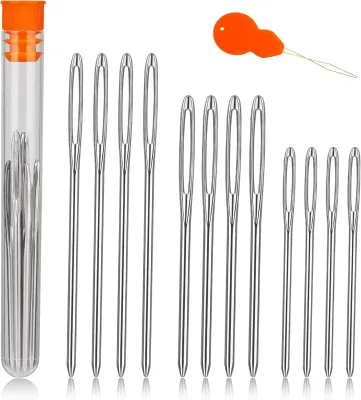
Prices are valid at publication and may change. Please refer to the product page for the latest price.
Matching Needle Types to Common Fabric Categories
Woven fabrics, such as quilting cotton, linen, and canvas, consist of threads crossed at right angles. For standard woven materials, universal needles are the traditional choice because they feature a slightly rounded point that is sharp enough to pierce woven threads while remaining versatile. However, for tightly woven or delicate fabrics like silk, microfiber, or high-thread-count cotton, a sharp needle (often labeled as Microtex) is preferred. Sharp needles feature an exceptionally slim, acute point that cleanly penetrates the fabric weave without causing puckering or pulling the threads out of alignment.

Knit fabrics, including jersey, interlock, and rib knits, are constructed from continuous interlocking loops of yarn. Using a sharp needle on knits can cut these delicate loops, leading to small holes that eventually run and unravel like a stocking. To prevent this, knit fabrics require ballpoint needles (sometimes called jersey needles), which feature a rounded tip designed to slide between the fabric yarns rather than piercing them. For highly elastic knits containing significant spandex or elastane, such as swimwear or athletic wear, a specialized stretch needle is necessary. Stretch needles feature a modified scarf and eye design that prevents the skipped stitches common when sewing highly elastic materials.
Heavy, dense, or tightly packed materials require needles engineered to withstand high resistance without bending or breaking. Denim or jeans needles are constructed with a reinforced shaft and a very sharp, slender point, allowing them to pierce multiple layers of heavy canvas, denim, or heavy twill without deflecting. Leather needles, on the other hand, feature a cutting wedge point that actually slices a tiny hole in the material as it penetrates. Because leather does not have a woven or knit structure to slide around a needle, this cutting action is necessary to allow the thread to pass through without shredding, though these needles should never be used on woven or knit fabrics as they will leave permanent, destructive holes.
Lightweight, sheer, or slippery fabrics demand a delicate touch to avoid snagging or gathering. Microtex needles are highly effective for these materials because their sharp, narrow shafts create the smallest possible entry hole. When working with delicate synthetics, polyester satins, or sheer organza, a fine sharp needle ensures the fabric feeds smoothly through the machine feed dogs without being pushed down into the needle plate hole.
Selecting the Correct Needle Size for Fabric Weight
Once you have identified the correct needle point type, you must select the appropriate needle size based on the weight of your fabric. Using a needle that is too thick for a lightweight fabric will leave permanent, unsightly holes and cause the fabric to pucker along the seam line. Conversely, using a needle that is too thin for a heavy fabric will cause the needle to bend, deflect, or snap under the pressure of penetration, potentially damaging your machine’s throat plate or bobbin hook.
For lightweight fabrics such as chiffon, organza, voile, and lightweight silks, select fine needles in the range of size 60/8 to 70/10. These thin needles penetrate delicate fibers easily and require very fine thread to match. For medium-weight fabrics, which include the vast majority of beginner projects like quilting cotton, linen, flannel, and standard t-shirt jersey, use standard needle sizes ranging from 80/12 to 90/14. These sizes offer a balanced compromise between strength and a small entry footprint, accommodating standard all-purpose polyester or cotton threads. For heavyweight fabrics such as denim, canvas, corduroy, and thick wool, opt for thick needles in the range of 100/16 to 110/18, which provide the structural rigidity needed to pierce dense layers.
To verify your selection before sewing your actual project, always perform a simple scrap test. Take a small scrap of your project fabric, fold it to replicate the exact number of layers you will be sewing, and stitch a straight line using your chosen needle and thread. Inspect the test seam closely: look for any skipped stitches, check if the fabric puckers along the seam, and pull the fabric slightly to ensure the stitches do not pop. If you see large, visible holes where the needle penetrated, switch to a smaller needle size; if the thread shreds or the machine struggles to pierce the fabric, upgrade to a larger size.
Step-by-Step Guide to Changing and Checking Your Needle
Replacing your sewing machine needle regularly is a fundamental habit that prevents a host of stitching frustrations. Before beginning the replacement process, always turn off the power switch on your sewing machine to prevent accidental injury if the foot pedal is bumped. For added safety, place a small piece of paper, cardstock, or a scrap of fabric over the hole in the throat plate directly beneath the needle. This simple precaution prevents the needle from slipping out of your fingers and falling down into the bobbin area, which can require extensive disassembly to retrieve.
To install the new needle, loosen the needle clamp screw by turning it toward you (usually counterclockwise) using your machine’s screwdriver or by hand. Carefully pull the old needle straight down out of the needle bar. Take your new needle and identify the flat side of the shank; on almost all modern domestic sewing machines, this flat side must face toward the back of the machine, while the rounded side faces toward you. Insert the needle shank up into the needle clamp as far as it will possibly go. Holding the needle firmly in this highest position, tighten the needle clamp screw securely using your screwdriver, ensuring it is snug but not overtightened.
It is important to recognize the observable signals that indicate a needle needs to be replaced. A dull, bent, or burred needle will often make a distinct “thumping” or “popping” sound as it forces its way through the fabric. You may also notice the fabric pulling upward slightly with the needle, or see tiny snags appearing along the stitch line. As a general guideline, a sewing machine needle should be replaced after approximately 8 hours of active sewing time, or at the start of every new major project, as the tip dulls quickly against fabric fibers.
Troubleshooting Common Stitching Issues
When stitching issues arise, the needle is often the first component you should investigate. Skipped stitches occur when the bobbin hook fails to catch the thread loop created by the needle, a problem frequently caused by using a dull needle or the wrong needle type. For example, if you attempt to sew a stretchy knit fabric with a universal needle, the needle may push the fabric down into the throat plate instead of cleanly penetrating it, preventing the thread loop from forming correctly. Switching to a stretch or ballpoint needle usually resolves this issue immediately.
If you observe fabric snags, runs, or large holes along your seam, the needle is likely too thick for the fabric weight, or the tip has sustained damage. Even a microscopic burr on the tip of a needle—caused by hitting a straight pin or the throat plate—can catch and pull fabric fibers with every single stroke. Run your fingernail gently along the tip of the needle; if you feel any roughness or catching, discard the needle immediately.
Thread breaking or shredding is another common issue that points directly to a needle mismatch. If the needle eye is too small for the thickness of the thread you are using, the thread will experience excessive friction as it passes through the eye, causing it to fray and snap. Ensure that your thread slides smoothly through the needle eye with minimal resistance. If troubleshooting these factors does not resolve the issue, or if you hear unusual mechanical grinding noises, cease sewing immediately and consult your machine’s manual or a qualified technician to check the machine’s timing.
Frequently Asked Questions (FAQ)
Can I use a universal needle for all my sewing projects?
While universal needles are designed with a slight compromise point that works well on a wide variety of standard woven fabrics and stable knits, they are not suitable for every project. When working with highly elastic fabrics, dense materials like denim, or delicate silks, a universal needle can cause skipped stitches, fabric damage, or thread breakage. For the best results and to protect your materials, it is always recommended to switch to a specialized needle tailored to your specific fabric type.
How do I know if my sewing machine needle is dull?
A dull needle often reveals itself through distinct auditory and visual clues during sewing. You will typically hear a repetitive clicking or popping sound as the needle penetrates the fabric, indicating it is forcing its way through rather than gliding. Additionally, you may observe skipped stitches, uneven tension, or slight puckering in the fabric. If you suspect wear, you can gently run the tip of the needle across a piece of old pantyhose; if it snags, the needle is dull or damaged and should be replaced.
Does the thread type affect which needle I should use?
Yes, the thickness of your thread must always be compatible with the size of your needle’s eye and groove. If you use a thick thread with a fine needle, the thread will rub against the sides of the eye and the fabric, leading to shredding, tension imbalances, and frequent breakage. As a rule of thumb, the thread should occupy no more than 40 to 50 percent of the needle eye’s opening to allow for smooth passage during high-speed stitching.
Community discussion
Share your experience or ask a question. Comments are reviewed before publication.