
Embroidering on shoes is an exciting way to transform a plain pair of sneakers or boots into a personalized work of wearable art. Unlike flat fabric stretched across a standard embroidery hoop, footwear presents a highly structured, three-dimensional surface made of dense, unforgiving materials. To successfully stitch your designs without breaking your tools or straining your hands, you need a specialized toolkit. Choosing the right sewing kit for shoes requires understanding how different needles, threads, and auxiliary tools interact with tough materials like heavy canvas, synthetic panels, and leather.
Why Standard Sewing Kits Fall Short for Shoes
A common mistake for beginners is reaching for a standard household sewing kit or a basic embroidery starter pack. These kits are designed for lightweight apparel fabrics like cotton, linen, or thin polyester blends. When you attempt to push a standard sewing needle through the reinforced heel counter or thick canvas upper of a shoe, you will quickly encounter significant resistance.
Standard sewing needles are thin and highly flexible, which makes them prone to bending or snapping when forced through dense shoe panels. A snapping needle is not only frustrating but also poses a safety hazard, as metal fragments can fly toward your face. Furthermore, standard needles lack the specialized point shapes required to slice or cleanly pierce through heavy materials, forcing you to apply excessive pressure that can damage the shoe’s structure.
Products mentioned in this guide
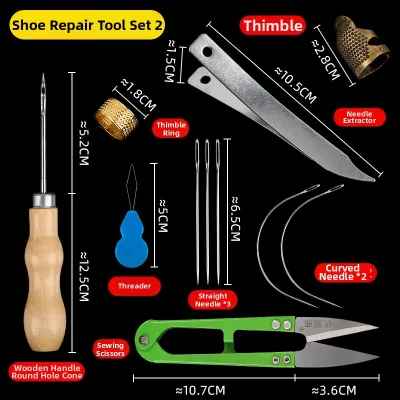
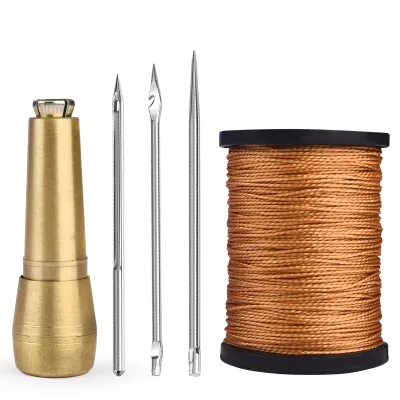
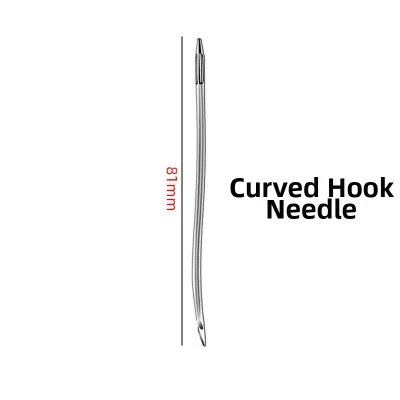
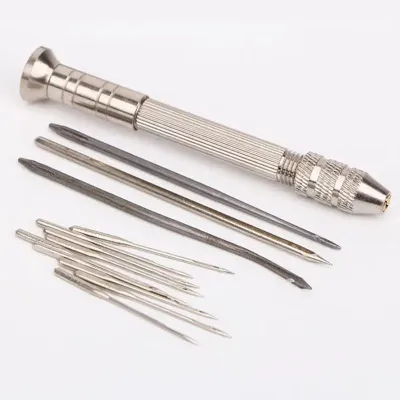
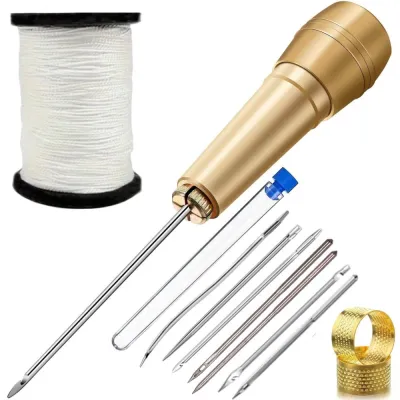
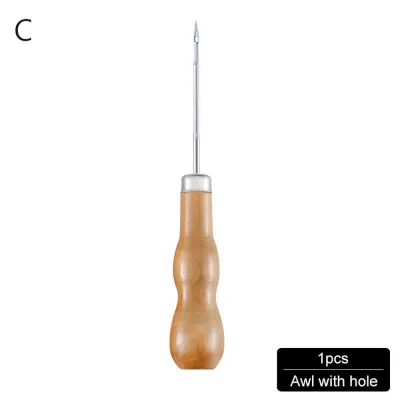
Prices are valid at publication and may change. Please refer to the product page for the latest price.
The thread included in generic sewing kits is equally unsuitable for footwear customization. Standard sewing thread or delicate embroidery floss is designed to lay flat on garments that experience minimal friction. Shoes, however, are subjected to constant flexing, dirt, moisture, and abrasive contact with the ground and other surfaces. Standard threads will quickly fray, snap, or wear away under the physical stress of daily wear, ruining your hard work after just a few steps.
Essential Components of a Shoe Embroidery Kit
To set yourself up for success, you must look for a kit specifically tailored for heavy-duty textiles or leatherwork, or assemble your own from specialized components. A functional shoe embroidery setup relies on three core pillars: heavy-duty needles, durable threads, and physical penetration aids.

When evaluating potential kits, prioritize these functional essentials over decorative extras. Many generic craft boxes tempt buyers with hundreds of colorful thread spools, plastic needle threaders, and cheap safety pins. For shoe embroidery, a kit with five high-quality, specialized needles and two spools of resilient thread is infinitely more valuable than a massive box of flimsy sewing notions that will fail on your first stitch.
Needles for Thick and Tough Materials
The needle is the most critical tool in your shoe embroidery kit, and its design must match the specific material of your shoe uppers. If you are working on leather, synthetic leather, or heavy vinyl, you must use leather needles, often referred to as chisel-point needles. These needles feature a triangular, blade-like tip that actually cuts a tiny slit as it penetrates the material, allowing the needle and thread to pass through without tearing the surrounding leather.
For canvas shoes, such as classic sneakers, chisel-point needles should be avoided, as they can cut and weaken the woven fabric fibers. Instead, opt for heavy-duty crewel or chenille needles. These needles feature an extremely sharp, tapered point that pushes the woven fibers aside rather than cutting them, preserving the structural integrity of the canvas. They also feature a larger eye, which is essential for accommodating thicker embroidery threads.
When selecting needles, pay close attention to the sizing system. Needle sizes can be confusing because different standards exist, but generally, lower numbers in some systems or higher numbers in others indicate thickness. Look for needles labeled as heavy-duty, denim, or leather, and physically inspect the shaft thickness. A thicker shaft provides the structural rigidity needed to withstand the downward force of your hand without bending. Ensure the needle eye is smooth and polished; a rough eye will shred your thread as you pull it through the dense shoe material.
Threads That Withstand Wear and Friction
The thread you choose determines the longevity of your custom design. Standard six-strand cotton embroidery floss, while popular for clothing, is highly susceptible to abrasion on footwear. If you choose to use cotton floss, you must verify its quality and consider treating it to withstand the elements.
For maximum durability, many shoe customizers prefer heavier alternatives such as waxed polyester thread, nylon thread, or heavy-duty buttonhole twist. Waxed threads are particularly beneficial because the wax coating lubricates the thread as it passes through the shoe material, reducing friction and preventing fraying. The wax also helps lock the stitches in place, ensuring your design does not unravel if a single thread is nicked during wear.
When inspecting thread options, check the manufacturer’s labels for colorfastness and water resistance. Shoes are frequently exposed to rain, puddles, and cleaning agents, so your thread must not bleed color onto the shoe upper. While thicker threads offer superior durability, they also require more effort to pull through the shoe. Beginners should strike a balance by choosing a medium-weight, high-tensile polyester or nylon thread that offers excellent strength without being overly difficult to work with.
Must-Have Auxiliary Tools
Embroidering on shoes is a highly physical process that requires more hand strength than standard embroidery. To protect your hands and make the process manageable, your kit must include several auxiliary tools. The most important of these is a stitching awl or a heavy-duty scratch awl. An awl allows you to pre-pierce holes in tough leather or rubberized panels before you ever attempt to pass a needle through, saving your fingers from strain and preventing needle breakage.
A sturdy thimble or a metal needle pusher is another non-negotiable tool. When pushing a needle through multiple layers of canvas or reinforced seams, you will need to apply significant pressure to the back of the needle. A high-quality metal thimble, or a leather finger protector, shields your skin from painful punctures and bruising.
Finally, design transfer tools are essential for mapping out your artwork on curved, dark, or textured shoe surfaces. Standard transfer paper often fails to adhere to shoes. Look for water-soluble fabric pens for light-colored shoes, or fine tailor’s chalk for dark canvas and leather. These tools allow you to draw your design directly onto the shoe and easily wipe or wash away the guidelines once your embroidery is complete.
How to Evaluate and Select Your First Kit
As a beginner, you face a choice between purchasing a pre-assembled shoe repair or leathercraft kit, or sourcing individual high-quality tools to build a custom setup. Pre-assembled kits offer convenience and are often cost-effective, but they frequently contain filler items of low quality. Sourcing tools individually allows you to select the exact needle sizes and thread types for your specific project, though it may require more initial research.
If you decide to buy a pre-assembled kit, use a strict checklist to evaluate its contents. Ensure it includes at least three different sizes of heavy-duty needles (including leather and canvas options), a solid wood or metal-handled stitching awl, and a durable metal thimble. Avoid kits that boast hundreds of pieces but lack these core heavy-duty tools, as they are likely designed for basic garment mending rather than footwear.
When planning your budget, expect to allocate around S$20 to S$40 for a reliable starter setup in Singapore. It is wise to invest the majority of your budget in high-quality needles and durable threads from reputable craft suppliers, rather than an expensive, elaborate carrying case. High-quality needles resist bending and have smoother eyes, which directly improves your stitching experience and reduces frustration.
Be cautious of oversized kits sold on generic online marketplaces that promise “all-in-one” solutions for incredibly low prices. These kits often feature brittle needles that snap easily and low-grade polyester threads that fray instantly. Investing in a smaller, curated selection of professional-grade tools will save you time, money, and physical discomfort in the long run.
Preparation and Safety Checks Before You Stitch
Before you make your first puncture, careful preparation and safety checks are essential to protect both your shoes and your hands. Begin by thoroughly examining the internal structure of the shoe you plan to customize. Many shoes contain hidden structural reinforcements, such as rigid plastic toe caps, stiff cardboard heel counters, or thick layers of industrial glue along the seams. Attempting to stitch through these areas can ruin your needles and permanently deform the shoe. Map your design to avoid these impenetrable zones.
Next, perform a tension and material test. Use a scrap piece of similar material, or a hidden area of the shoe—such as the inside of the tongue or the lower heel near the sole—to test your chosen needle and thread combination. This test allows you to gauge how much physical force is required to penetrate the material and helps you adjust your stitch tension so the fabric does not pucker or warp.
Safety must be your top priority when working with sharp awls and heavy needles. Always work on a stable, well-lit surface, and place a self-healing cutting mat underneath your work area to protect your furniture. When using an awl to pre-pierce holes, always push the tool away from your body and keep your non-dominant hand completely clear of the exit path. Never hold the shoe in a way that places your fingers directly behind the area you are piercing.
If you encounter extreme resistance during your test, or if the shoe material begins to crack, tear, or show signs of structural failure, stop immediately. Some synthetic materials and highly treated leathers are not suitable for hand embroidery. In such cases, consult the shoe manufacturer’s material specifications or seek advice from a professional shoe repair specialist before proceeding.
Frequently Asked Questions (FAQ)
Can I use a regular embroidery hoop for shoes?
No, standard flat embroidery hoops are generally unusable for shoe embroidery. Shoes are highly structured, three-dimensional objects with curved surfaces and stiff soles that prevent a standard wooden or plastic hoop from clamping onto the material. Attempting to force a hoop onto a shoe can crease the leather or damage the shoe’s internal structure. Instead of a hoop, you can hold the material taut by hand, or use heavy-duty binder clips to temporarily secure and tension loose fabric areas, such as the tongue. For larger, more complex designs, some customizers use specialized curved embroidery clamps, but for most beginners, careful hand-tensioning is the most practical approach.
How do I prevent the thread from fraying on canvas shoes?
Canvas is a highly abrasive material that acts like sandpaper on thread as it is repeatedly pulled through the fabric. To prevent fraying, work with shorter lengths of thread than you would for standard embroidery—ideally no longer than 30 to 40 centimeters. This limits the number of times any single section of thread passes through the rough canvas. Additionally, run your thread through a block of natural beeswax or a specialized thread conditioner before stitching. This coats the fibers, reducing friction and smoothing the passage through the canvas. Finally, always verify that your needle eye is large enough; if the eye is too small, it will compress and shred the thread with every single stitch.
Community discussion
Share your experience or ask a question. Comments are reviewed before publication.