
Selecting your first sashiko template is the most critical step in ensuring a successful introduction to this traditional Japanese embroidery technique. The ideal beginner template balances ease of transfer with a pattern that builds muscle memory without causing frustration. For those starting their first project, pre-printed wash-out fabric panels or simple reusable acrylic stencils featuring straight-line geometric patterns are highly recommended. These formats eliminate the complex step of manual pattern drafting, allowing you to focus entirely on mastering the rhythmic running stitch. By starting with a small, manageable project—such as a coaster or a small kitchen cloth—you can comfortably practice thread tension and stitch consistency. In Singapore, where crafting spaces might be compact and the tropical climate can affect certain marking tools, choosing a template that matches your immediate environment and skill level will set you up for a rewarding stitching experience.
Which Sashiko Template Format Suits Your Skill Level?
Sashiko templates come in several physical formats, each requiring a different level of preparation, tool investment, and patience. Understanding these formats allows you to choose one that aligns with your current comfort level and the amount of time you want to spend on setup before making your first stitch.
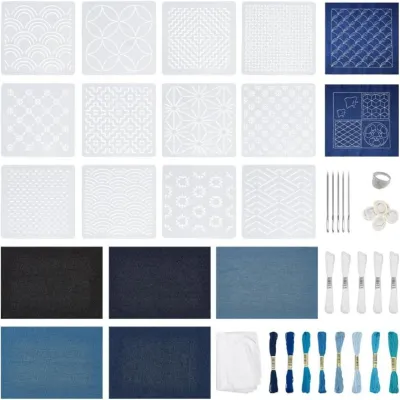
Pre-printed sashiko fabric panels represent the most accessible entry point for absolute beginners. These panels feature the entire pattern printed directly onto high-quality cotton fabric using water-soluble ink. Because the lines are already perfectly spaced and marked on the cloth, you can begin stitching immediately without any transfer tools or tracing steps. Once your stitching is complete, a simple rinse in lukewarm water dissolves the printed lines entirely, leaving only your beautiful handiwork. This format is highly recommended for those who want to experience the meditative flow of sashiko without the barrier of manual preparation.
Products mentioned in this guide
Prices are valid at publication and may change. Please refer to the product page for the latest price.
Iron-on transfer papers offer a middle ground, allowing you to choose your own custom base fabric while still avoiding manual tracing. These templates feature patterns printed in heat-sensitive ink that transfers to your fabric when pressed with a dry iron. While convenient, this format requires careful heat control and testing. If your iron is too hot, you risk scorching the fabric or setting the ink permanently; if it is too cool, the lines will be faint and difficult to follow. It is always wise to perform a test transfer on a small fabric scrap before committing to your main project.
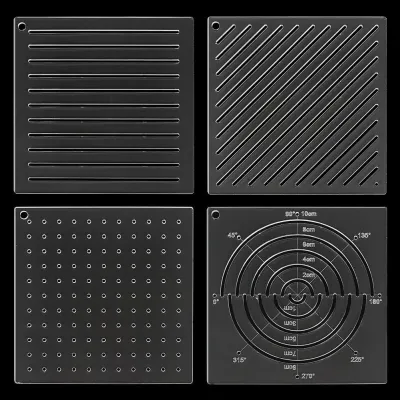
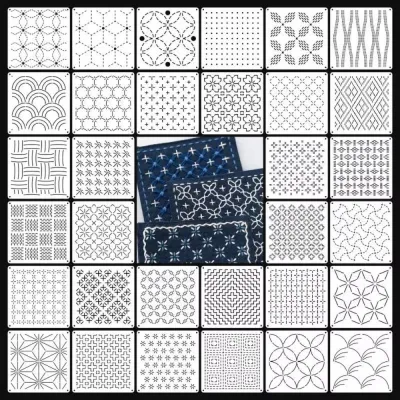
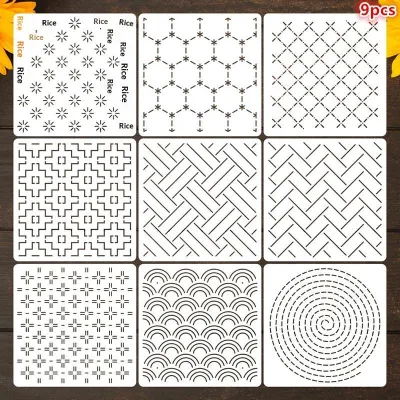
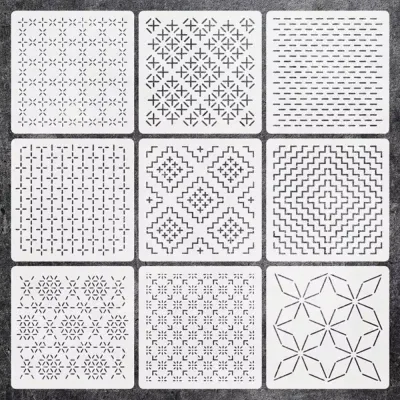
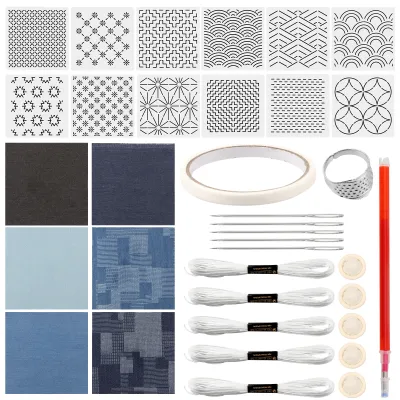
Tracing paper and reusable stencils are the traditional choice for crafters who plan to pursue sashiko long-term. Reusable stencils, typically made of durable acrylic or thin plastic, feature cut-out grooves that allow you to trace patterns directly onto your fabric using a fabric marker or chalk pen. While this method requires a steady hand, precise alignment, and a bit of patience, it is incredibly cost-effective. A single stencil can be used dozens of times across various projects, giving you complete freedom over pattern placement and fabric selection.
Peel-and-stick or adhesive templates are modern, water-soluble sheets that you can print or draw on and stick directly onto your fabric. You stitch directly through both the adhesive template and the fabric, and then wash the entire piece to dissolve the template. This format is exceptionally useful for dark, thick, or highly textured fabrics where traditional tracing lines are hard to see. However, when using adhesive templates, you must verify that the adhesive layer does not gum up your needle or make it difficult to pull the thread through the fabric layers.
How to Choose a Beginner-Friendly Pattern Complexity
The visual appeal of intricate sashiko patterns can be tempting, but starting with a design that matches your current skill level is essential for preventing hand fatigue and frustration. A beginner-friendly pattern should help you establish a steady stitching rhythm while teaching you how to manage thread tension.

Geometric grids and straight-line patterns are highly recommended for your first project. Patterns such as the triple stripe pattern or the hemp leaf pattern consist primarily of straight lines that intersect at predictable angles. These designs make it easy to maintain a consistent stitch length and keep your lines straight. In contrast, organic, curved motifs like the ocean wave pattern or the seven treasures pattern require you to constantly pivot your needle and adjust your stitch size to navigate the curves smoothly. Saving curved patterns for your second or third project will make your initial learning curve much gentler.
When evaluating a template, look closely at the line spacing and the presence of stitch-length indicators. Many beginner-friendly templates feature dashed lines rather than solid lines. These dashes act as physical guides, showing you exactly where the needle should enter and exit the fabric to achieve the traditional stitch-to-space ratio. Ideally, the line spacing should be wide enough—at least 5mm to 10mm—to allow your fingers to hold the fabric comfortably without cramping as you work.
Pattern density and overall project size also play a significant role in your initial success. A dense pattern with hundreds of tiny, intersecting lines requires a massive time commitment and can lead to hand strain if you are not used to holding a sashiko needle. For your first attempt, select a small sampler or a set of coasters, typically measuring between 10cm and 30cm square. Completing a small, beautiful item in a few hours provides immediate satisfaction and builds the confidence needed to tackle larger projects like table runners or garments.
Matching Your Template to the Right Fabric and Thread
A sashiko template does not work in isolation; its success depends heavily on how well it pairs with your chosen fabric, thread, and needles. Ensuring physical compatibility between these elements prevents fabric distortion and makes the stitching process significantly smoother.
The base fabric must have the right weight, weave tightness, and stability to support sashiko thread. Traditional sashiko is worked on medium-weight, loosely woven cotton or linen. The loose weave is crucial because sashiko thread is relatively thick and unmercerized, meaning it needs space to pass through the fabric fibers without causing them to bunch up. Avoid stretchy knits, slippery silks, or extremely dense canvas for your first project. Stretchy fabrics will warp under your template, while dense fabrics will make pulling the needle through an exhausting chore.
Verifying thread thickness and needle eye compatibility against your template is another essential step. Sashiko thread is uniquely twisted and matte, designed to loft and fill the spaces between stitches. If your template features very fine, delicate lines, a thick sashiko thread may look bulky and distort the pattern. Conversely, thin thread on a bold, wide-lined template can look sparse. Ensure your needle has a long, smooth eye specifically designed for sashiko thread; using a standard sewing needle will shred the thread and make threading an exercise in frustration.
You must also determine whether your template and fabric combination is best worked hand-held or in a hoop. Traditional sashiko is stitched hand-held, utilizing a long needle to gather multiple stitches onto the fabric before pulling the thread through. This technique relies on the fabric being flexible and loose. However, if you are using a delicate peel-and-stick template or a slightly lighter fabric that tends to pucker easily, using a loose embroidery hoop can help keep the fabric flat and stable while you transfer and stitch the design.
Step-by-Step Preparation and Transfer Techniques
Proper preparation is the foundation of beautiful sashiko. Taking the time to prepare your fabric and execute your template transfer accurately prevents alignment issues and fabric distortion before you even make your first stitch.
Begin by pre-washing and pressing your base fabric. Natural fibers like cotton and linen are prone to shrinkage when washed for the first time. If you transfer your template to unwashed fabric and then wash the finished piece to remove the ink, the fabric may shrink unevenly, causing your beautiful stitches to pucker and warp. Wash the fabric in lukewarm water, let it air dry, and press it thoroughly with a hot iron to remove all wrinkles and creases.
When executing your transfer, safety and precision are paramount. If you are using an iron-on transfer template, check the manufacturer’s instructions for the recommended iron temperature. Always use a dry iron, as steam can smudge the transfer ink or cause the paper to warp. Place a thin, clean pressing cloth over the template to protect both your iron and the fabric from direct, intense heat. If you are using a reusable stencil, secure it to the fabric using low-tack masking tape or fabric weights to prevent it from shifting while you trace the lines with a water-soluble marker.
Once the pattern is transferred, secure your fabric layers to prevent shifting during stitching. If your project includes a backing fabric, as is common with coasters or table runners, do not rely solely on pins. Instead, use long, loose basting stitches running from the center of the fabric outward to the edges. This keeps the layers perfectly flat and aligned, preventing the backing fabric from bunching up or shifting as you work your way through the sashiko pattern.
Troubleshooting Common First-Project Stitching Challenges
Even with the perfect template and careful preparation, beginners often encounter a few physical challenges during their first sashiko project. Knowing how to identify and resolve these issues quickly will keep your crafting experience enjoyable.
Fabric puckering and warping are almost always caused by improper thread tension. Unlike standard embroidery, sashiko thread should lie completely flat on the surface of the fabric without pulling it tight. To prevent puckering, always leave a small loop of thread—known as a slack loop—on the backside of the fabric whenever you make a sharp turn or cross an intersection. These loops provide the necessary slack for the fabric to stretch and move naturally when handled or washed. If you notice puckering, gently stretch the fabric diagonally to distribute the thread tension evenly.
Faint, smudged, or prematurely disappearing transfer lines can be incredibly frustrating. In Singapore’s humid climate, air-erasable fabric markers can fade much faster than expected, sometimes disappearing within a few hours. To combat this, switch to a water-soluble marker, which only disappears when fully soaked in water, or work in smaller, manageable sections. Ensure you have bright, direct task lighting over your workspace to help you see faint lines clearly without straining your eyes.
Thread tangling, fraying, or knotting usually happens when your thread is too long or your needle is incorrect. A good rule of thumb is to cut your sashiko thread to a length no longer than the distance from your fingertips to your elbow (approximately 50cm). Thread that is too long passes through the fabric too many times, causing the fibers to wear down, fray, and knot. If your thread continues to shred, check the eye of your needle for any sharp burrs and ensure you are using a dedicated sashiko needle that creates a large enough hole for the thread to pass through smoothly.
Frequently Asked Questions (FAQ)
Can I use a regular printer to print my own sashiko templates?
Yes, you can use a standard home printer to print sashiko designs, but you should not stitch directly through regular printer paper. Standard copy paper does not tear away cleanly, can dull your needle, and may leave paper fibers trapped under your stitches. Instead, print your chosen design onto lightweight tracing paper or specialized water-soluble stabilizer sheets that stick to your fabric and dissolve completely in water. Alternatively, you can print the pattern on regular paper, place it under your fabric on a light box or a bright window, and trace the design manually using a water-soluble fabric pen.
Do I need to remove the template lines after finishing the project?
Yes, removing the template lines is essential for achieving a clean, professional finish. For pre-printed wash-out fabrics and water-soluble markers, gently submerge the finished piece in a basin of lukewarm water and let it soak for about 10 to 15 minutes without rubbing or wringing the fabric. The ink will dissolve naturally. Always ensure you do not iron the fabric or expose it to high heat before washing, as heat can permanently set some water-soluble inks, making them impossible to remove. Once the lines are gone, lay the piece flat on a towel to air dry, then press it gently from the backside.
Community discussion
Share your experience or ask a question. Comments are reviewed before publication.