
Choosing the correct safety pin for your clothing requires balancing the pin’s physical size and structural style against the weight and weave of your fabric. Using a pin that is too thick can leave permanent holes or snag delicate fibers, while a pin that is too thin will bend under the weight of heavy garments. To secure your clothes safely and discreetly, you must match the standard sizing scale—ranging from the tiny size 00 to the heavy-duty size 4—and select the appropriate pin style, such as standard straight, curved, or locking designs, for your specific task.
Understanding Safety Pin Sizes and Styles
Safety pins are categorized by a standard numbering system that dictates their length and wire thickness. The scale typically runs from size 00, which is the smallest and thinnest, up to size 4, which is the largest and thickest. A smaller number indicates a shorter pin with a finer gauge wire, designed to pass through tight fabric weaves without disrupting the threads. Conversely, larger numbers represent longer pins made from thicker wire, engineered to withstand the tension of heavy materials.
Understanding these dimensions helps you avoid structural failures during clothing adjustments. For instance, a size 00 pin is approximately 19 millimetres long, making it highly discreet but easily bent under pressure. A size 4 pin can measure up to 76 millimetres in length, offering substantial holding power but requiring a much larger entry hole. When selecting a pin, you must verify that the wire gauge is compatible with the density of your garment’s weave to prevent permanent fiber displacement.
Products mentioned in this guide

Prices are valid at publication and may change. Please refer to the product page for the latest price.
Beyond size, safety pins are manufactured in several distinct structural styles to serve different functional needs. The standard straight safety pin is the most common, featuring a straight shaft that works well for flat, low-tension areas. Curved safety pins, often used in quilting and basting, have a slight bend in the shaft that allows them to penetrate and exit fabric layers smoothly without puckering the material. Kilt pins are large, decorative, and heavy-duty, designed to secure thick, wrapped garments. Locking pins feature a sliding plastic or metal sleeve over the clasp to prevent accidental opening under stress.
Material composition is another critical factor when choosing a safety pin. Most commercial pins are made from nickel-plated steel, stainless steel, or brass. Stainless steel offers excellent rust resistance and durability, making it suitable for garments that might encounter moisture or require long-term placement. Brass pins are naturally rustproof and are often preferred for delicate or light-colored fabrics where rust spots would ruin the garment. If you have sensitive skin or are pinning close to the body, check the manufacturer’s label to ensure the pins are nickel-free to avoid allergic reactions.
Matching Pin Sizes to Fabric Weights
Matching the physical size of a safety pin to the weight of your fabric is essential for preserving the integrity of your wardrobe. Delicate and lightweight fabrics, such as silk, chiffon, lace, satin, and fine knits, require the utmost care. For these materials, you should check for the smallest standard sizes, specifically size 00 or size 0. The ultra-fine wire of these small pins slips between the delicate threads rather than piercing and tearing them, minimizing the risk of visible holes or snags.

Medium-weight fabrics, including cotton, linen, polyester blends, and light wool, offer more structural stability but can still be damaged by excessively large pins. For general temporary hems, securing linings, or standard repairs on these everyday garments, evaluate mid-range sizes such as size 1 or size 2. These sizes provide a balanced combination of holding strength and a relatively thin wire gauge, ensuring the pin remains secure without distorting the fabric weave.
Heavyweight fabrics, such as denim, canvas, heavy wool, leather, and multi-layered outerwear, demand maximum structural support. For these applications, look for the largest sizes, such as size 3 or size 4. The thick wire gauge of these heavy-duty pins prevents them from bending or snapping when forced through dense materials. Using a smaller pin on these fabrics is highly ineffective, as the tension will quickly distort the pin and potentially cause it to pop open, risking injury or fabric damage.
To simplify your selection process, you can use the following quick-reference matrix to verify which standard safety pin size matches your specific fabric category:
| Fabric Category | Typical Materials | Recommended Pin Size | Primary Use Case |
|---|---|---|---|
| Delicate / Ultra-Light | Silk, chiffon, lace, organza, satin | Size 00 (19 mm) or Size 0 (22 mm) | Temporary repairs, securing tags, delicate drapes |
| Lightweight | Thin cotton, rayon, jersey, polyester | Size 0 (22 mm) or Size 1 (28 mm) | Securing linings, minor hem adjustments |
| Medium-weight | Standard cotton, linen, flannel, light wool | Size 1 (28 mm) or Size 2 (38 mm) | Temporary hems, securing scarves, general repairs |
| Heavyweight | Denim, canvas, corduroy, heavy knits | Size 2 (38 mm) or Size 3 (51 mm) | Outerwear adjustments, heavy fabric layers |
| Extra-Heavy / Bulky | Thick wool coats, leather, upholstery | Size 3 (51 mm) or Size 4 (76 mm) | Securing heavy blankets, kilt styling, utility tasks |
Before committing to a specific pin size, perform an observable trial on an inconspicuous area of the garment, such as an inner seam allowance. Insert the pin gently and check if the wire leaves a permanent hole or pulls any threads. If the fabric fibers do not easily slide back into place after removing the pin, switch to a smaller size or a finer wire gauge.
Selecting the Right Pin Style for Specific Clothing Tasks
The specific task you are performing dictates the ideal pin style just as much as the fabric weight does. Standard straight safety pins are highly versatile and serve as the default choice for quick, temporary fixes on flat seams and lightweight hems. They are excellent for securing a loose thread, keeping a lining in place, or holding a temporary fold before sewing. However, because the shaft is straight, they can cause flat fabrics to bunch slightly if used on curved areas or under high tension.
Curved safety pins offer a specialized solution for tasks involving curved seams or multiple layers of fabric. The distinct bend in the pin’s shaft allows you to insert and exit the fabric in a single, smooth motion without lifting or distorting the material. This design is particularly useful for basting garments during fitting sessions or securing curved hemlines, as it prevents the fabric from puckering and ensures a flatter, more accurate representation of how the garment will drape.
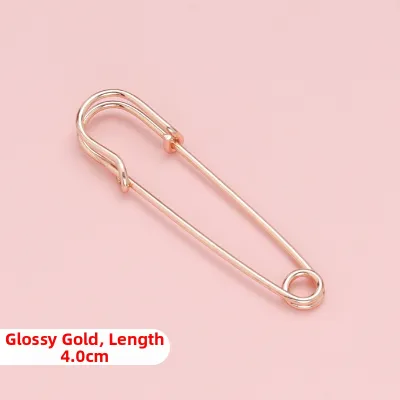
For heavy layers, outerwear, or fashion pieces where the pin is intended to be visible, kilt and locking pins are the most appropriate choices. Kilt pins are large, sturdy, and often feature decorative loops or designs, making them a stylish accessory for securing heavy wool wraps, kilts, or thick scarves. Locking pins, on the other hand, feature a specialized locking mechanism—such as a sliding metal or plastic sleeve—that covers the clasp. This mechanism ensures the pin cannot accidentally pop open, making them ideal for active wear or securing heavy drapes where sudden movement could put stress on the fastener.
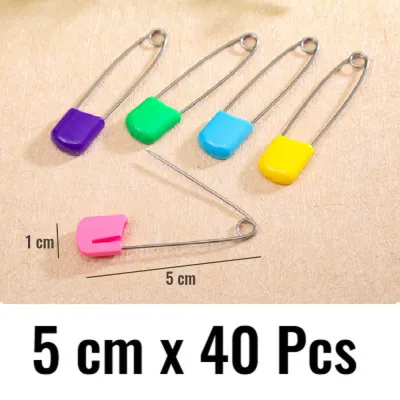
Diaper pins, which are a specific subset of locking pins, feature a bulky plastic head with a built-in safety lock. While originally designed for cloth diapers, these pins are highly effective for securing thick, bulky materials that require extra security, such as heavy winter coats, sleeping bags, or utility gear. The plastic locking head prevents the sharp point from escaping even under extreme pressure, providing peace of mind when securing heavy-duty items.
Step-by-Step Guide to Pinning Clothes Safely
Securing your garments with safety pins requires a methodical approach to prevent fabric damage and avoid painful finger pricks. Follow these steps to ensure a secure and clean result:
- Preparation and Alignment: Lay the garment flat on a clean surface. Align the fabric layers smoothly, ensuring there are no wrinkles or tension points. Identify the exact entry and exit points for the pin. If you want to keep the pin hidden, plan to insert it from the inside of the garment, catching only the inner layers of fabric or the seam allowance. Avoid placing pins directly on high-stress seams where the fabric is pulled tight during movement.
- Insertion Technique: Hold the fabric gently between your thumb and forefinger to create a slight tension. Insert the sharp tip of the safety pin at a shallow angle. Instead of piercing directly through the threads, try to weave the pin through the natural grain of the fabric, passing between the woven fibers. This technique reduces the risk of cutting or tearing the individual threads. Push the pin through until the point emerges on the other side, keeping the insertion distance relatively short to prevent the fabric from bunching.
- Securing the Clasp: Once the pin has passed through the necessary layers, guide the sharp point into the protective guard or clasp. Press the clasp firmly until you hear or feel it click into place. If you are using a locking pin, slide the safety sleeve over the clasp to engage the lock. Double-check that the point is fully enclosed and cannot slip out when the fabric moves.
- Removal and Fabric Recovery: When it is time to remove the pin, unfasten the clasp carefully, keeping your fingers away from the sharp point. Gently pull the pin out along the same path it entered to avoid snagging the fibers. After removal, you may notice small pinholes in the fabric. To help the fabric weave close, gently massage the area with your fingertips, rubbing the fibers in a circular motion. For stubborn holes in cotton or linen, a light mist of water or a quick pass with a steam iron will help the threads return to their original positions.
Common Mistakes and Fabric Damage Prevention
One of the most common mistakes when using safety pins is using oversized pins on delicate fabrics. A thick wire gauge will permanently displace or break the fine threads of silk or satin, leaving unsightly holes that cannot be repaired. Always check the pin’s thickness against the fabric’s weave before use, and opt for the thinnest pin that can still hold the weight of the material.
Another frequent error is leaving standard safety pins in clothing during laundering. If non-rust-proof pins are exposed to water and detergent in a washing machine, they can quickly oxidize, leaving stubborn rust stains on your clothes. Furthermore, the agitation of the washing machine can cause the pins to catch on other garments, leading to severe tears, or even damage the washing machine drum. Always remove all safety pins before washing or dry cleaning your clothes.
Forcing bent, dull, or damaged pins through fabric frequently causes tears. If a pin resists penetrating the fabric, stop immediately. A dull tip will push and tear the fibers rather than sliding between them. Inspect the pin’s tip for burrs or bends, and replace it with a fresh, sharp pin if any imperfections are found.
Finally, it is important to recognize the limits of safety pins. While they are excellent for temporary adjustments and quick fixes, they are not a permanent substitute for proper tailoring. If a safety pin is subjected to constant structural stress—such as holding a tight waistband together or securing a high-tension seam—it will eventually bend, tear the fabric, or pop open. In these situations, stop using safety pins and switch to proper sewing, fabric tape, or professional tailoring services to ensure a secure and lasting repair.
Frequently Asked Questions (FAQ)
Can I use a safety pin to fix a broken zipper temporarily? (FAQ)
Yes, a safety pin can serve as a highly effective temporary fix for a broken zipper. If the zipper slider has lost its pull tab, you can slide a small safety pin through the eyelet of the slider to act as a replacement pull. If the zipper teeth are failing to stay closed, you can use a medium-sized locking pin to secure the fabric layers directly across the zipper track at the point of failure. This will prevent the zipper from sliding down further. However, this is strictly a temporary measure; the zipper should be professionally repaired or replaced for long-term use, as the pin can damage the zipper teeth under continuous tension.
How do I remove rust stains from clothes caused by a safety pin? (FAQ)
To treat rust stains left by an oxidized safety pin, first check the garment’s care label to ensure the fabric can tolerate liquid treatments. Avoid using chlorine bleach, as it will permanently set rust stains. Instead, apply a mild household acid such as lemon juice or white vinegar to the stain, then sprinkle a small amount of table salt over the area. Let the mixture sit for about ten minutes, keeping it moist, then rinse thoroughly with cool water. For stubborn stains on robust fabrics, you can use a commercial rust remover following the manufacturer’s instructions. Always test any treatment on an inconspicuous area first and stop immediately if you observe any fabric discoloration or damage.
Are there safety pins designed specifically to be invisible under clothing? (FAQ)
Yes, there are safety pins designed specifically for discreet clothing adjustments. These are often referred to as low-profile, invisible, or seamless safety pins. They typically feature a flat head design rather than the traditional coiled loop, allowing them to lie completely flat against the fabric without creating a noticeable bulge. Many of these pins are manufactured with matte finishes in various colors—such as black, nude, white, or silver—to blend seamlessly with different garment shades. When using these low-profile pins, always verify their wire strength, as their smaller profile and thinner gauge mean they may not hold up well under the weight of heavy or highly tensioned fabrics.
Community discussion
Share your experience or ask a question. Comments are reviewed before publication.