
Choosing the right resin mould is the foundation of any successful resin art project. Your choice directly impacts the structural integrity, surface finish, and ease of demoulding of your finished piece. By matching the mould’s material properties, size, and design to your specific resin chemistry, you can avoid common crafting pitfalls like warping, tearing, and trapped air bubbles.
Whether you are crafting delicate jewellery in a home workshop or pouring large homeware pieces, understanding how different moulds perform is essential. This guide covers how to evaluate silicone quality, calculate pour depths, and inspect designs to ensure your next resin project cures flawlessly.
Define Your Project Goal and End Use
Before browsing mould options, define the scope and intended function of your finished craft. Resin moulds are engineered to accommodate specific shapes, sizes, and chemical reactions, and your end goal will narrow down your choices.
Products mentioned in this guide
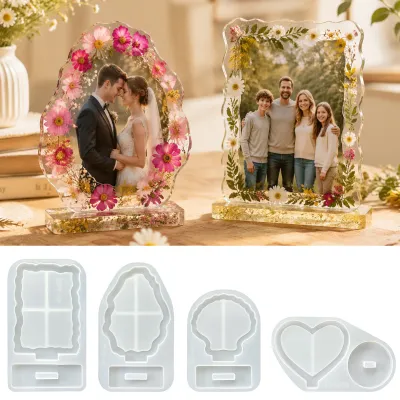

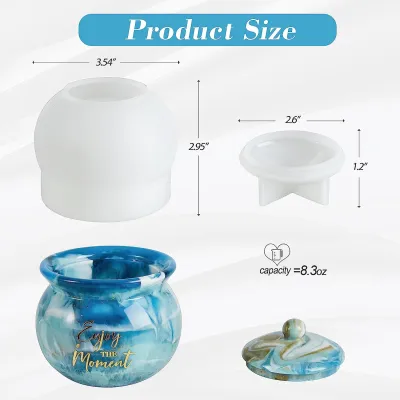
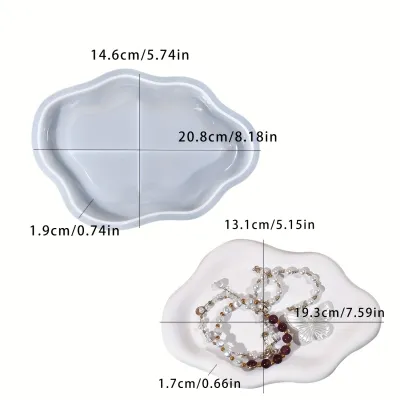

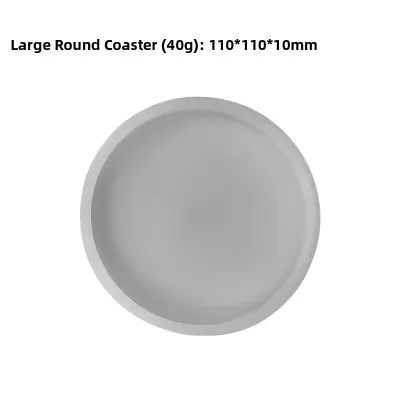
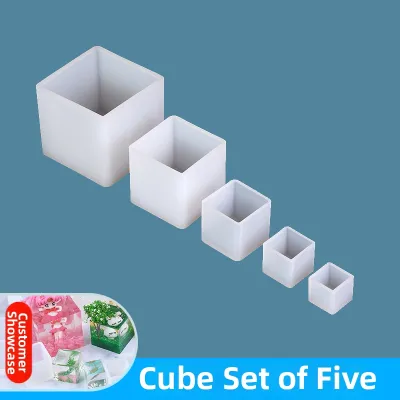
Prices are valid at publication and may change. Please refer to the product page for the latest price.
Common resin projects generally fall into a few primary categories:
- Jewellery and Small Accessories: Items like earrings, pendants, and keychains require small, high-precision moulds. These must have flawless interior surfaces because even microscopic scratches will be highly visible on tiny pieces.
- Medium Functional Homeware: Coasters, soap dishes, and trinket trays require moulds with perfectly flat bases. Any warping or bowing in the mould will result in an even finished product that wobbles on flat surfaces.
- Large Decorative Castings: Deep flower preservation blocks, bookends, and large paperweights require heavy-duty moulds. These must be structurally reinforced to hold several kilograms of liquid resin without bulging.
The intended use of your piece also determines your safety requirements. If you plan to craft functional kitchenware like cheese boards or fruit platters where food makes direct contact, you must choose a mould made from food-grade silicone. Additionally, the resin you select must be explicitly certified as food-safe once fully cured. For wearable items like rings or bracelets that sit against the skin, ensuring the mould is free from toxic chemical fillers prevents skin irritation.
Finally, consider your production scale. If you are crafting a one-off gift, an individual single-cavity mould is a cost-effective choice. However, if you are running a small craft business and need to produce items in batches, investing in multi-cavity moulds is highly recommended. Multi-cavity moulds allow you to pour multiple identical pieces from a single batch of mixed resin, saving you time and ensuring consistent colour and curing across your entire product line.
Evaluate Silicone Thickness and Flexibility
Silicone is the undisputed standard material for resin crafting due to its exceptional flexibility, heat resistance, and natural non-stick properties. Cured resin does not easily adhere to silicone, allowing you to peel the mould away without damaging your finished piece. However, understanding the differences in silicone thickness and flexibility is crucial for crafting success.

When browsing options, you will find a clear distinction between thin-walled and thick-walled silicone moulds:
- Thin Silicone Moulds: These are highly flexible, lightweight, and generally more affordable. They are incredibly easy to demould because you can peel them back like a glove. However, thin silicone lacks structural integrity. When filled with heavy liquid resin, the walls can bow outward, resulting in distorted shapes and uneven edges. They are best suited for small, shallow projects like jewellery or thin coasters.
- Thick Silicone Moulds: These feature robust, sturdy walls that maintain their shape under the weight of a heavy pour. They are essential for deep-pour projects, large trays, and geometric shapes where straight lines and sharp angles are critical. While they are more expensive, they offer superior durability and resist warping over multiple uses.
Another key specification to consider is the Shore hardness of the silicone. Shore hardness measures how resistant the material is to indentation and stretching.
Softer silicone (typically rated Shore 15A to 20A) is highly elastic and stretches easily. This is vital for complex, three-dimensional designs with deep crevices or undercuts, such as detailed figurines, flowers, or intricate crystals, as it allows you to pull the mould over complex edges without tearing the silicone.
Firmer silicone (rated Shore 30A to 40A) is much stiffer and provides excellent structural support. This is the ideal choice for simple geometric shapes, coasters, and large frames where flat surfaces and crisp edges are required.
You should generally avoid using rigid, non-silicone materials like hard plastic or acrylic moulds unless you are prepared to use a dedicated mould release agent. Without a proper release spray, epoxy resin will bond permanently to rigid plastics, ruining both your cured piece and the mould during extraction. Silicone remains the safest, most reliable choice for both beginners and experienced crafters alike.
Calculate the Right Size and Pour Depth
One of the most common mistakes in resin crafting is mismatching the mould depth with the type of resin being used. Resin curing is a chemical process known as an exothermic reaction, which generates heat as the liquid polymerizes into a solid. The deeper the mould, the more heat is trapped within the resin mass, which can lead to serious curing issues.
If you pour a standard epoxy resin designed for thin coatings into a deep mould, the heat can build up rapidly. This can cause the resin to flash-cure, resulting in severe shrinkage, deep cracks, yellowing, or even smoking. To prevent this, you must match your mould depth to your resin type:
- Shallow Moulds (under 1 cm): Ideal for coasters, jewellery, and shallow trays. You can safely use standard, fast-curing epoxy resin or UV resin.
- Deep Moulds (over 2 cm): Required for paperweights, flower preservation, and deep geometric shapes. You must use a specialized deep-pour epoxy resin, which is formulated to cure slowly over 48 to 72 hours, releasing heat gradually. Alternatively, you can pour standard resin in multiple thin layers, allowing each layer to cool completely before adding the next.
Calculating the volume of your mould is also essential for managing your materials and workspace. To estimate how much resin you need, you can measure the mould’s dimensions and calculate its volume, or simply fill the mould with water and pour it into a measuring cylinder. For example, if your mould holds 250 ml of water, you will need approximately 250 grams of mixed resin. Knowing this volume beforehand prevents you from mixing too much resin—which leads to expensive waste—or mixing too little, which forces you to quickly mix a second batch while the first is already beginning to gel.
In warm and humid climates, resin can cure faster than the manufacturer’s stated times. High ambient temperatures accelerate the chemical reaction, giving you a shorter working time (pot life). Therefore, managing your pour volume and depth is even more critical to avoid overheating.
Additionally, you must account for slight resin shrinkage. Resin naturally shrinks by about 0.5% to 2% as it cures. If you are casting a piece that needs to fit precisely into a metal bezel, a wooden tray insert, or a clock mechanism, choose a mould that is slightly larger than your hardware to compensate for this shrinkage.
Match the Surface Finish and Detail Level
The interior surface of your resin mould acts as a mirror image for your finished piece. Every texture, scratch, or polish on the inside of the silicone will transfer perfectly to the cured resin. Therefore, you must match the mould’s interior finish with your desired aesthetic outcome.
Mould interiors generally fall into two categories:
- Glossy Interiors: These moulds have a highly polished, glass-like inner surface. When your resin cures, it emerges with a perfectly shiny, reflective finish that looks professional and requires no additional polishing. This is the preferred choice for jewellery, coasters, and decorative crystals.
- Matte Interiors: These moulds have a slightly textured, satin, or frosted inner surface. Resin cast in these moulds will have a dull, frosted, or soft-touch finish. While this can look highly artistic for certain modern designs, if you want a glossy finish, you will have to spend hours sanding the piece with ultra-fine sandpaper and applying a glossy topcoat (a process known as doming).
The level of detail in your mould also dictates the pouring technique and resin viscosity you must use. Highly intricate moulds with deep crevices, fine text, or complex patterns are prone to trapping air bubbles. High-viscosity (thick) resins struggle to flow into these tiny spaces, leaving unsightly voids on the surface of your finished piece.
For highly detailed designs, choose a low-viscosity (thin) resin that flows easily. When pouring, fill the mould slowly from one corner, and use a silicone brush, a toothpick, or a wooden skewer to gently push the resin into the deep details, releasing any trapped air bubbles before the resin begins to set.
Before pouring, always inspect the mould cavity under a bright light. Look for manufacturing defects such as seam lines, parting lines, or micro-scratches. Cheaply made moulds often have these imperfections, which will transfer permanently to your resin. If you spot a prominent seam line, you can trim it carefully with a craft knife before pouring, or prepare to sand it down on the cured piece later.
Inspect the Design for Easy Demoulding
A beautiful mould design is useless if you cannot safely extract the cured resin without destroying the mould or breaking your finished piece. Before purchasing, you must evaluate the structural design of the mould to ensure it allows for easy demoulding.
One of the most important design features to look for is a draft angle. A draft angle is a slight taper on the vertical walls of the mould, making the top opening slightly wider than the bottom base. This subtle slope is incredibly helpful. When you pull the silicone walls outward, the tapered shape immediately breaks the vacuum and releases the resin, allowing it to slide out effortlessly. Moulds with perfectly vertical 90-degree walls create intense suction and friction, making extraction a frustrating struggle, especially for rigid resins.
You should also learn to identify problematic design features that make demoulding highly difficult:
- Severe Undercuts: An undercut is any area where the mould curves inward, trapping the cured resin beneath a lip of silicone. While highly flexible silicone can stretch around undercuts, rigid or thick silicone will lock the piece in place, risking tears.
- Narrow Necks: Designs like bottles, vases, or deep spheres often have a wide body but a very narrow neck. Pulling a wide, cured resin piece through a narrow silicone neck requires immense force and highly elastic silicone. If the silicone is too stiff, the neck will tear during demoulding.
- Inward-Curving Lips: These create a hook-like effect that grabs onto the cured resin.
To make demoulding safer and easier, look for moulds that feature built-in structural supports. High-quality moulds often have reinforced rims, wide outer flanges, or dedicated pull tabs. These features give your fingers a secure grip, allowing you to peel the silicone back safely without slipping and scratching the cured resin.
For highly complex or deep three-dimensional designs, consider using a high-quality mould release spray. Applying a light mist of release agent before pouring creates a microscopic barrier that prevents sticking and dramatically extends the lifespan of your silicone mould.
Quick Checklist for Inspecting a New Mould
When you receive a new resin mould, it is highly recommended to perform a thorough quality inspection before mixing and pouring your resin. This quick checklist will help you identify any defects or issues that could ruin your craft project.
- Visual Inspection: Hold the mould up to a bright light source. Check the interior cavity carefully for any dust, lint, hair, or manufacturing residue. Even a tiny speck of dust will leave a permanent, visible dimple on a glossy resin surface. Also, look closely at the silicone walls for any trapped air bubbles from the manufacturing process; if these bubbles are close to the inner surface, they can rupture under the pressure of liquid resin.
- Tactile Check: Run your fingers gently along the interior walls and bottom of the cavity. Feel for consistent wall thickness and smooth transitions. Ensure there are no micro-tears, thin spots, or rough patches that could fail or cause the resin to stick during demoulding.
- Flex Test: Gently bend, twist, and stretch the mould. A high-quality silicone mould should be highly elastic and immediately return to its original shape without leaving permanent creases or distortions. If the silicone turns white or shows stress marks when stretched, it indicates the presence of cheap plastic fillers, which will degrade rapidly when exposed to the heat of curing resin.
- Compatibility Check: Verify the manufacturer's specifications on the packaging or official product page. Ensure the mould material is explicitly compatible with your specific type of resin (e.g., epoxy, polyurethane, or UV resin). Some polyurethane resins can react aggressively with certain silicone formulations, causing the mould to degrade or stick permanently. Ensure the mould can withstand the curing temperatures of your chosen resin.
Frequently Asked Questions (FAQ)
Can I use the same resin mould for both epoxy and UV resin?
Yes, high-quality silicone moulds are generally compatible with both epoxy and UV resin, but there are important physical limitations to consider. UV resin requires ultraviolet light to cure, which means the light must be able to penetrate the mould to reach the resin from all angles. For UV resin, you must use thin, highly translucent or clear silicone moulds. If you use a thick, opaque, or coloured mould, the UV light will be blocked, leaving the back and center of your resin sticky and uncured. Additionally, UV resin cures extremely fast and generates intense, rapid heat, which can degrade thin silicone moulds much faster than slow-curing epoxy resin.
How do I verify if a resin mould is food-safe?
To verify if a resin mould is food-safe, you must check the manufacturer’s official product specifications and safety data sheets for explicit food-grade certifications, such as FDA compliance or LFGB approval. Do not assume a mould is food-safe simply because it is made of silicone, as many craft-grade moulds contain chemical fillers, colorants, or plasticizers that can leach into food. Furthermore, a food-safe mould is only half of the equation; the resin you pour into it must also be explicitly certified as food-safe once fully cured. If either the mould or the resin lacks official certification, the finished piece should only be used for decorative purposes and never come into contact with food or beverages.
Community discussion
Share your experience or ask a question. Comments are reviewed before publication.