
Selecting the correct mounting board for your child’s school project depends on the specific assignment guidelines, the typical expectations for their grade level, and the intended display method. While teachers usually provide a project brief with exact dimensions, understanding the general progression of project complexity across different educational stages in Singapore helps you stock the right materials, verify requirements, and avoid last-minute stationery runs. The right choice ensures the project remains structurally sound, looks professional, and survives the journey to school.
Understanding Mounting Board Types and Materials
To choose the right base for a school project, you must first understand the three primary types of mounting boards available in local stationery shops: illustration board, foam board, and corrugated plastic board. Each material offers distinct advantages depending on the weight of the display items and the media your child plans to use.
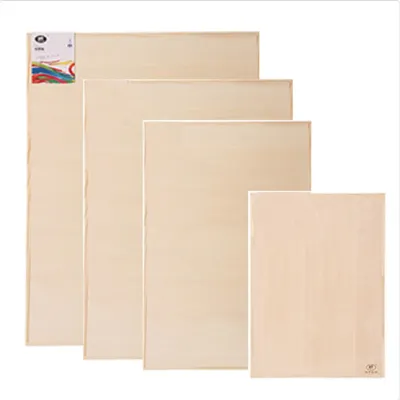
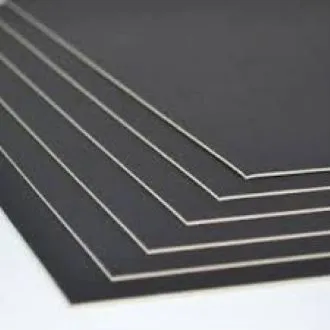
Illustration board is a dense, solid paperboard available in various thicknesses. It features a smooth or slightly textured paper surface on one or both sides, making it highly suitable for direct drawing, sketching, and painting. Because it lacks a foam core, it is relatively heavy but thin, offering excellent resistance to bending. However, because it is solid, cutting through thicker illustration boards requires significant force and a very sharp blade.
Products mentioned in this guide
Prices are valid at publication and may change. Please refer to the product page for the latest price.
Foam board, often referred to as foam-core, consists of a lightweight polystyrene foam center sandwiched between two sheets of smooth paper. This structure makes it incredibly light and rigid, allowing even large sheets to remain flat without sagging. It is the easiest material to cut cleanly, making it a favorite for quick school projects. However, the paper surface is susceptible to moisture, and the inner foam core can melt if it comes into contact with solvent-based glues or hot glue guns.
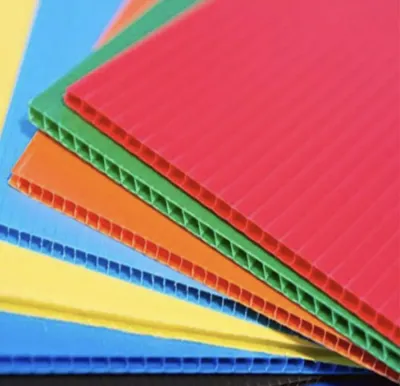
Corrugated plastic board, commonly known as PP (polypropylene) hollow board, is a durable, waterproof option featuring parallel flutes running through its center. It is virtually tear-proof and highly resistant to impact, making it ideal for projects that require heavy 3D attachments or outdoor displays. Cutting corrugated plastic requires a sturdy utility knife and careful guidance along the flutes to avoid jagged edges.
When selecting a board, consider how the surface material interacts with your child’s chosen media. Since smoothness, ink drying speed, and bleed resistance depend on the exact combination of paper coating and marker type, it is always best to perform an observable trial. Have your child test their markers, paints, or adhesives on a small scrap piece of the board first. This simple check ensures the ink does not bleed through or warp the surface before they commit to the final layout.
Matching Board Sizes and Types to Grade Levels
As children progress through the school system, the complexity, scale, and presentation standards of their projects evolve. Matching the mounting board to their specific grade level ensures they have a manageable canvas that meets academic expectations.

In primary school (Primary 1 to Primary 6), projects are typically highly guided and focus on developing basic research and presentation skills. Teachers often specify smaller formats, such as A4 or A3, which fit easily on standard classroom desks and are manageable for younger children to carry. For these younger students, lightweight illustration boards or thin 3mm foam boards are ideal. They provide enough rigidity for light paper cut-outs, drawings, and printed text sheets without adding unnecessary weight to a school bag. At this stage, ease of handling is paramount, and complex structural support is rarely required.
In secondary school (Secondary 1 to Secondary 4 or 5), projects become more independent and multidisciplinary. Subjects like Design & Technology (D&T), Geography, History, and Art frequently require students to present detailed infographics, historical timelines, or design concepts. The standard size requirement typically increases to A2 or A1 to accommodate more comprehensive information. For these larger formats, 5mm foam board or corrugated plastic board is highly recommended. These sturdier materials can support heavier attachments, such as small wooden prototypes, clay models, or interactive flaps, without bowing or collapsing under the weight.
For pre-university and polytechnic students (Junior College, Millennia Institute, and Polytechnic courses), the focus shifts toward professional-grade presentation and portfolio development. Projects at this level are often displayed in public exhibitions, graded by external examiners, or used for university admissions. Students require pristine, warp-free boards that showcase high-resolution prints and precise layouts. High-density, acid-free foam boards or self-adhesive mounting boards are the standard choice here. These professional boards allow students to mount printed graphics smoothly without air bubbles, ensuring clean, crisp edges that withstand close scrutiny.
How to Verify Project Requirements Before Buying
Purchasing the wrong type or size of mounting board can lead to wasted materials and unnecessary stress. Before visiting a stationery store, take a few minutes to verify the exact project parameters.
Start by carefully reviewing the teacher’s project brief, rubric, or syllabus handbook. Look for specific constraints regarding dimensions, thickness, and color. For instance, some rubrics explicitly state that only white or black backgrounds are permitted to ensure readability, while others might allow colored boards for creative expression. If the brief specifies an exact size like A2, do not assume an A3 board will suffice; teachers often design display spaces or grading templates around these standardized dimensions.
Next, assess how the final project will be displayed in the classroom or exhibition hall. If the project must stand independently on a table, your child will need a thicker, more rigid board—such as a 5mm foam board—or a specialized tri-fold presentation board. If the project is meant to be pinned to a corkboard or taped to a wall, a lightweight illustration board or 3mm foam board is a safer choice. Heavy boards often slide down or fall off walls because standard classroom adhesives cannot support their weight over time.
Finally, check if the school cooperative or bookshop provides standardized project packs or mandates specific brands. In Singapore, certain national coursework modules require specific materials approved by examining bodies. Verifying these details beforehand ensures your child’s project complies with all official guidelines and is eligible for full marks.
Practical Tips for Cutting, Storing, and Transporting
Once you have selected the correct mounting board, proper handling is essential to keep it in pristine condition from the drafting table to the classroom.
Cutting mounting boards cleanly requires the right tools and safety precautions. Always use a sharp utility knife or craft knife paired with a heavy metal safety ruler. Avoid using plastic rulers, as the blade can easily shave off the plastic edge, leading to crooked cuts and potential slips. Always place a dedicated cutting mat underneath the board to protect your furniture. Because cutting thick foam or plastic boards requires steady pressure and a sharp blade, primary school students should never perform this task alone. Parents must provide close supervision or handle the cutting themselves to ensure safety and straight edges.
Storing mounting boards correctly is crucial, especially in Singapore’s humid tropical climate. Paper-faced boards readily absorb moisture from the air, which can cause them to bow or warp even before any glue is applied. Store your boards completely flat on a dry, level surface, away from open windows, damp floors, and direct sunlight. To keep them perfectly flat, you can place a few heavy, flat books evenly across the surface of the board during storage.
Transporting a completed project to school without damage requires careful planning. Large, rigid boards are highly susceptible to crushed corners and moisture damage from sudden rain showers. Invest in a weather-resistant plastic portfolio bag or a rigid carrying case that matches the size of the board. If your child must travel on public transport or a school bus, a protective sleeve will shield the project from being bent or scratched by other commuters’ bags, ensuring it arrives at school looking as professional as it did at home.
Frequently Asked Questions (FAQ)
Can I use recycled cardboard instead of a proper mounting board?
While recycled cardboard from shipping boxes is excellent for rough drafts, internal structural supports, or 3D model bases, it is generally not suitable for final school project submissions. Standard cardboard features visible internal ridges (corrugation) that telegraph through paper, making it difficult to write, draw, or glue items smoothly. Manufactured mounting boards provide a perfectly flat, uniform surface that ensures a professional presentation and prevents adhesives from peeling off over time.
How do I prevent the mounting board from warping over time?
Warping is typically caused by uneven moisture absorption, which is accelerated by high humidity and the use of wet adhesives. To prevent warping, avoid using liquid school glues or heavy water-based paints directly on paper-faced boards. Instead, use dry adhesives such as double-sided tape, glue sticks, or dry-mount adhesive sheets. Additionally, store the boards horizontally in a dry, air-conditioned room whenever possible, keeping them flat under a light, even weight until they are ready to be submitted.
Community discussion
Share your experience or ask a question. Comments are reviewed before publication.