
Selecting the right metal snap button kit size is the difference between a professional, durable closure and a ruined sewing project. If the snap is too large or heavy, it will distort the fabric, cause sagging, or eventually tear through the fibers. Conversely, a snap that is too small or has an inadequate post length will fail to hold the layers together, popping open under the slightest tension. To make the correct choice, you must evaluate your fabric’s characteristics, match the snap dimensions to the compressed thickness of your material, and ensure your setting tools are fully compatible with your hardware.
Assess Your Fabric and Project Requirements
Before purchasing a metal snap button kit, you must carefully analyze the physical properties of the fabric you are using. The weight, weave density, and total number of layers at the closure point dictate the physical demands placed on the snap. For instance, lightweight fabrics like cotton lawn, voile, or delicate silks require small, low-profile snaps that do not weigh down the garment. Medium-weight fabrics such as linen, quilting cotton, or light canvas can support standard utility snaps, while heavy-weight materials like denim, thick canvas, or leather demand heavy-duty fasteners with robust posts.
You must also calculate the exact number of fabric layers that will sit between the snap components. A typical closure consists of at least two layers of fashion fabric plus one or two layers of interfacing. Interfacing is crucial when installing metal hardware; it stabilizes the weave and prevents the metal prongs or posts from cutting through the fabric fibers over time. In Singapore’s warm and humid climate, lightweight and breathable interfacings are often preferred to keep garments comfortable while still providing the necessary structural support for metal fasteners.
Products mentioned in this guide
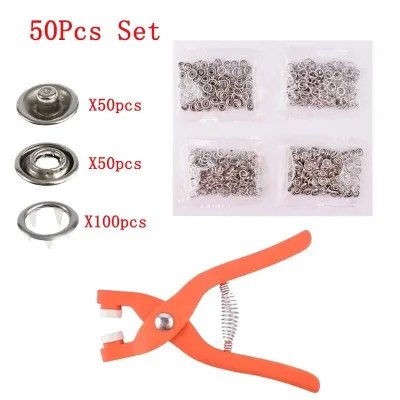
Prices are valid at publication and may change. Please refer to the product page for the latest price.
Furthermore, consider the end-use stress of the finished item. Baby clothes and children’s wear undergo frequent pulling and washing, requiring gentle, low-profile snaps—often open-ring prong snaps—that are easy to open but secure enough to stay closed during play. On the other hand, static closures on home textiles, such as cushion covers or duvet casings, experience less frequent operation but require a secure hold that will not slip under tension. Outerwear like jackets or windbreakers requires heavy-duty spring snaps that can withstand strong winds and active movement.
Match Snap Button Sizes to Fabric Thickness
Once you have assessed your fabric, you must match the snap button size to the total compressed thickness of your material. Metal snaps are generally categorized by their diameter, often measured in millimeters or using the traditional Ligne sizing system. Common sizes found in a standard metal snap button kit include Size 12 (approx. 9mm), Size 15 or 16 (approx. 10mm to 11mm), Size 20 (approx. 12.5mm), and Size 24 (approx. 15mm).

The most critical dimension to verify is the post length of the snap. The post is the central shaft that penetrates the fabric layers to connect the cap to the socket, or the stud to the post. For a secure installation, the post must extend past the compressed fabric layers by approximately 1.5mm to 2mm. This extra length is what the setting tool rolls, flattens, or splits to lock the components together. If the post is too short, it will not reach far enough to grip the opposing piece, causing the snap to fall off. If the post is too long, the excess metal will bend or collapse unevenly during installation, resulting in a loose, wobbly snap that can snag on threads.
To avoid guesswork, consult the manufacturer’s sizing charts on the kit packaging. These charts typically correlate specific snap sizes with recommended fabric weight categories. As a general rule, reserve Size 12 and Size 15 snaps for lightweight fabrics and baby items. Use Size 16 and Size 20 snaps for medium-weight everyday garments, shirts, and light home decor. Reserve Size 24 and larger snaps exclusively for heavy-duty applications like thick jackets, bags, and outdoor gear. Using an oversized snap on a lightweight fabric will inevitably lead to fabric distortion and tearing around the installation site.
Evaluate Kit Composition and Tool Compatibility
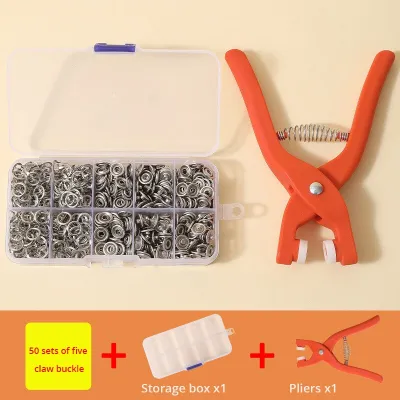
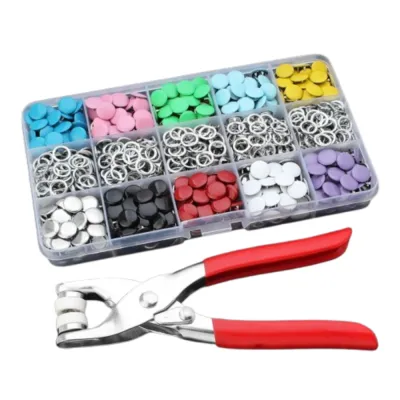
A comprehensive metal snap button kit should provide not only the snap components but also the specialized tools required for installation. When evaluating a kit, first calculate the total number of closures your project requires. Always choose a kit that offers a generous buffer—ideally 5 to 10 extra snap sets beyond your project’s requirements. This buffer allows you to perform test installations and accounts for any mistakes made during the learning process.
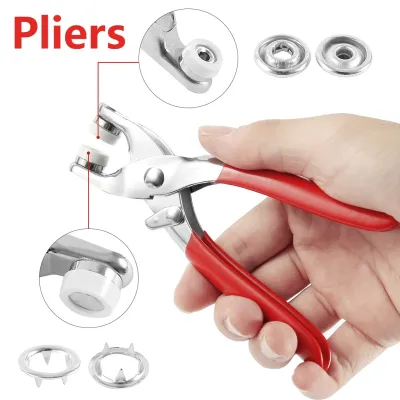
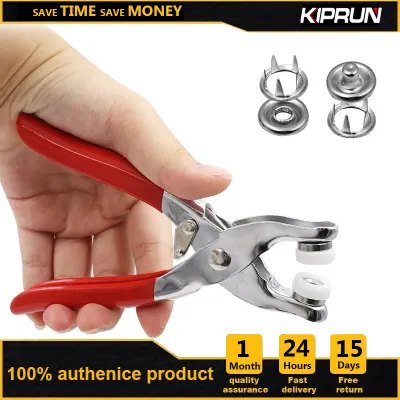
Next, verify the type of setting tools included in the kit. Metal snaps cannot be installed with standard sewing tools; they require specific pressure to deform the metal posts or prongs securely. Basic kits often include a manual punch and anvil set, which you strike with a hammer. While budget-friendly, this method requires a steady hand and a hard, protected surface. More advanced kits feature specialized snap fastener pliers or heavy-duty hand press machines. Pliers offer greater control and are quieter to use, making them highly suitable for home sewing spaces.
Ensure that the setting tools or pliers are directly compatible with the snap sizes included in the kit. Many high-quality kits feature interchangeable dies, allowing you to swap out the plastic or metal molds to accommodate different snap diameters, such as switching from a 9.5mm prong snap die to a 12.5mm utility snap die. If you plan to work on a variety of projects over time, investing S$20 to S$40 in a versatile kit with interchangeable dies and a sturdy pair of pliers is far more cost-effective than buying individual single-size kits.
Pre-Installation Testing and Verification
Never install a metal snap directly onto your finished sewing project without performing a test run first. Because metal snaps permanently deform during installation, removing a misplaced or poorly set snap is incredibly difficult and often leaves a permanent hole in your fabric. To prevent this, construct a test swatch that replicates the exact conditions of your final project.
Cut scraps of your project fabric and layer them precisely as they will be configured on the finished item, including any fusible or sew-in interfacing. Use the tools provided in your metal snap button kit to install a complete snap set onto this test swatch. Pay close attention to the amount of pressure required to set the snap; under-squeezing leaves the snap loose, while over-squeezing can crack plastic-capped snaps or distort metal prongs.
Once installed, evaluate the test snap thoroughly. Open and close the snap at least ten times to check its operation. The closure should feel secure and snap shut with a distinct click, yet release without requiring so much force that the surrounding fabric stretches or distorts. Examine the back of the snap to ensure the prongs or post have flattened smoothly against the fabric without leaving sharp edges that could scratch the skin or snag other garments. If the fabric puckers, consider adding a stronger stabilizer. If the snap pulls free from the fabric, you may need a snap with a longer post or a different prong configuration.
Frequently Asked Questions (FAQ)
Can I use the same metal snap size for both woven and knit fabrics?
While you can sometimes use the same diameter snap, the installation method and snap style must be adjusted for knit fabrics. Knit fabrics stretch and have open loops that can easily slip past metal prongs, leading to the snap pulling out. When working with knits, you must apply a fusible stabilizer or knit interfacing to the snap area to lock the loops in place. Additionally, open-ring prong snaps are generally preferred for knits because the multiple small prongs grip the fabric fibers without cutting them, whereas heavy post-style snaps are better suited for stable woven fabrics.
What should I do if the snap button post is too short for my thick fabric?
If the snap post does not extend at least 1.5mm past your compressed fabric layers, do not attempt to force the installation. Forcing a short post will result in an insecure connection that will quickly fail during use, potentially damaging your fabric and your setting tools. Instead, check your kit for alternative long-post snap variants designed specifically for thick materials. If none are available, you can carefully trim away excess seam allowance bulk inside the fabric layers at the exact spot where the snap will be installed, or use a small hammer to gently compress the fabric layers before setting the snap.
Community discussion
Share your experience or ask a question. Comments are reviewed before publication.