
To choose the right magnetic button for your bag-making projects, you must balance the installation method, physical dimensions, magnetic pull strength, and the weight of your fabric. Selecting the wrong hardware can lead to torn linings, weak closures, or bulky seams that ruin the silhouette of your handmade bag. By matching the button type to your specific material and reinforcing the installation point, you ensure a secure, professional-grade closure that withstands daily wear.
Whether you are crafting a delicate evening clutch, a rugged waxed canvas backpack, or a structured leather tote, the closure is one of the most frequently touched parts of the finished piece. High-quality hardware not only elevates the overall aesthetic but also determines how long the bag remains functional. Understanding the technical specifications of magnetic snaps allows you to make informed purchasing decisions at local haberdashery shops or online marketplaces.
Identify the Right Magnetic Button Types for Your Project
Selecting the correct structural type of magnetic button is the first step in planning your bag’s construction. The installation method must align with your fabric choice, the bag’s structural design, and your comfort level with cutting into your project.
Products mentioned in this guide
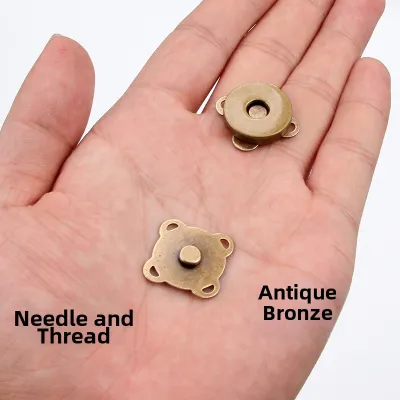
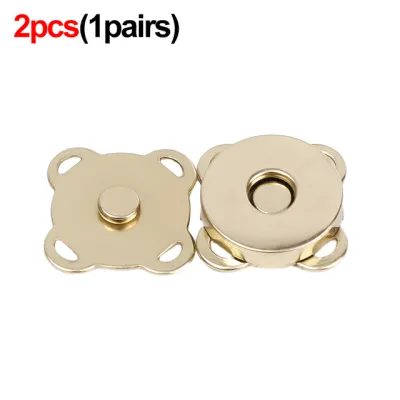
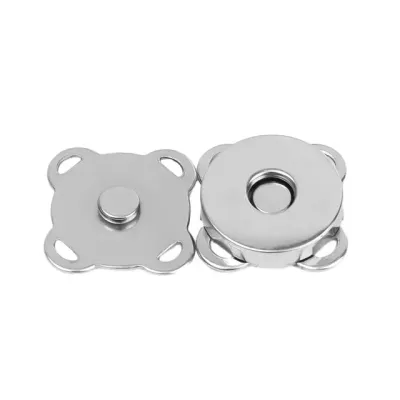
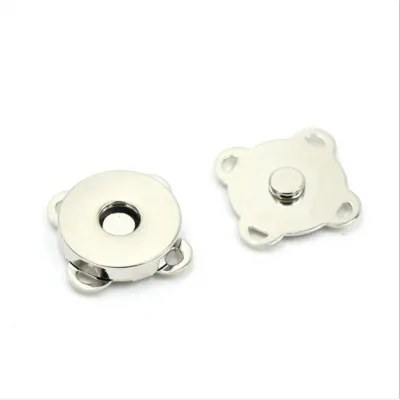
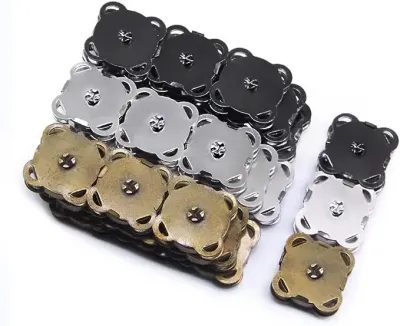
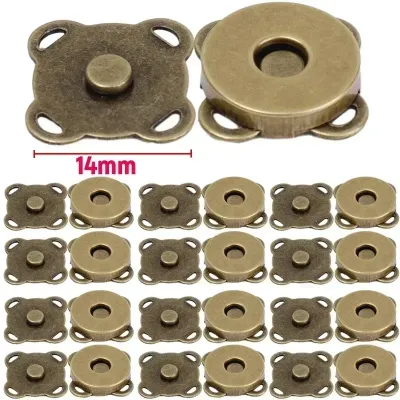
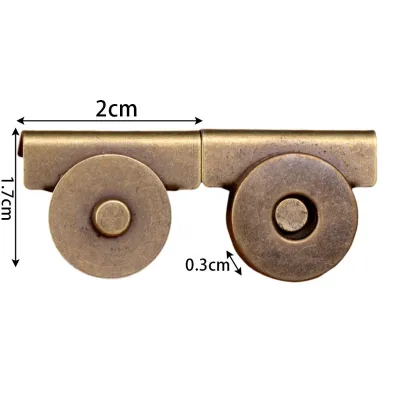
Prices are valid at publication and may change. Please refer to the product page for the latest price.
Prong (claw) magnetic buttons are the most common and widely available style in the bag-making community. These buttons feature two flat metal prongs extending from the back of the button face. To install them, you cut two tiny slits in your fabric, push the prongs through to the wrong side, slide a metal backing washer over them, and fold the prongs flat. This mechanical connection is incredibly secure, making prong buttons ideal for medium to heavy materials like denim, canvas, and structured leather. They are particularly well-suited for bag flaps and main closures that experience direct, repetitive pulling forces.
Sew-on magnetic snaps offer an alternative that completely avoids the need to cut into your fabric. These snaps are typically encased in a small, square plastic or vinyl flange, or they feature pre-drilled holes along a decorative metal rim. You stitch them directly onto the lining or facing of the bag. This method is highly advantageous for delicate fabrics, silk linings, or thin synthetic materials where cutting slits would inevitably lead to fraying and structural failure. Sew-on snaps are also the preferred choice for waterproof or water-resistant fabrics, as they preserve the integrity of the moisture barrier without creating puncture holes.
Hidden versus exposed designs allow you to control the visual impact of your hardware. Hidden magnetic snaps are designed to be sewn between the outer fabric and the lining, making them completely invisible when the bag is closed. This creates a sleek, minimalist aesthetic perfect for modern clutches and high-end fashion bags. However, because the magnetic field must pass through layers of fabric, hidden snaps require significantly stronger magnets to function effectively. Exposed magnetic buttons, conversely, are meant to be seen. They act as functional design accents, adding a classic, utilitarian look to the bag’s exterior while providing a direct, metal-to-metal contact that maximizes holding power.
Key Specifications to Check Before Buying
Before purchasing magnetic buttons, you must evaluate their physical and magnetic specifications to ensure they fit your design and perform reliably under daily use.

Diameter and thickness are the primary physical dimensions to consider. Magnetic buttons generally range from 10mm to 20mm in diameter. A small 10mm or 12mm button is perfect for delicate coin purses, internal pocket closures, or small wallets where a larger button would look disproportionate and add unnecessary weight. For standard everyday totes, crossbody bags, and messenger flaps, a 14mm or 18mm button is the industry standard, offering a balanced visual scale and a secure grip. Thickness is equally critical; standard profile buttons can create a noticeable bulge on a sleek flap, whereas ultra-thin profiles sit flush against the fabric, preserving a clean line.
Holding force and magnetic strength determine how well the bag stays closed when fully loaded. While exact pull force ratings are rarely printed on consumer packaging, you can generally choose between standard ferrite magnets and strong neodymium (rare-earth) magnets. Standard magnets are perfectly adequate for lightweight closures, small pouches, or bags with secondary closures like zippers. However, for large tote bags, heavy-duty backpacks, or designs where the opening is under constant tension, neodymium magnets are highly recommended. They provide a powerful, snap-shut hold that prevents the bag from spilling its contents if dropped or jostled.
Base material and plating quality directly impact the durability and appearance of your hardware. The core of the button is typically made from brass, iron, or zinc alloy. Brass is the premium choice due to its natural resistance to rust and corrosion, while zinc alloy offers excellent structural strength. The outer plating provides the final color and finish, with popular options including antique brass, gunmetal, nickel, and gold. In humid environments, such as Singapore’s tropical climate, choosing high-quality brass-based hardware is essential. Lower-grade iron-based buttons will quickly oxidize when exposed to atmospheric moisture, leading to stiff operation and rust stains that can ruin expensive fabrics.
Match the Button to Your Fabric and Bag Design
A successful bag design requires a harmonious pairing between the weight of your fabric and the strength of your magnetic closure. Installing a heavy, high-strength button on a delicate fabric without proper planning is a recipe for structural failure.
Fabric weight and stabilization must always be addressed during the construction phase. If you install a strong prong magnetic button directly onto a thin cotton lining, the constant pulling action of opening the bag will quickly tear the fabric fibers around the metal prongs. To prevent this, you must stabilize the area. For lightweight fabrics, always fuse a square of firm interfacing or place a small scrap of real leather, vinyl, or heavy canvas behind the button on the wrong side of the fabric. This reinforcement distributes the pulling force across a wider surface area, protecting the delicate lining from stress tears.
Bag style alignment should dictate the size and strength of the hardware you select. A lightweight evening clutch or a soft, slouchy hobo bag only requires a small, low-profile magnet to keep the opening neat. In contrast, a structured briefcase or a heavily loaded crossbody bag needs a robust, heavy-duty closure. If you are designing a bag with a deep flap, a single medium-sized magnet placed near the bottom edge is often sufficient. For wide-mouth tote bags without a zipper, installing two smaller magnetic buttons spaced evenly along the rim can provide a more secure and balanced closure than a single large magnet in the center.
Stress and wear factors play a major role in the longevity of your handmade bag. Analyze the direction of force when the bag is opened. A direct, perpendicular pull puts the maximum amount of stress on the fabric and the prongs. If possible, design your bag with a tab, strap, or flap that allows the user to slide the magnet apart laterally (shear force) rather than pulling it straight open. This simple design adjustment significantly reduces the strain on the fabric fibers and extends the overall lifespan of both the hardware and the bag.
Quality Indicators and Red Flags to Watch For
When sourcing magnetic buttons from specialty craft suppliers or online marketplaces, knowing how to spot high-quality hardware will save you from future project failures.
Magnet encasement and sealing is the first detail to inspect. High-quality magnetic buttons feature a fully sealed, smooth metal casing that completely encloses the internal magnet. If you notice visible gaps, loose edges, or exposed magnetic material along the seams, avoid using them. Poorly sealed casings allow moisture to seep inside, leading to internal corrosion. Over time, this rust will degrade the magnetic field and cause orange-brown stains to bleed through your fabric, which is nearly impossible to remove without damaging the bag.
Prong and backing plate integrity can be assessed by handling the hardware before installation. The prongs should feel sturdy and resistant to casual bending, yet pliable enough to be folded flat with a pair of pliers. If the prongs feel brittle or show signs of hairline cracks near the base, they are likely to snap during installation or after a few weeks of use. Additionally, examine the backing washers. They should be thick, completely flat, and free of sharp, rough edges. A backing plate with sharp edges will act like a blade, slowly cutting through your stabilizing interfacing and fabric every time the bag is opened.
Corrosion resistance is a vital consideration, especially for bags intended for daily use in warm, humid climates. When shopping, look for hardware explicitly labeled as rust-resistant or solid brass. If the material is not specified, you can perform a quick check using a strong magnet. Solid brass and high-quality zinc alloys are non-magnetic; if your test magnet clings tightly to the outer casing of the button (excluding the active magnetic face itself), the hardware is made of iron or steel and is highly susceptible to rusting if the plating wears thin. Investing a few S$ more in premium, rust-proof hardware is always a wise safeguard for your hard work.
Installation Requirements and Hardware Compatibility
Installing magnetic buttons securely requires the right tools and a systematic approach to reinforcing the fabric layers. Proper installation ensures the hardware remains flush and functional for years.
Necessary tools for basic prong button installation are simple and readily available in most sewing kits. You will need a marking pen to plot the exact placement, a sharp awl or a pair of small embroidery scissors to cut the slits, and a pair of flat-nose pliers to fold the prongs. To protect the metal finish of the button from scratches while using pliers, place a scrap piece of fabric or leather over the prongs before squeezing them. For professional bag makers or those producing items for sale, investing in a hand press machine with dedicated magnetic button dies can streamline the process and ensure a perfectly flush, uniform finish.
Interfacing and reinforcement are non-negotiable steps in the installation process. Before cutting any slits for a prong button, fuse a square of heavy-duty stabilizer—such as Decovil, Peltex, or a firm woven interfacing—to the wrong side of the fabric. Once the slits are cut and the prongs are inserted, slide a small scrap of non-fraying material, like vinyl or real leather, over the prongs before adding the metal backing washer. This “sandwich” method cushions the metal hardware against the fabric, preventing the backing plate from wearing a hole in your lining over time.
Troubleshooting fit issues is a common part of the assembly process, especially when working with thick materials like foam stabilizer, fleece, or multiple layers of heavy canvas. If you find that the prongs are too short to fold over the backing plate securely, do not attempt to force them. Instead, use a warm iron or a mallet to compress the fabric layers at the installation point, or carefully trim away a small circle of the inner foam stabilizer to reduce the bulk. If the prongs are too long and the backing plate sits loosely, add extra layers of leather or heavy interfacing scraps over the prongs to act as spacers until the connection is tight and flush.
Frequently Asked Questions (FAQ)
Can magnetic buttons interfere with credit cards or phones inside the bag? (FAQ)
Standard magnetic buttons used in bag making generally have a low magnetic field strength that is highly unlikely to damage modern smartphones, tablets, or solid-state electronics. However, direct, prolonged contact with the magnetic strip on older credit cards, transit cards, or hotel keycards can occasionally cause demagnetization. To mitigate this risk, design your bag so that card slots and phone pockets are positioned away from the main closure, or use a slightly thicker lining fabric to act as a natural barrier.
How do I remove or replace a prong magnetic button without ruining the fabric? (FAQ)
To safely remove a prong button, slide a thin, flathead tool—such as a small screwdriver or a seam ripper—underneath the folded prongs on the backing plate. Gently pry the prongs upward until they are completely straight. Carefully slide the backing plate off, then pull the button out from the front of the fabric. If the fabric slits have stretched or frayed, reinforce the area by fusing a new patch of heavy interfacing over the holes before installing a replacement button.
Are sew-on magnetic snaps as strong as prong versions? (FAQ)
Sew-on magnetic snaps can be just as secure as prong versions, provided they are installed correctly. While prong buttons rely on a mechanical metal grip concentrated in two small slits, sew-on snaps distribute the pulling force across multiple stitches around the entire perimeter of the button casing. Using a strong, polyester thread and a tight, dense stitch pattern ensures that the snap remains firmly attached to the fabric, making it an exceptionally durable option for soft-sided bags.
Community discussion
Share your experience or ask a question. Comments are reviewed before publication.