
A garment needle clip—commonly referred to as a sewing clip, fabric clip, or binding clip—is a spring-loaded, flat-bottomed fastener designed to hold multiple layers of fabric together securely during the sewing process. Unlike traditional straight pins that pierce through fibers, these clips clamp onto the edges of your project, preserving the integrity of your material. Choosing the right type of clip depends on matching its size, jaw capacity, and spring tension to your fabric’s weight and the specific construction technique you are using. By understanding how these tools interact with different textiles, you can prevent fabric damage, maintain precise seam allowances, and streamline your assembly process.
What Are Garment Needle Clips and When Do You Actually Need Them?
To understand the value of a garment needle clip, it helps to examine its physical design. Most clips feature a flat plastic or metal base, a curved upper lever, and a small metal spring coil that provides clamping force. The flat base is engineered to slide smoothly along the bed of your sewing machine or overlock machine as you guide the fabric toward the needle. This flat profile prevents the fabric from lifting or shifting, maintaining a level plane that is crucial for even feeding.
The primary diagnostic signal for switching from traditional straight pins to garment needle clips is the material itself. When working with materials that suffer permanent damage from punctures, pins are no longer a viable option. Fabrics such as natural leather, synthetic vinyl, laminated cottons, polyurethane-coated waterproof fabrics, and delicate oilcloth will retain visible, irreparable pinholes if pierced. Using clips allows you to secure these challenging materials along the seam allowance without leaving a single mark on the finished garment.
Products mentioned in this guide
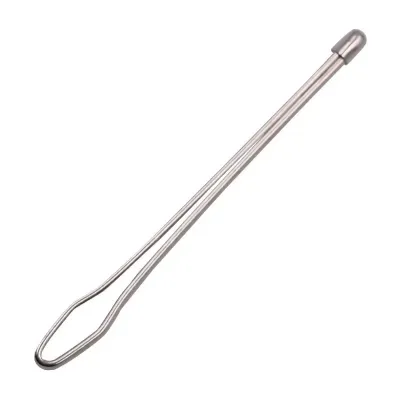
Prices are valid at publication and may change. Please refer to the product page for the latest price.
Another clear indicator for using clips is the sheer bulk of your project. When assembling thick layers—such as heavy denim seams, quilted jacket panels, or multi-layered bag straps—traditional straight pins often bend, warp, or fail to penetrate all layers. Even if a pin does pass through, it can distort the layers, causing the fabric to bunch and resulting in uneven seams. Garment needle clips provide a uniform, high-tension grip that holds thick or compressed layers completely flat, ensuring that the top and bottom layers feed through the machine at the exact same rate.
Despite these advantages, traditional pins still hold a vital place in your sewing toolkit. For tasks requiring micro-adjustments deep within the body of a garment—such as securing darts, pinning intricate applique, or gathering a sleeve cap—clips are impractical because they can only clamp along the outer edges of the fabric. Extremely lightweight, slippery woven fabrics like silk gauze or chiffon can also slip out of standard clips, making fine, sharp glass-head pins the superior choice for securing internal design lines.
Diagnosing Your Fabric: How to Match Clip Size and Grip to Material Weight
Before selecting a garment needle clip from your haberdashery collection, you must evaluate the physical characteristics of your fabric. This self-assessment involves analyzing three primary dimensions: thickness, compressibility, and surface sensitivity. Compressibility refers to how much the fabric layers flatten under pressure, while surface sensitivity dictates whether the fabric will retain temporary or permanent indentations from the clip’s jaws.

Lightweight and Delicate Fabrics (Silk, Chiffon, Lace)
When working with delicate textiles, the primary risks are fabric stretching, distortion along the bias, and unsightly jaw marks left by excessive spring tension. For these materials, mini or small-sized clips with a low-tension spring are highly recommended. These lightweight clips exert just enough pressure to hold thin layers together without crushing the delicate fibers or pulling the fabric out of alignment.
To prevent stretching or distorting the fabric, always place the clips parallel to the cut edge rather than perpendicular. This positioning distributes the weight of the clip evenly along the seam allowance and prevents the weight of the hanging clip from pulling on the bias grain. If you are working with exceptionally sheer, slippery, or high-value fabrics like silk chiffon, perform a quick test on a scrap piece of fabric first. If the clip leaves a visible indentation that does not disappear after a light steam, switch to ultra-fine glass-head pins placed strictly within the seam allowance.
Medium-Weight Everyday Fabrics (Cotton, Linen, Blends)
For everyday apparel projects involving medium-weight fabrics—such as quilting cotton, linen, chambray, and moderate synthetic blends—standard-sized sewing clips are the most versatile option. These clips typically measure approximately 2.7 centimeters in length and offer a balanced spring tension that easily manages two to four layers of fabric.
In warm, humid climates like Singapore, where lightweight linens and breathable cotton blends are staple wardrobe items, standard clips are exceptionally useful for holding hems, facings, and side seams. They provide a secure grip that prevents the shifting common with lightweight woven fabrics, yet they are light enough not to drag the fabric down as it feeds into the machine. You can confidently use these clips to hold bias binding around necklines or armholes, ensuring a clean, puckering-free finish.
Heavyweight, Bulky, and Non-Woven Materials (Denim, Canvas, Leather, Vinyl)
Heavyweight and non-woven materials present the double challenge of high bulk and high sensitivity to permanent damage. For these demanding projects, you must use large or jumbo-sized clips. These heavy-duty clips feature a significantly wider jaw opening and a reinforced steel spring that delivers the high clamping force required to compress bulky layers.
When working with non-woven materials like real leather or heavy vinyl, pins are entirely out of the question because any puncture is permanent. Before starting your project, check the maximum jaw opening of your clips against the fully compressed thickness of your fabric layers, especially at intersections where multiple seams meet. If the fabric thickness exceeds the clip’s comfortable jaw capacity, do not force the clip onto the fabric, as this can warp the spring or leave deep, permanent indentations in the material. Instead, use a specialized leather tape or a larger jumbo clip designed specifically for heavy upholstery work.
Selecting Clips Based on Your Sewing Technique and Construction Stage
Beyond matching the weight of your fabric, your choice of garment needle clip should be guided by the specific construction task at hand. The physical design features of the clip—such as the shape of its base, the texture of its jaws, and the presence of measurement markings—can significantly influence your sewing accuracy and speed.
Seams, Hems, and Curved Edges
When preparing straight seams or deep hems for machine stitching, the physical orientation of the clip is critical. Always ensure that the completely flat side of the clip is facing downward, resting against the bed of your sewing machine. This orientation allows the clip to slide smoothly over the needle plate without catching, snagging, or lifting the fabric as it approaches the presser foot. If the curved lever side of the clip is placed downward, it will tilt the fabric upward, creating uneven tension and potentially causing the machine to skip stitches.
For curved edges, such as armholes, necklines, or rounded pockets, clip selection requires a different approach. Standard or large clips can create rigid, straight segments along a curve, distorting the natural drape and shape of the fabric. To maintain the accuracy of a curved seam, use mini clips spaced closely together. The smaller footprint of mini clips allows the fabric to follow its natural curve smoothly, preventing the distortion that occurs when forcing a curved edge into a series of straight, clipped sections.
Bindings, Facings, and Thick Intersections
Securing bindings and facings requires a high degree of precision, as even a millimeter of shifting can result in missed stitches or uneven edges. For these tasks, look for garment needle clips that feature integrated measurement markings molded directly onto the flat plastic base. These markings—typically spaced at 5mm, 7mm, and 10mm increments—allow you to check your seam allowance or binding depth instantly as you clip, eliminating the need to constantly reach for a separate metal seam gauge.
The texture of the clip’s inner jaws is another important variable during complex assembly. Clips are available with either smooth or ridged jaws. Ridged jaws feature tiny interlocking plastic teeth that provide maximum security against slippage, making them ideal for holding slippery satin linings, thick fleece, or bulky quilted layers. However, these ridges can easily snag delicate knit fabrics or leave permanent pressure marks on soft napped fabrics like velvet. For delicate knits or napped textiles, opt for clips with smooth inner jaws or place a small scrap of tissue paper between the clip jaws and the fabric to act as a protective buffer.
Self-Check: Is Your Current Clip Choice Damaging Your Garment?
Even with the right tools, improper clipping techniques can lead to structural or aesthetic issues in your finished garment. Conducting a regular self-check during your sewing process helps you identify and correct these issues before they become permanent.
Keep a close eye out for these common warning signs:
- Fabric waving or puckering: If you notice the fabric bulging or waving in the spaces between your clips, your clips are likely spaced too far apart. This allows the fabric to shift and stretch between the secure points.
- Permanent jaw marks or creases: If removing a clip reveals deep, stubborn indentations on the right side of the fabric, your clip's spring tension is too high for the material, or the clips have been left clamped in place for too long.
- Frequent needle breakage or skipped stitches: This is a critical indicator that clips are being fed too close to the presser foot or that the fabric is tilting as it passes over the machine bed.
To resolve these issues, implement the following corrective actions:
- Optimize your clip spacing: Rather than switching to larger clips with higher tension, simply place smaller clips closer together (approximately 3 to 5 centimeters apart) to distribute the holding force more evenly.
- Adjust clip orientation: Double-check that the flat side of every clip is resting flat against the machine bed.
- Protect sensitive surfaces: If tension marks persist, switch to a clip with lower spring tension, or place a small piece of scrap felt between the clip jaws and your fabric.
Finally, establish a strict safety boundary in your sewing practice: always remove each garment needle clip immediately before it reaches the presser foot. Never attempt to sew over a plastic or metal clip. Running your sewing machine needle into a solid clip will instantly shatter the needle, potentially sending sharp fragments toward your eyes, throwing your machine’s timing out of alignment, or damaging the delicate feed dogs.
Frequently Asked Questions (FAQ)
Can I use garment needle clips instead of pins for all sewing projects?
While garment needle clips are highly versatile and excellent for securing edges, bindings, and thick materials, they cannot completely replace traditional straight pins. Clips are limited to clamping along the outer edges of your fabric. For tasks that require securing fabric layers deep within the body of a pattern—such as pinning darts, marking interior pocket placements, securing applique, or gathering large sections of fabric—you must still rely on straight pins to pierce and hold the material in place.
How do I prevent sewing clips from leaving marks on delicate fabrics?
To protect delicate fabrics from jaw indentations, use mini clips with a lighter spring tension and place them strictly within the designated seam allowance so any temporary marks are hidden inside the finished garment. Additionally, avoid leaving clips clamped onto sensitive fabrics for extended periods, such as overnight or during storage. If you must leave a project assembled for a while, remove the clips and lay the pieces flat, or use fine glass-head pins instead.
What is the difference between metal and plastic sewing clips?
The vast majority of standard sewing clips feature a hybrid construction consisting of a durable plastic body, a metal spring, and plastic jaws. These hybrid clips are lightweight, affordable, and gentle on most apparel fabrics. Fully metal clips, often made of stainless steel, offer exceptionally high grip strength and durability, making them excellent for heavy upholstery, canvas, or outdoor gear. However, fully metal clips are generally too heavy for delicate garment construction, as their weight can drag lightweight fabrics down and their sharp metal edges are more prone to snagging fine fibers.
Community discussion
Share your experience or ask a question. Comments are reviewed before publication.