
Selecting the correct embroidery needle is the foundation of clean stitches and undamaged fabric. The right choice depends on balancing three core variables: your fabric’s weight and weave, the thickness of your thread, and the specific stitch effect you want to achieve. This guide breaks down the criteria for matching needle types and sizes to your materials, helping you avoid common frustrations like frayed threads, puckered fabric, or visible holes. When you begin a new needlework project, the needle acts as the primary tool that negotiates the relationship between your thread and your background textile. Choosing the wrong tool can quickly turn a relaxing creative pursuit into a struggle against snagged fibers and broken threads. By understanding how different needle structures interact with various textiles, you can ensure a smooth, enjoyable stitching process and a professional-looking finished piece.
Understanding Embroidery Needle Anatomy and Types
To make an informed decision, you must first understand the physical anatomy of an embroidery needle and how its different parts function. A needle consists of the point, the eye, and the shaft. The point determines how the needle enters the fabric, the eye holds the thread, and the shaft creates the path through which both the needle and the thread must pass.
The point of the needle is its most critical feature when matching it to a fabric’s weave. Sharp points are designed to pierce tightly woven fabrics cleanly. When you work on materials like cotton calico, linen, denim, or silk, a sharp point cuts through the fibers without pushing them out of alignment, ensuring that your stitches land exactly where you intend. Conversely, blunt points are designed for open-weave or even-weave fabrics, such as Aida cloth, hardanger fabric, or needlepoint canvas. A blunt point slips gently into the existing spaces between the woven threads rather than piercing the threads themselves. This prevents splitting the background fibers, which would otherwise weaken the fabric structure and distort your pattern.
Products mentioned in this guide
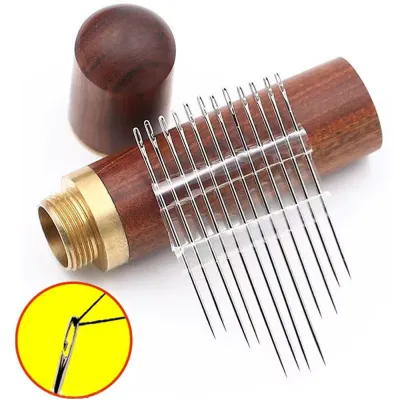
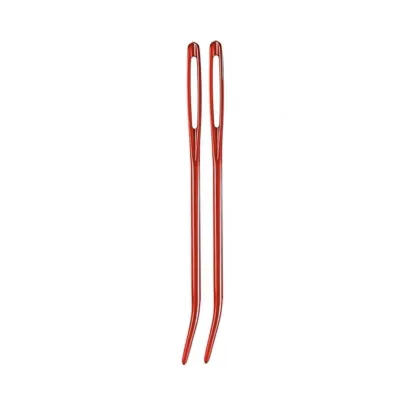
Prices are valid at publication and may change. Please refer to the product page for the latest price.
The relationship between the needle eye and the shaft is equally important. The eye of an embroidery needle is typically elongated compared to a standard sewing needle. This elongated shape allows you to thread multiple strands of embroidery floss, thick wool, or delicate silk ribbon without bunching. The shaft of the needle must be slightly thicker than the eye when threaded. This design ensures that as the shaft passes through the fabric, it opens up a temporary hole large enough for the eye and the thread to follow with minimal friction. If the shaft is too thin, the thread will rub against the fabric fibers on every pass, leading to rapid wear and fraying.
Several distinct categories of embroidery needles exist, each tailored to specific techniques:
- Crewel Needles (often labeled simply as Embroidery Needles): These feature a sharp point, a medium-to-long eye, and a slender shaft. They are the standard choice for surface embroidery, crewel work, and general decorative stitching on woven fabrics.
- Chenille Needles: These possess a sharp point and a very large, wide eye paired with a thick shaft. They are designed for heavy threads, thick wools, or ribbon embroidery on dense, heavy fabrics where a strong, wide path must be cleared.
- Tapestry Needles: These have a blunt point and a long, wide eye. They are the standard tool for cross-stitch, needlepoint, and blackwork, where you work on even-weave fabrics and must avoid piercing the background threads.
- Milliner Needles (or Straw Needles): These are exceptionally long with a sharp point and a round eye. Crucially, the shaft is the exact same thickness as the eye, making them the ideal choice for wrap stitches like bullion knots, as the needle can slide smoothly through the wrapped thread loops without catching.
Matching Needle Size to Fabric Weight and Thread Thickness
Once you have identified the correct type of needle, you must determine the appropriate size. The needle sizing system can be confusing because it operates on an inverse scale: the larger the size number, the smaller and finer the needle. For example, a size 10 crewel needle is extremely fine and thin, whereas a size 3 crewel needle is thick and robust.

To select the right size, you must balance the weight of your fabric with the thickness of your thread. Lightweight fabrics, such as silk organza, fine lawn, or batiste, require very fine needles (typically sizes 9 to 12). A thick needle used on these delicate materials will leave permanent, unsightly holes because the fine fibers do not have enough elasticity to spring back and close the gap after the needle passes through. Medium-weight fabrics, including standard quilting cotton, medium linen, and lightweight canvas, are highly versatile and pair best with mid-range needles (sizes 5 to 8). Heavyweight fabrics, such as denim, heavy canvas, or wool felt, require thick, sturdy needles (sizes 1 to 4, or heavy chenille needles) that can pierce the dense layers without bending or breaking under pressure.
The thickness of your thread or the number of plies you use must dictate your final size choice within these fabric categories. Standard stranded embroidery floss consists of six individual plies that can be separated. If you are stitching a delicate detail using only a single ply of floss, you must use a fine needle (such as a size 9 or 10 crewel needle) to ensure the thread remains secure in the eye and does not slip out constantly. If you are using three or four plies for bolder lines, a size 7 or 8 needle is more appropriate. For a full six plies of floss, you will need a size 3 to 5 needle to accommodate the bulk.
As a general rule of thumb, the thread should fill approximately one-half to two-thirds of the needle eye’s width. If the thread completely stuffs the eye, it will be pinched and subjected to damaging friction. If the eye is too large for the thread, the thread will slide around excessively, leading to uneven stitch tension and making it difficult to control your placement.
Step-by-Step Guide to Selecting Your Needle for a New Project
Choosing the right needle should not involve guesswork. By following a systematic selection and testing process before you begin your actual project, you can prevent damage to your materials and save hours of frustration.
Step 1: Analyze the Fabric Structure
Begin by examining your background fabric under good lighting. Determine whether it is a woven fabric with a tight, solid structure or an even-weave fabric with visible, open grids. Feel the weight and thickness of the material. If the fabric has any stretch, note how the fibers behave when pulled gently. This initial assessment will tell you whether you need a sharp point (for tight weaves) or a blunt point (for open weaves), and will give you a starting range for the needle size based on the fabric’s weight.
Step 2: Prepare Your Thread and Check the Eye Fit
Select the thread type and determine the exact number of plies you plan to use for your design. Take a candidate needle from your collection and attempt to thread it. The thread should pass through the eye easily without splitting or requiring extreme force. Once threaded, hold the needle vertically; the thread should slide slightly but not fall out of the eye instantly. If you must use a needle threader and still struggle to pull the thread through, the eye is too small, and you must select a larger needle size.
Step 3: Perform the "Thread and Slide" Test
Before touching the needle to your fabric, hold a 30-centimeter length of your chosen thread horizontally between your hands. Hang the threaded needle in the center of the thread. Tilt the thread slightly to one side. The needle should slide smoothly along the thread under its own weight. If the needle clings to the thread or gets stuck, the eye is pinching the fibers. This indicates that the needle is too small for the thread thickness, and you need to move to a larger size to prevent fraying during stitching.
Step 4: Conduct a Test Stitch on a Scrap Piece
Always keep a small scrap of your project fabric specifically for testing. Secure the scrap fabric in your embroidery hoop, ensuring it is taut but not stretched out of shape. Using your threaded needle, work a short line of your intended stitches (such as backstitch, satin stitch, or French knots). Pay close attention to how the needle feels as it moves through the textile.
Stop Conditions and Adjustments
As you perform your test stitches, watch for specific visual and physical cues that indicate you need to change your needle:
- Fabric Puckering: If the fabric gathers or puckers around your stitches, or if you must pull hard to force the needle through, the needle is too small for the thread thickness, or the needle point is too dull. Switch to a larger needle size or a fresh, sharp needle.
- Visible Holes: If you can see clear, open holes in the fabric where the needle entered, and these holes do not close up when you gently rub the fabric surface, your needle is too large. Switch to a finer needle size.
- Thread Fraying: If the thread begins to look fuzzy, loses its sheen, or starts to shred near the needle eye after only five to ten stitches, the eye is too small. The friction of the fabric is stripping the thread. Switch to a needle with a larger eye or a thicker shaft.
- Popping Sound: If you hear a distinct "pop" or snapping sound every time the needle pierces the fabric, the needle is too thick for the weave density. Switch to a finer size to protect the fabric fibers from tearing.
Troubleshooting Common Stitching Issues Caused by Wrong Needles
Even experienced stitchers occasionally encounter problems mid-project. Many common embroidery flaws that appear to be issues with technique or thread quality are actually caused by an incorrect needle choice.
If you notice your fabric showing snags, pulled threads, or a distorted weave structure, the culprit is usually an incorrect needle point. This often happens when a sharp needle is mistakenly used on an even-weave fabric like Aida, splitting the woven threads and pulling them out of alignment. It can also occur if your sharp needle has developed a microscopic burr or hook on the tip. To resolve this, switch to a blunt tapestry needle for even-weave projects, or run your fingernail along the tip of your sharp needle to check for damage. If you feel any roughness, discard the needle and replace it.
Thread fraying and frequent breaking are classic signs of a mismatched needle eye. When the eye is too small, the thread is compressed tightly within the metal opening. As you pull the needle back and forth through the fabric, the edges of the eye scrape against the thread fibers. This friction quickly wears down the thread, causing it to break mid-stitch. To fix this, increase your needle size by one or two numbers, which will provide a larger eye and a thicker shaft to clear a wider path through the fabric, reducing friction on the thread.
Fabric distortion, where your stitches pull too tight and cause the fabric to warp inside the hoop, often stems from using a needle that is too small for the thread. When the needle shaft is too thin, it does not create a large enough temporary hole in the fabric. You are forced to pull the thread through a tight space, which naturally increases your stitching tension. This excess tension pulls the fabric fibers inward. By switching to a slightly larger needle, the shaft will open a suitable passage, allowing the thick thread to glide through effortlessly and lay flat on the fabric surface with natural, relaxed tension.
Maintaining and Storing Your Embroidery Needles
Proper care and storage of your embroidery needles not only extends their lifespan but also protects your delicate fabrics from damage and ensures your personal safety.
You must regularly inspect your needles for signs of wear. Run your fingers gently along the shaft of each needle before starting a stitching session. If you feel any bending, roughness, or microscopic burrs, do not use the needle. A bent needle changes the angle of entry, leading to misaligned stitches and uneven tension. A needle with a burr will snag and ruin your fabric fibers instantly. Additionally, look closely at the metal surface; if you see any dark spots, tarnish, or rust, the needle must be retired.
Storage conditions play a vital role in preserving needle quality, especially in humid environments. In Singapore’s warm, humid climate, moisture in the air can quickly cause steel needles to rust or tarnish. To prevent this, store your needles in a dry, airtight container, such as a small tin or a plastic storage case. Adding a small silica gel packet to your storage container is an excellent way to absorb excess moisture. Alternatively, store your needles in a needle book made from wool felt. The natural lanolin present in real wool helps coat the metal surfaces, providing a natural barrier against rust. Avoid leaving needles stuck directly into your active embroidery project for long periods, as the metal can react with atmospheric moisture and leave permanent rust stains on your fabric.
For safety and hygiene, establish a secure method for disposing of old needles. Never throw loose needles directly into the household waste, as they can easily pierce trash bags and cause accidental injuries to yourself, your family, or waste management workers. Instead, keep a small, puncture-proof container, such as an empty plastic pill bottle or a small metal tin with a secure lid, nearby. When a needle becomes dull, bent, or rusted, drop it into this container. Once the container is full, tape the lid shut securely before placing it in the bin.
Frequently Asked Questions (FAQ)
Can I use a regular sewing needle for embroidery?
While you can physically push a regular sewing needle through fabric, it is not recommended for embroidery. Regular sewing needles, such as sharps, are designed with a small, round eye intended for very fine, single-strand sewing thread. Embroidery floss is much thicker and often consists of multiple plies. Forcing embroidery thread through a standard sewing needle eye causes extreme friction, which shreds the thread, strips its sheen, and makes threading incredibly difficult. Embroidery needles feature an elongated eye specifically engineered to hold multiple strands of floss smoothly, protecting the thread from wear as you stitch.
How often should I replace my embroidery needle?
You should replace your embroidery needle as soon as you notice any decline in its performance or physical condition. Observable signs that a needle needs replacing include increased resistance when piercing the fabric, a clicking or popping sound as the needle passes through, or visible bending of the shaft. For regular stitchers, a good guideline is to replace your needle after every major project, or after approximately 8 to 12 hours of active stitching. Using a fresh needle ensures smooth stitching, prevents hand fatigue, and protects your fabric from snags and tension issues.
Community discussion
Share your experience or ask a question. Comments are reviewed before publication.