
Choosing the correct embroidery needle is the foundation of successful hand stitching. The right pairing of needle, fabric, and thread ensures that your stitches lie flat, your thread does not shred, and your fabric remains free of unsightly holes. To make the best choice, you must evaluate the needle’s physical structure, understand the inverse sizing system, and match the needle’s point and eye to your specific textile. Failing to do so often leads to hand fatigue, broken threads, and ruined fabric.
Understanding Embroidery Needle Anatomy and Common Types
To select the perfect needle for your project, it helps to understand its anatomy. Every hand-sewing needle consists of three primary components: the point, the eye, and the shaft. The point determines how the needle enters the fabric, whether by piercing the threads or sliding between them. The eye holds the thread and must be large enough to accommodate your chosen thread weight without causing friction. The shaft is the body of the needle, and its thickness dictates the size of the hole left in the fabric.
Different embroidery techniques and materials require distinct needle designs. Here are the four most common types you will encounter in needlework:
Products mentioned in this guide
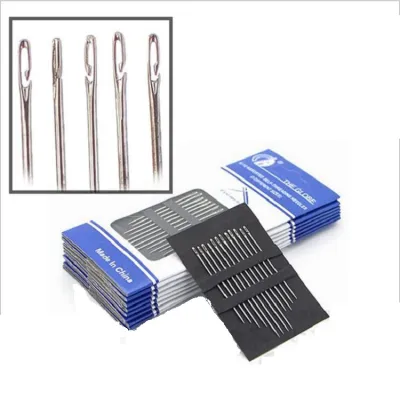
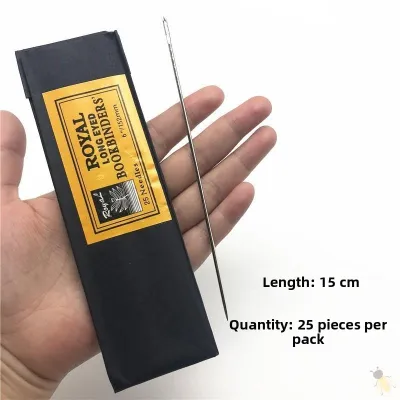
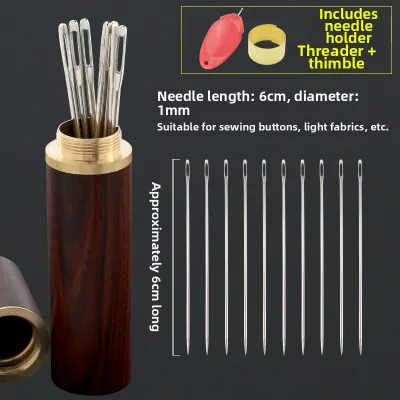
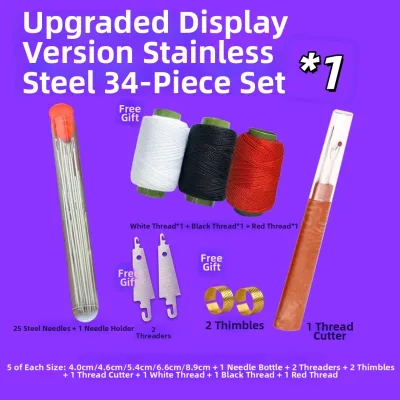
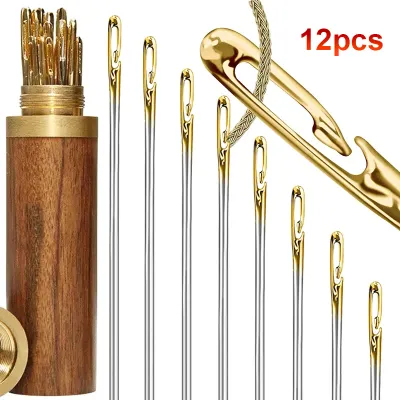
Prices are valid at publication and may change. Please refer to the product page for the latest price.
Crewel (Embroidery) Needles Crewel needles, often simply labeled as embroidery needles, feature a sharp point, a medium-length eye, and a medium-weight shaft. The sharp point is designed to pierce tightly woven fabrics easily, making them the standard choice for general surface embroidery. The elongated eye accommodates multiple strands of standard cotton embroidery floss or thicker threads while remaining narrow enough to prevent the needle from creating excessively large holes.
Tapestry Needles Tapestry needles have a blunt point, a large eye, and a sturdy shaft. Because the point is rounded rather than sharp, these needles are designed to slip between the threads of open-weave fabrics rather than piercing them. This makes them indispensable for counted thread work, such as cross-stitch on Aida cloth, hardanger, or needlepoint on canvas. The large eye easily accommodates thick tapestry wool, perle cotton, or multi-strand floss without friction.
Chenille Needles Chenille needles combine the sharp point of a crewel needle with the large, long eye of a tapestry needle. They are ideal for working with thick, textured threads, crewel wool, or silk ribbon on dense, tightly woven fabrics. The sharp point allows the needle to penetrate heavy fabrics like linen twill or denim, while the spacious eye prevents bulky threads from shredding as they pass through the textile.
Milliner (Straw) Needles Milliner needles, also known as straw needles, are characterized by a sharp point, a small round eye, and an exceptionally long, uniform shaft. Unlike other needles where the eye is wider than the shaft, a milliner needle’s eye is the exact same width as its body. This unique geometry is essential for wrapped stitches, such as French knots, bullion knots, and cast-on stitches. The uniform shaft allows the wrapped thread loops to slide off the needle smoothly without catching on a wider eye.
How to Match Needle Size to Your Fabric and Thread
Once you understand the basic types of needles, the next step is determining the correct size. Using a needle that is too large will leave permanent, unsightly holes in your fabric, while a needle that is too small will cause your thread to fray and make stitching physically difficult.

Matching Needle Size to Fabric Weight and Weave
Embroidery needles use an inverse sizing system where a higher number indicates a finer, thinner needle. For example, a size 10 crewel needle is much thinner and shorter than a size 3 crewel needle. Matching this number to your fabric’s physical characteristics is critical for maintaining the structural integrity of your textile.
Lightweight Fabrics Delicate materials such as silk, organza, lawn, batiste, and fine cotton require very fine needles, typically ranging from size 9 to size 12. These fabrics have delicate fibers that can easily snag or shift. A thin shaft ensures the needle makes the smallest possible opening, preventing visible, permanent holes and maintaining the smooth drape of the fabric.
Medium-Weight Fabrics Standard quilting cotton, linen, and medium-weight synthetic blends are highly versatile and pair best with medium-sized needles, generally between size 7 and size 9. These needles offer enough structural strength to penetrate the weave repeatedly without bending, while still keeping the entry holes small enough that the fabric fibers naturally close back around the thread.
Heavyweight Fabrics Dense or thick materials like canvas, denim, wool felt, and upholstery fabrics require robust needles, usually from size 1 to size 5. The thicker shaft provides the necessary leverage and strength to pierce dense weaves without bending or snapping.
The Verification Standard To verify if your needle is the correct size for your fabric, push the unthreaded needle halfway through a scrap piece of your project fabric. The needle should glide through without requiring excessive force. When you pull it out, the fabric threads should naturally close back around the hole. If a distinct, open gap remains, your needle is too thick, and you should switch to a higher size number.
Matching Needle Eye to Thread Thickness
The eye of your needle must be carefully matched to the thickness of your thread to protect the fibers from wear and tear. As you stitch, the thread passes through the fabric hole repeatedly; if the eye does not prepare a large enough passage, the thread will experience excessive friction.
The Fit Test To perform the fit test, cut a short length of your chosen thread and slide it through the eye of the needle. The thread should pass through with only slight, manageable resistance. If you must struggle, flatten, or wet the thread excessively to get it through, the eye is too small. Conversely, if the thread slides around loosely and falls out of the eye constantly while you hold the needle vertically, the eye is too large, which can lead to uneven tension and sloppy stitches.
Fine Threads When working with a single strand of cotton floss, fine silk, or delicate sewing thread, choose a needle with a small, narrow eye. A small eye keeps the thread securely in place, allowing for precise placement of detailed stitches. Using an unnecessarily large eye with fine thread can cause the needle to wobble, leading to irregular stitch lengths.
Thick Threads Thicker threads, such as perle cotton, tapestry wool, or multiple strands of six-strand embroidery floss, require a larger, more elongated eye. The eye must accommodate the entire bulk of the thread without compressing it. If the eye is too small, it will strip the outer fibers of the thread, causing it to thin out, lose its sheen, and eventually snap before you finish the length.
Specialty Threads Specialty threads, particularly metallic, holographic, or highly textured options, require extra care. Metallic threads consist of a delicate foil wrapping around a polyester core. This wrapping is highly susceptible to friction. When working with these materials, use needles with specially polished, elongated eyes—such as dedicated metallic needles or slightly larger tapestry needles—to reduce friction and prevent the delicate outer layer from shredding.
Step-by-Step Guide to Selecting and Testing Your Needle
To avoid frustrating mistakes and protect your materials, follow this systematic process to select and verify your needle before starting any new embroidery project.
Step 1: Identify Your Fabric Examine the fabric you plan to use. Check the fabric label or observe the weave density and weight to determine the baseline needle type (sharp vs. blunt) and estimated size range. Note the weight and thickness. This initial assessment will tell you whether you need a sharp point or a blunt point, and give you a baseline idea of the fabric’s density.
Step 2: Determine Your Thread Setup Decide exactly which thread you will use and how many strands will be threaded at once. If you are using stranded cotton floss, decide if you need one, two, three, or all six strands. The total thickness of your thread bundle determines the minimum eye size you can use.
Step 3: Select the Needle Type Based on your fabric and embroidery technique, select the appropriate needle category. If you are doing freeform surface embroidery on linen, select a Crewel needle. If you are working a cross-stitch pattern on Aida, choose a Tapestry needle. For heavy wool embroidery on canvas, opt for a Chenille needle. For dimensional stitches like bullion knots, reach for a Milliner needle.
Step 4: Pick an Estimated Size Refer to the sizing guidelines to select a specific needle size. If you are working with two strands of floss on medium-weight linen, a size 8 or 9 crewel needle is a reliable starting point. Gather a few adjacent sizes (for example, a size 7, 8, and 9) so you can compare their performance.
Step 5: Perform a Test Stitch Never start stitching directly on your main project area without testing. Take a scrap piece of the exact same fabric and thread combination. Thread your selected needle and execute five to ten sample stitches of the specific stitch type you plan to use most frequently in your design.
Step 6: Evaluate and Adjust Closely inspect your test stitches under good lighting. If the needle is difficult to pull through the fabric, or if you hear a loud popping sound as it pierces the textile, your needle shaft is too thick or the point is too blunt. Switch to a finer needle or a sharper type. If your thread begins to fuzzy, shred, or strip near the eye after only a few stitches, the eye is too small. Switch to a needle with a larger eye or reduce the number of thread strands. If you see visible, empty holes in the fabric where the needle entered, your needle shaft is too thick. Switch to a smaller needle size (higher number). If the stitches look neat, the thread remains smooth, and the needle glides effortlessly, you have found the perfect match.
Troubleshooting Common Needle and Fabric Issues
Even with careful preparation, you may encounter physical issues while stitching. Understanding how to diagnose these problems allows you to make quick adjustments and preserve the quality of your work.
Issue: Thread frays, shreds, or breaks frequently Cause & Fix: This is almost always caused by a needle eye that is too small for the thread thickness. The constant friction of pulling a tight thread bundle through a narrow metal opening strips the fibers. To fix this, switch to a needle with a larger eye. If you are already using the correct size, inspect the inside of the eye under a magnifying glass. Over time, needles can develop microscopic metal burrs or rust inside the eye that act like tiny saws. If you suspect a burr, discard the needle and replace it with a new one.
Issue: Visible holes, snagged threads, or distorted weave in the fabric Cause & Fix: This occurs when the needle shaft is too thick for the fabric weight, forcing the woven threads too far apart. It can also happen if you use a sharp needle on a counted-thread fabric like Aida, accidentally piercing and splitting the fabric’s woven threads instead of sliding between them. To resolve this, switch to a finer needle size (a higher number). If you are working on an open-weave fabric, ensure you are using a blunt tapestry needle rather than a sharp crewel needle.
Issue: Difficulty pulling the needle through the fabric, causing hand fatigue Cause & Fix: If you have to pull hard or use rubber grips to get your needle through the fabric, your needle is mismatched. The shaft may be too thick, or the point may be too blunt for a dense, tightly woven textile. This issue is common when trying to use tapestry needles on dense cottons, or when using a needle that has become dull over time. Switch to a sharper point, a finer shaft, or a new needle. For exceptionally dense fabrics, you can also use a high-quality thimble to provide comfortable leverage without straining your fingers.
Issue: The needle bends or breaks during stitching Cause & Fix: Needles bend or snap when the shaft is too thin or flexible to withstand the physical resistance of the fabric. This is common when trying to force a fine, high-number needle through heavy fabrics like denim, canvas, or multiple layers of felt. To prevent this, upgrade to a thicker, stronger needle shaft (a lower size number) that can handle the physical pressure, or switch to a Chenille needle which offers a sharp point with a heavier shaft.
Frequently Asked Questions (FAQ)
How often should I replace my embroidery needle?
Unlike sewing machine needles, which are often replaced after a set number of hours, hand embroidery needles should be replaced based on observable wear. Over time, the constant friction against fabric dulls the point, wears away the smooth outer plating, and can create microscopic rough spots. You should replace your needle when you notice it requires more effort to pierce the fabric, if it begins to make a popping sound as it goes through, if the metal surface looks tarnished, or if you feel any roughness that snags your thread or fabric. For large, dense projects, starting with a fresh needle is always a good practice.
Can I use a regular sewing needle for embroidery?
Regular hand sewing needles, often called sharps, are not ideal for most embroidery projects. Sharps feature a very small, round eye designed to hold a single strand of fine sewing thread. If you attempt to thread multiple strands of embroidery floss through a sharp, the thread will shred instantly. However, if you are working on a very fine surface embroidery project that requires only a single strand of delicate silk or cotton thread, a regular sewing needle can work in a pinch. For standard embroidery, dedicated crewel needles remain the superior choice due to their elongated eyes.
What is the best needle for metallic embroidery thread?
The best option for metallic thread is a specialized metallic needle or a needle with an exceptionally large, polished eye, such as a tapestry or chenille needle. Metallic threads are notoriously difficult to work with because the metallic foil wrapped around the core easily catches on rough surfaces. A needle with a large, smooth eye minimizes friction, allowing the delicate thread to pass through without stripping or bunching up. When using metallic threads, it is also helpful to use shorter lengths of thread to limit the number of times the fibers pass through the fabric.
Community discussion
Share your experience or ask a question. Comments are reviewed before publication.