
For a beginner stepping into the world of hand embroidery, selecting your first needle can feel surprisingly overwhelming. The ideal starting point for almost any beginner is a size 7 or size 8 crewel needle (often sold simply as an “embroidery needle”) paired with standard six-strand cotton embroidery floss and a medium-weight woven fabric like cotton calico or linen. This specific combination offers a highly forgiving learning curve, allowing you to master basic stitches without struggling against your materials.
Choosing the correct tool directly impacts how smoothly your thread glides through the fabric, how tired your hands get, and how clean your finished stitches look. By understanding the structural differences between needle types and learning how their sizing systems work, you can avoid common pitfalls like frayed thread, puckered fabric, or unsightly puncture holes.
Understanding the Main Types of Embroidery Needles
Hand embroidery needles are not one-size-fits-all tools; they are engineered with specific points, eyes, and shafts to suit different fabrics and threads. The three most common types you will encounter in craft shops are crewel needles, chenille needles, and tapestry needles. Understanding their unique physical traits will help you identify the right tool for your specific project.
Products mentioned in this guide
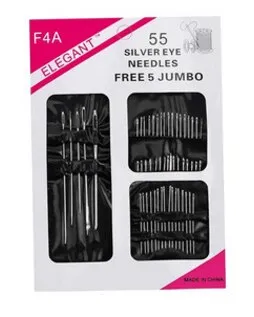
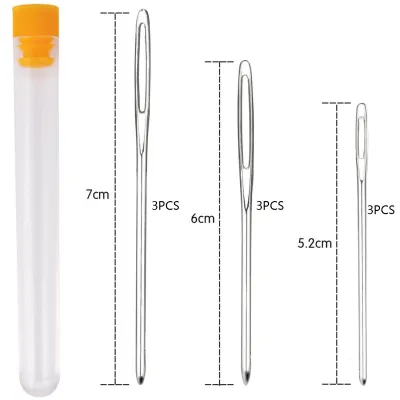
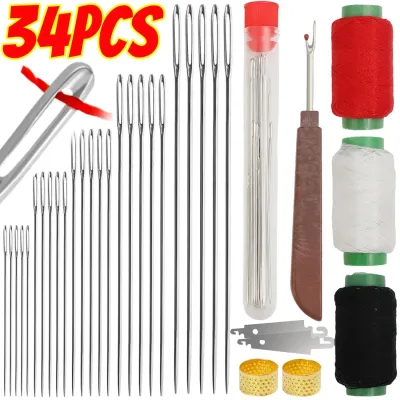
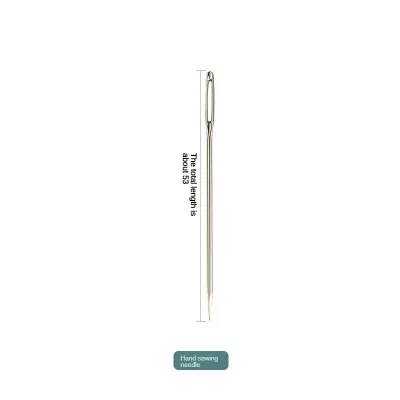
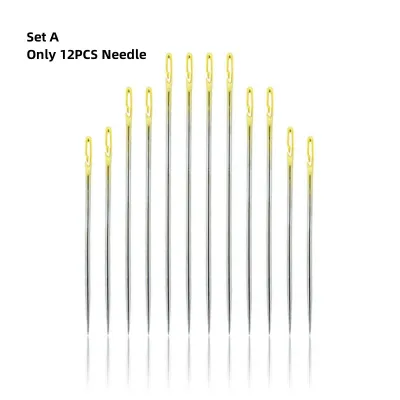
Prices are valid at publication and may change. Please refer to the product page for the latest price.
Crewel Needles
Crewel needles, widely referred to simply as embroidery needles, are the absolute standard for surface embroidery. They feature a sharp point, a medium-length shaft, and an elongated eye. The sharp point allows the needle to pierce tightly woven fabrics cleanly, while the elongated eye is designed to hold multiple strands of cotton embroidery floss or fine wool without bunching.
If you are working on a standard starter kit, a printed sampler, or freehand designs on woven cotton, linen, or denim, the crewel needle is your primary tool. The medium shaft length provides excellent leverage for hand movements, making it easy to execute classic stitches like the satin stitch, backstitch, split stitch, and French knots.
Chenille Needles
Chenille needles share many similarities with crewel needles, but they are built for heavy-duty work. They feature an exceptionally sharp point, a noticeably thicker shaft, and a very large, wide eye. This construction is designed to accommodate thick, heavy threads that would otherwise shred or refuse to pass through a standard needle eye.
You should reach for a chenille needle if you are working with thick crewel wool, tapestry yarn, silk ribbon, or multi-strand metallic threads. The sharp point easily penetrates dense fabrics like wool felt, heavy canvas, or denim, while the thick shaft stretches the fabric fibers apart just enough to let the bulky thread pass through without friction damage.
Tapestry Needles
Tapestry needles are structurally distinct because they feature a blunt, rounded point instead of a sharp tip. They also have a long, wide eye and a stiff, uniform shaft. Because the point is blunt, this needle is not meant to pierce fabric fibers; instead, it is designed to slip smoothly into the pre-existing gaps of open-weave fabrics.
Tapestry needles are the essential tool for counted thread work, such as cross-stitch and blackwork, which are typically worked on grid-like fabrics like Aida cloth or evenweave linen. Using a blunt needle ensures you do not accidentally split the background threads of the fabric, which keeps your grid stitches perfectly square, neat, and uniform.
How to Match Needle Size to Your Thread and Fabric
Once you have identified the correct type of needle, you must select the appropriate size. Navigating the sizing system is a common point of confusion for beginners, but it follows a simple mathematical rule that is easy to master.

Demystifying the Sizing Numbers
In the world of hand sewing and embroidery, needle sizes are represented by numbers that operate on an inverse scale. This means that the higher the size number, the finer and shorter the needle. Conversely, a lower size number indicates a thicker, longer needle.
For example, a size 3 crewel needle is thick and long, designed for heavy threads and thick fabrics. A size 10 crewel needle is incredibly fine and short, meant for delicate, single-strand detail work. As a beginner, you will rarely need to work at these extreme ends of the spectrum; instead, you will spend most of your time in the middle range.
The Physical Thread Test
To verify if your needle and thread are compatible before you begin stitching, you can perform a quick, observable “Thread Test” on a scrap piece of your project fabric. This test helps prevent thread wear and ensures smooth stitching.
First, thread your needle with the number of strands you plan to use. Look closely at how the thread sits in the eye; it should fill roughly one-half to two-thirds of the eye’s width. If the thread is crammed tightly into the eye, the friction will strip the thread’s protective sheen and cause it to fray.
Next, pull the threaded needle through a scrap piece of your fabric. Observe the puncture hole left by the needle. The needle’s shaft should create a hole just large enough for the double thickness of the thread (where it loops through the eye) to pass through without resistance. If you have to tug hard to pull the needle through, the needle is too thin. If the needle slides through effortlessly but leaves a visible, empty hole around the thread after it has passed, the needle is too thick.
Fabric and Thread Baselines
Your choice of fabric weave dictates how sharp and thin your needle needs to be. Tightly woven fabrics offer more resistance, requiring a sharp, fine needle to pierce the fibers cleanly. Loose, open-weave fabrics have natural gaps that can accommodate thicker, blunter needles without distorting the material.
To make your first project easier, use these standard baselines for stranded cotton embroidery floss:
- For 1 to 2 strands of floss: Use a size 9 or 10 crewel needle. This keeps your stitches delicate and prevents the needle from leaving visible holes in fine linen or cotton.
- For 2 to 3 strands of floss: Use a size 7 or 8 crewel needle. This is the most common configuration for beginner kits and general line work.
- For 4 to 6 strands of floss: Use a size 5 or 6 crewel needle. The larger eye easily accommodates the full thickness of the floss without bunching.
Step-by-Step Guide to Selecting Your First Embroidery Needle
To ensure your first embroidery project is an enjoyable, frustration-free experience, follow this logical, step-by-step sequence to select, test, and prepare your needle.
Step 1: Identify Your Fabric Type
Examine the fabric you are using for your project. If it is a standard woven textile like cotton calico, linen, denim, or canvas, you need a needle with a sharp tip to pierce the threads. Select either a crewel needle (for standard thread) or a chenille needle (for very thick thread). If your fabric is a grid-like, open-weave material like Aida cloth used for cross-stitch, select a tapestry needle with a blunt tip to avoid splitting the grid fibers.
Step 2: Determine Your Thread Thickness
Decide how many strands of embroidery floss your pattern requires. Most beginner projects use two or three strands of standard six-strand cotton floss. If you are using specialty threads like wool, pearl cotton, or metallic ribbon, note their thickness, as they will require a needle with a significantly larger eye to prevent friction damage.
Step 3: Select the Baseline Needle Size
Using the sizing baselines, choose a starting needle. If you are stitching with three strands of cotton floss on woven linen, select a size 7 or 8 crewel needle. If you are stitching a cross-stitch project on 14-count Aida cloth with two strands of floss, select a size 24 tapestry needle.
Step 4: Perform a Physical Test on a Scrap Piece
Cut a small scrap of your project fabric and mount it in your embroidery hoop. Thread your chosen needle and make five to ten basic stitches. Observe how the needle feels as it passes through the fabric. If it glides smoothly, leaves no gaping holes, and does not cause the thread to shred or bunch up at the eye, you have found the perfect match. If you encounter resistance or notice fabric distortion, adjust your needle size up or down accordingly.
Step 5: Thread the Needle Correctly
To prevent your thread from fraying before you even begin stitching, use a proper threading technique. Avoid licking the thread, as moisture can weaken the fibers and make them swell. Instead, try the “pinch method”: pinch the end of the thread tightly between your thumb and forefinger until only a tiny fraction of a millimeter is visible. Bring the eye of the needle down over this tiny point of thread, slowly releasing your pinch as the thread slips through. Alternatively, use a high-quality wire or hook needle threader to guide the floss through the eye smoothly.
Common Beginner Mistakes and How to Avoid Them
Even with the right guidelines, it is easy to make simple errors when starting out. Recognizing these common mistakes will save you time, materials, and frustration.
Using a Needle That Is Too Thick
Many beginners assume a larger needle is easier to use because it is easier to thread. However, using a needle that is too thick forces the fabric fibers apart permanently, leaving unsightly, visible puncture holes around your stitches. It also requires significantly more physical effort to push the needle through the fabric, leading to hand fatigue and cramping during long stitching sessions.
Using a Needle That Is Too Thin
Conversely, using a needle with an eye that is too small for your thread causes excessive friction. Every time you pull the needle through the fabric, the tight eye scrapes against the thread fibers. Over time, this friction strips away the thread’s mercerized sheen, causing it to look dull, pill, fray, and eventually snap mid-stitch. If your thread is constantly knotting or shredding, switch to a slightly larger needle size (a lower number).
Using a Sharp Needle on Open-Weave Fabric
Using a sharp crewel needle on Aida cloth or evenweave fabric makes it incredibly difficult to maintain neat stitches. The sharp point will frequently pierce the woven threads of the fabric grid rather than sliding into the natural holes. This results in split fibers, misaligned stitches, and an uneven, messy finish on your cross-stitch or blackwork projects. Always stick to blunt tapestry needles for counted thread work.
Leaving the Needle in the Fabric Between Sessions
In humid environments, such as Singapore, leaving a steel needle parked in your fabric hoop between stitching sessions is a recipe for disaster. The high ambient humidity causes the metal of the needle to oxidize and rust surprisingly quickly. This rust transfers directly to your fabric, leaving permanent, dark orange or brown stains that cannot be washed out, ruining hours of hard work. Always remove your needle from your project fabric when you are finished stitching for the day.
Frequently Asked Questions (FAQ)
How often should I replace my embroidery needle?
You should replace your embroidery needle as soon as you notice any signs of wear, such as a bent shaft, a rough or burred eye that snags the thread, or a dull point that resists piercing the fabric. As a general rule of thumb, a high-quality needle lasts for about 8 to 12 hours of active stitching. If you feel the needle dragging or making a popping sound as it pierces the fabric, it is time to discard it and slide a fresh one into your holder.
Can I use regular sewing needles for embroidery?
While you can technically force thread through them, regular hand sewing needles (often called sharps) are not ideal for embroidery. Standard sewing needles feature small, round eyes designed for very fine sewing thread. Attempting to thread multi-strand embroidery floss through these small round eyes is highly frustrating and will quickly shred your floss. Crewel needles are specifically designed with elongated eyes to accommodate thicker threads and multiple strands smoothly.
What is the best way to store embroidery needles?
To prevent your needles from rusting, getting lost, or causing accidental injury, store them in a dry, secure environment. A magnetic needle minder attached to your embroidery hoop is excellent for holding your needle during active stitching breaks. For long-term storage, use a felt needle book, a magnetic storage case, or a sealed plastic needle tube. In humid climates, placing a small silica gel packet inside your needle storage container will absorb excess moisture and protect your tools from rust.
Community discussion
Share your experience or ask a question. Comments are reviewed before publication.