
Selecting the right foil product for your digital cutting machine is the key to transforming simple paper crafts into striking, professional-grade art. Whether you want to add shimmering accents to custom wedding invitations, create reflective decals, or build sturdy metallic gift boxes, the success of your project depends on matching the correct foil type with your specific machine model and crafting materials. By understanding the physical properties of different foil formats and verifying how they interact with your cutting tools, you can avoid wasted materials and achieve clean, flawless transfers every time.
To make an informed purchase, you must evaluate three primary factors: the structural format of the foil, its application method, and your machine’s physical compatibility. Cricut foil products generally fall into distinct categories, ranging from micro-thin transfer sheets to heavy, structural cardstocks. Because each format requires different blades, mats, and pressure settings, taking the time to understand these variables before you buy ensures a smooth crafting process and a beautiful, long-lasting finish.
Understanding Cricut Foil Types and Machine Compatibility
Before purchasing any foil product, it is essential to distinguish between the three primary formats available: foil transfer sheets, foil cardstock, and foil poster boards. These materials differ fundamentally in their physical structure, weight, and how they are processed by your cutting machine. Foil transfer sheets are incredibly thin, delicate films designed solely to deposit a metallic layer onto a separate base material, such as cardstock, vellum, or faux leather. They do not possess any structural rigidity of their own and must always be paired with a host medium.
Products mentioned in this guide
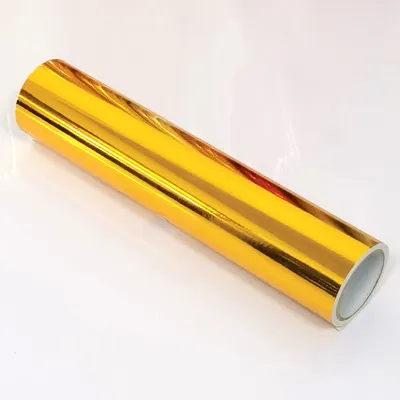
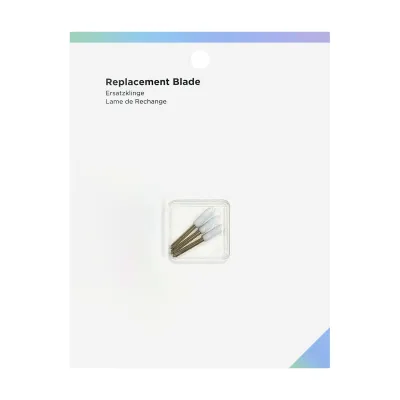
Prices are valid at publication and may change. Please refer to the product page for the latest price.
In contrast, foil cardstock and foil poster boards are structural materials. Foil cardstock features a reflective metallic layer laminated onto a medium-weight paper backing, making it ideal for cutting intricate shapes, folding, and layering. Foil poster board is significantly thicker and more rigid, designed to hold its shape in three-dimensional crafts or large-scale displays. Because these materials are cut completely through rather than used as a transfer medium, they require different machine settings and blade types than thin transfer sheets.
Machine compatibility is another critical factor to verify before finalizing your purchase. Not every Cricut machine can utilize every foil product or tool. For instance, the official pressure-activated Foil Transfer Tool, which is required to use foil transfer sheets, is designed to fit specific machine carriages. While larger models like the Explore and Maker series accommodate the standard multi-tip transfer tool, smaller machines like the Joy series require a specialized, smaller version of the tool. Always check the compatibility list on the product packaging or the manufacturer’s official website to ensure your specific machine model is supported.
Additionally, you must identify the required application method for the foil product you choose. Cricut’s proprietary foil transfer system is entirely pressure-activated, utilizing a unique tool tip to press the foil film onto the base material without heat. However, the crafting market also features heat-activated foils, which require a heated pen, laminator, or hot foil stamp to release the metallic layer. Attempting to use heat-activated foils with a pressure-only tool, or vice versa, will result in a failed transfer and can potentially ruin your project or damage your machine’s writing head. Always read the product label to confirm whether the foil requires heat or mechanical pressure to activate.
Key Selection Criteria for Your Crafting Needs
When comparing different foil options, the visual finish is often the first attribute crafters consider. Foil products are available in a wide array of finishes, including classic metallic, matte, glossy, and holographic. Classic metallic finishes (such as gold, silver, and copper) offer a traditional, high-shine reflective surface that mimics polished metal. Matte foils provide a softer, satin-like sheen that reduces glare and offers a more contemporary, understated look. Holographic foils feature a multi-colored, light-shifting effect that changes appearance depending on the angle of view, making them excellent for eye-catching accents. Choosing the right finish depends heavily on the aesthetic goals of your project and how the finished piece will be lit.

Beyond aesthetics, you must evaluate the physical dimensions, thickness, and weight of the foil sheets. Standard sheets typically come in sizes like 12×12 inches for larger machines, or smaller, pre-cut sizes tailored for compact smart cutting machines. Ensure the dimensions of the foil sheet align with your cutting mat size and the maximum cutting area of your machine. Furthermore, pay close attention to the material’s weight, usually measured in grams per square meter (gsm) or pounds (lb). Heavy foil poster boards require more vertical clearance under the machine’s rollers and a stronger blade to cut through cleanly, whereas thin foil cardstock can be processed with a standard fine-point blade.
Another vital consideration is the adhesive or transfer mechanism required to secure the foil during and after the cutting process. For foil transfer sheets, you will need a reliable way to hold the delicate sheet completely taut against your base material. Most official transfer sheet packs include low-tack tape strips for this purpose. If you are using foil cardstock or poster board, you must select a cutting mat with the appropriate grip strength. A mat with too much grip can tear the paper backing of foil cardstock when you attempt to peel it off, while a mat with insufficient grip may allow the heavy material to slip during cutting, ruining your design.
Matching Foil Products to Specific Project Types
To ensure your finished craft can withstand its intended use, you must match the physical properties of the foil to the practical demands of the project. For greeting cards, invitations, and stationery, foldability and paper weight are paramount. If you use a foil cardstock that is too thick or rigid, it may crack along the fold lines, exposing the white paper core beneath the metallic laminate. To prevent this, look for medium-weight foil cardstocks that are rated for clean scoring and folding, or use foil transfer sheets to apply metallic designs directly onto high-quality, fold-resistant cardstock bases.
For durable, frequently handled items such as custom bookmarks, luggage tags, or product packaging, structural integrity and scratch resistance are critical. Foil poster board is highly suitable for these applications because its rigid core resists bending and warping over time. However, because these items will be touched repeatedly, you should verify the durability of the foil surface itself. Some high-shine glossy foils show fingerprints, smudges, and fine scratches very easily. For items subjected to constant handling, a matte or textured metallic foil is often a more practical choice, as it hides wear and tear much better than a mirror-like finish.
Large-format projects, such as wall art, framed posters, or party banners, present a different set of challenges. Here, sheet size limits and visual impact under room lighting are your primary concerns. When planning a large poster, ensure the foil sheets you purchase are large enough to cover the design area without requiring visible seams. Additionally, consider how light reflects off large metallic surfaces in a room. A massive sheet of high-gloss gold foil can create intense, distracting reflections under direct sunlight or overhead home lighting. Opting for a matte metallic or a strategically placed holographic accent can deliver a stunning visual impact without causing uncomfortable glare.
Pre-Purchase Checks and Usage Verification
Before you begin cutting your chosen foil material, always consult the manufacturer’s instructions for the recommended machine settings, blade types, and pressure levels. Digital cutting software typically includes pre-programmed material settings for official foil products, which automatically adjust the blade depth and cutting pressure. If you are using a new or non-standard foil material, you may need to manually adjust these settings. Using the wrong pressure can lead to incomplete cuts on thick cardstock, or it can cause the blade to slice completely through a delicate foil transfer sheet and damage your cutting mat underneath.
To prevent material waste and ensure a perfect final result, always perform a small test cut or test transfer on a scrap piece of your material before starting your main project. Cut a simple, one-inch geometric shape, such as a circle or square, in an unused corner of the sheet. This trial run allows you to observe how cleanly the blade cuts through the foil laminate, whether the foil transfer adheres evenly to your base medium, and how easily the material releases from your cutting mat. If the test cut shows jagged edges or fails to weed cleanly, you can adjust your machine’s pressure settings or install a fresh blade before committing your primary materials.
During the cutting or transferring process, keep a close eye on your machine’s progress. If you observe the foil tearing, lifting off the mat, transferring unevenly, or causing the machine’s motor to strain, pause or stop the cut immediately. These issues often indicate that the blade is dull, the mat has lost its stickiness, or the material thickness exceeds the machine’s physical limits. Continuing a failing cut can lead to permanent damage to your cutting mat, blade housing, or the machine’s internal drive gears. In such cases, stop the operation, inspect your tools, and consult the manufacturer’s troubleshooting resources to resolve the issue safely.
Frequently Asked Questions (FAQ)
Can I use third-party foil with Cricut machines?
Yes, you can use third-party foil products with your machine, but you must do so with caution and careful preparation. Before purchasing non-branded foil sheets or transfer rolls, carefully review the third-party manufacturer’s specifications to confirm they are explicitly rated for use with digital cutting machines and standard adhesive mats. Keep in mind that using third-party materials carries certain risks, such as inconsistent transfer quality, premature blade wear, or physical damage to your cutting mat if the material is too thick or has an incompatible adhesive backing. Additionally, if a non-approved material causes physical damage to your machine’s carriage or motor, it may void your manufacturer’s warranty. Always perform thorough test cuts with third-party materials to verify compatibility before proceeding.
How should I store unused foil sheets to prevent damage?
Proper storage is essential to preserve the reflective finish and structural quality of your unused foil sheets over time. Always store your foil sheets completely flat in their original packaging or in a dedicated, rigid storage folder. Allowing the sheets to roll up, bend, or stand on their edges can cause permanent creasing, corner curling, and delamination of the metallic layer from its paper backing.
Additionally, store your foil materials in a cool, dry environment away from direct sunlight and high humidity. This is particularly important in tropical climates, such as Singapore, where elevated relative humidity can weaken paper backings, degrade the adhesives on foil cardstock, or cause the delicate metallic film on transfer sheets to degrade. Direct sunlight and UV exposure can also fade vibrant holographic or colored foil finishes, so keeping them in a dark, climate-controlled drawer or cupboard will ensure they remain in pristine, project-ready condition.
Community discussion
Share your experience or ask a question. Comments are reviewed before publication.