
Finding the ideal button snap tool for your home sewing projects in Singapore depends on your crafting frequency, the fabrics you typically use, and the storage space available in your home. For most hobbyists working on lightweight garments or baby clothes, a portable set of hand-held snap pliers offers the best balance of affordability, ease of use, and compact storage. If you frequently work with heavy-duty materials like canvas, denim, or thick layers of webbing, a tabletop press machine provides the mechanical leverage needed to secure fasteners without straining your hands.
Choosing the wrong tool can lead to misaligned snaps, damaged fabrics, or hand fatigue during long sewing sessions. By understanding the mechanical differences between pliers, tabletop presses, and hammer-and-anvil kits, you can select an option that fits your workspace and skill level. This guide breaks down the primary types of snap tools, key selection criteria, and practical tips to ensure clean, professional results on every project.
Understanding the Main Types of Button Snap Tools
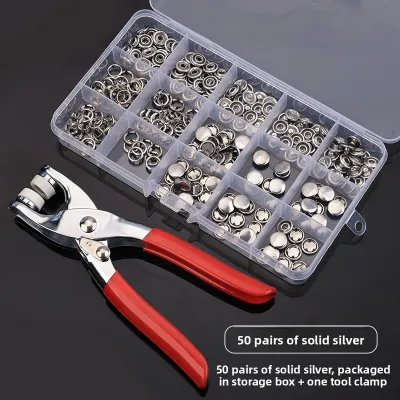
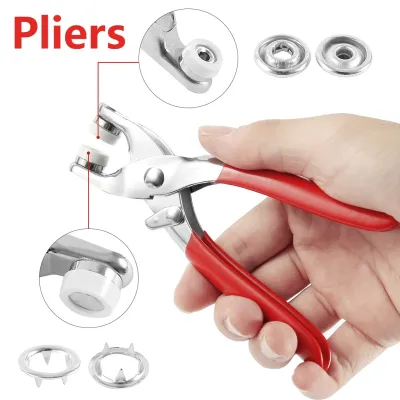
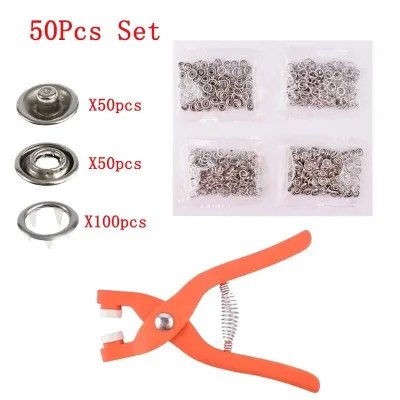
Plier-style applicators are the most common choice for home sewists due to their portability and straightforward operation. These hand-held tools function similarly to a pair of pliers, using manual squeeze pressure to crimp the snap components together. They are highly portable, making them easy to store in a standard sewing basket or drawer, which is particularly advantageous in space-conscious Singapore apartments. However, because they rely entirely on your grip strength, installing multiple snaps in a single session can cause hand fatigue, and they may struggle to apply sufficient pressure on heavy-duty metal snaps.
Products mentioned in this guide
Prices are valid at publication and may change. Please refer to the product page for the latest price.
Table-top press machines offer a stationary, heavy-duty alternative designed for maximum stability and precision. These machines feature a cast-iron or heavy aluminum frame that sits firmly on your worktable, utilizing a long lever handle to multiply your physical force. This mechanical advantage allows you to install heavy-duty metal snaps, grommets, and rivets with minimal physical effort. While they deliver highly consistent results and perfect alignment, they have a much larger workspace footprint and are significantly heavier, making them less convenient to move or store when not in use.
Hammer-and-anvil kits represent the most traditional and budget-friendly method of installing snaps. These kits consist of a small metal base (the anvil) and a cylindrical rod (the setter) that you strike with a hammer or mallet to flare the snap prong. While extremely cost-effective and capable of handling various snap sizes, this method is highly dependent on manual coordination and can be quite noisy. The loud hammering sound can be disruptive in close-living environments like HDB estates, and a single off-center strike can easily bend the snap or damage the surrounding fabric.
Key Selection Criteria for Home Sewing
When evaluating different button snap tools, compatibility with various snap sizes and materials is a primary consideration. Snaps come in several styles, including plastic utility snaps (often used for baby clothes and diapers), standard metal ring snaps, and heavy-duty spring snaps. Some tools are designed exclusively for plastic snaps, while others can handle both plastic and metal fasteners. You must verify that the tool you choose supports the specific diameter and style of snaps required for your projects, whether you are working with delicate 9mm fasteners or jumbo 15mm utility snaps.

Interchangeable dies and molds are essential for versatility, allowing a single tool body to install different sizes and shapes of snaps. High-quality tools feature removable rubber caps or metal dies that can be swapped out quickly to match the cap, socket, stud, or prong of the snap you are installing. When selecting a tool, look for models that include a comprehensive set of dies or offer widely compatible replacement parts, so you do not have to purchase an entirely new tool when your project requirements change.
Fabric thickness clearance and jaw depth determine where and how you can apply snaps on your projects. The jaw depth refers to the distance between the pressing center and the inner throat of the tool. Hand-held pliers typically have a shallow jaw depth, meaning you can only install snaps close to the edge of a fabric panel, such as on cuffs, plackets, or pocket flaps. If your project requires placing a snap deep within the body of a bag or a wide fabric panel, you will need a tool with a deeper throat clearance, which is more commonly found on tabletop press machines.
Ergonomic handle design and grip materials play a crucial role in preventing hand strain, especially during repetitive tasks. Look for hand-held pliers that feature padded, non-slip rubber grips and an integrated spring-return mechanism that automatically opens the handles after each squeeze. For tabletop presses, a long, curved lever handle with a comfortable foam or plastic grip ensures that you can apply steady, controlled pressure without putting unnecessary stress on your wrists and shoulders.
Matching the Tool to Your Skill Level and Project Volume
For occasional crafters, beginners, and those focused on quick repairs, lightweight snap pliers or basic hammer-and-anvil kits are generally the most practical choice. If you only need to replace a missing snap on a raincoat, add fasteners to a simple fabric pouch, or complete a few baby bibs a year, there is little need to invest in heavy, expensive machinery. A simple, well-constructed plier set is easy to master, requires no permanent desk space, and can be stored away in a small craft box when your project is complete.
Regular garment makers who produce everyday clothing, children’s wear, or lightweight accessories will benefit from heavy-duty pliers with padded grips or an entry-level manual press. If you sew weekly, the physical effort of using basic pliers can quickly become tedious. Upgrading to a tool with better mechanical leverage and more precise die alignment ensures that your snaps remain secure through repeated wash cycles. This level of tool provides the consistency needed for professional-looking garments without the high cost of industrial equipment.
High-frequency creators, independent designers, and small business owners running home-based studios should invest in a dedicated table-top press machine. When you are producing items in bulk or working with dense, unforgiving materials like heavy canvas, denim, or leather, manual pliers are simply inefficient and physically demanding. A tabletop press with quick-change dies allows you to streamline your assembly line, ensuring that every single snap is applied with identical pressure and perfect alignment, which minimizes wasted materials and defective products.
Pre-Purchase Checks and Compatibility Verification
Before finalizing your purchase, it is critical to verify whether the snap tool requires brand-specific dies or if it supports universal third-party molds. Some manufacturers design their tools with proprietary threading or unique die dimensions, forcing you to buy their specific brand of replacement snaps and accessories. Opting for a tool that accepts universal or standard-sized dies gives you the freedom to source snaps from various suppliers, which is often more cost-effective and provides a wider selection of colors, finishes, and materials.
You must also check the manufacturer’s specifications regarding maximum fabric thickness and snap prong length limits. If the fabric layers are too thick for the snap prong to penetrate and crimp securely, the snap will inevitably fall off or damage the fibers. Conversely, if the prong is too long for a very thin fabric, the snap will wobble and fail to close tightly. Always measure your compressed fabric layers with a caliper or ruler and compare this measurement against the recommended prong length specified by the snap manufacturer.
Reviewing the long-term availability of replacement dies, extra molds, and warranty terms is another essential step when investing in specialized craft equipment. High-quality tools are an investment, and you want to ensure that if a rubber cushion wears out or you need a new die size in the future, parts are readily available from local sewing supply shops or reliable online distributors. Checking the warranty terms can also give you peace of mind regarding the durability of the tool’s frame and mechanical joints under regular use.
Finally, always plan a mandatory test run on fabric scraps that perfectly replicate the thickness and structure of your final project before applying snaps to your finished work. This simple step allows you to verify that the dies are aligned correctly, the pressure applied is sufficient, and the fabric can handle the stress of the installation. A test run also helps you determine if you need to add interfacing or stabilizer to reinforce the area, preventing costly mistakes on a garment that took hours to sew.
Frequently Asked Questions (FAQ)
How can I prevent the tool from tearing the fabric during installation?
To prevent the snap tool from tearing or pulling through your fabric, always reinforce the installation area with a layer of fusible interfacing or a sturdy fabric stabilizer. This is especially important for lightweight, stretchy, or loosely woven materials like linen, double gauze, and knits. Additionally, ensure that the snap prong length matches the total thickness of your fabric layers; a prong that is too short will strain the fibers, while one that is too long can bend awkwardly and slice through the weave. Always apply smooth, even pressure rather than sudden, jerky force when squeezing the tool.
What is the best way to store and organize interchangeable dies?
The best way to store interchangeable dies is to keep them in a labeled, multi-compartment plastic organizer box to prevent them from getting lost or damaged. Because Singapore experiences high humidity levels year-round, metal dies are susceptible to rust if left exposed to the air. To protect your investment, place a few silica gel packets inside the storage container to absorb excess moisture, and ensure the dies are completely dry before putting them away. Periodically applying a very light coat of sewing machine oil to the metal surfaces can also help prevent oxidation.
How do I fix a misaligned or loosely attached snap?
If a snap is misaligned or loose, it must be removed and replaced, as attempting to re-press a bent prong rarely results in a secure fit. To remove a faulty plastic snap, use a pair of side-cutting pliers to carefully snip the center post on the underside of the cap, taking care not to cut the surrounding fabric. For metal snaps, use a specialized snap removal tool or gently pry the prongs open with a small flathead screwdriver. Once removed, inspect the fabric for damage; if the hole has stretched, reinforce the area with a small patch of interfacing before installing a new snap in its place.
Community discussion
Share your experience or ask a question. Comments are reviewed before publication.