
Selecting the right bubble polymailer size is a balancing act between protecting your items and keeping shipping costs low. If the mailer is too small, you risk seam bursts and damaged goods; if it is too large, you pay unnecessary dimensional weight fees and allow your products to slide around during transit. To find the correct size, you must look beyond flat two-dimensional measurements and calculate how your product’s thickness reduces the usable space inside the envelope.
The Core Sizing Formula for Bubble Poly Mailers
To estimate the minimum dimensions of the bubble polymailer you need, use a straightforward three-dimensional calculation. A flat envelope must stretch and curve to accommodate the height of your item, which pulls the front and back panels closer together. Use these formulas as your starting point:
- Minimum Mailer Width = Product Width + Product Thickness + 15 mm (Allowance)
- Minimum Mailer Length = Product Length + Product Thickness + 25 mm (Sealing Edge and Flap Allowance)
Relying solely on flat, two-dimensional product measurements is one of the most common reasons businesses purchase undersized packaging. A book that is 200 mm wide and 30 mm thick will not fit into a mailer that is exactly 200 mm wide, because the 30 mm thickness pulls the sides inward, narrowing the opening. Once you calculate these minimum dimensions, always round up to the next standard commercial size available from your packaging supplier. Standard sizes are more cost-effective than custom orders and ensure you have a safe margin of error.
Products mentioned in this guide
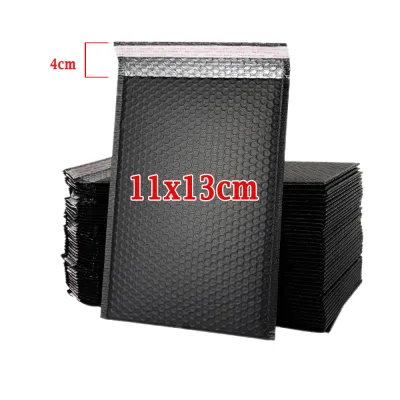
![[SG] ⭐CHEAPEST BUNDLE⭐ Bubble Polymailer | Bubble Envelope | Bubble Mailer | Padded Envelope | 20pcs/50pcs/100pcs](https://img.lazcdn.com/g/p/40e64ebba58dc26934100879fa7789d6.jpg_400x400q80.jpg_.webp)
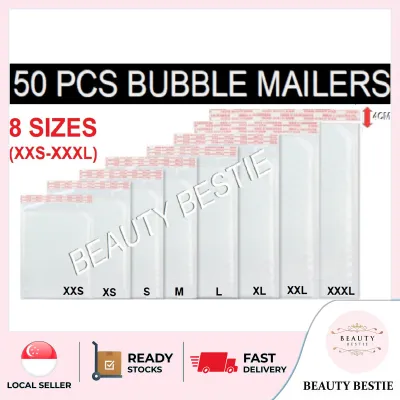
![[SG SELLER] Matte Bubble Mailer Poly Mailer Self-Seal Adhesive Padded Envelope Water Resistant Shipping Bags for Mailing](https://img.lazcdn.com/g/p/a61faf78eab8d6675425500915db76e8.png_400x400q80.png_.webp)
Prices are valid at publication and may change. Please refer to the product page for the latest price.
How to Measure Your Products Accurately
Before applying any formula, you must establish a reliable baseline by measuring your items at their absolute widest, longest, and thickest points. Use a firm ruler or a caliper rather than a flexible tape measure, which can easily sag and give inaccurate readings. If your product has protruding parts, such as a bottle cap, a decorative bow, or a raised handle, include these features in your maximum thickness measurement.

Handling irregularly shaped items or soft goods requires a slightly different approach. Soft goods like apparel, plush toys, or socks can compress easily, meaning you can often use a slightly smaller mailer than the raw measurements suggest. However, you should avoid compressing them so tightly that the seams of the mailer are placed under constant tension. For multi-item bundles, stack or arrange the items exactly as they will be packaged, wrap a rubber band or a temporary strap around them, and measure the entire bundle as a single solid object.
Additionally, always measure your products in their final shipping state. If you plan to place a cosmetic bottle inside a retail paperboard box or wrap a ceramic mug in a protective polybag first, measure the outer dimensions of that primary packaging rather than the bare product itself.
Adjusting for Thickness and Sealing Flaps
When a flat bubble polymailer is filled, it undergoes what packaging professionals call the “gusset effect.” Because the mailer lacks built-in side walls or gussets, the front and back layers must bend to wrap around the sides of your product. This bending action consumes both the width and the length of the mailer simultaneously. The thicker your product, the more dramatic this shrinkage becomes, reducing the actual usable interior space.
You must also allocate sufficient space for the adhesive seal flap to fold over and secure itself properly. The flap should seal flat against the exterior back of the mailer. If your product is too tall or positioned too close to the opening, the flap will be forced to stretch over the top curve of the item. This creates an uneven seal, exposes the adhesive to dust and moisture, and increases the risk of the mailer popping open during sorting at local courier hubs.
In warm, humid climates, adhesive performance and bond strength can vary depending on the exact plastic and adhesive formulation. Performing a manual peel test on a sample mailer—by sealing it, letting it sit, and attempting to pull it apart—is an excellent observable trial to verify that the seal remains secure under local environmental conditions before committing to a bulk order. Leaving adequate slack is essential for protecting the integrity of the packaging. A tight fit puts continuous tension on the side seams, making them vulnerable to splitting when dropped or stacked. Furthermore, excessive pressure compresses the air bubbles inside the lining, flattening them and destroying the very cushioning designed to protect your goods from impact.
Matching Mailer Dimensions to Product Types
Different categories of goods demand distinct fitting strategies to balance protection and material efficiency.
- Flat and Flexible Items: Products like documents, art prints, t-shirts, and soft textiles require minimal extra allowance. Because these items have negligible thickness, you can choose a mailer size very close to the product's flat dimensions. A standard bubble lining provides excellent puncture resistance and light cushioning without adding unnecessary bulk.
- Rigid and Boxed Items: Items such as hardcover books, board games, or boxed cosmetics require a highly precise fit. If the mailer is too loose, the sharp corners of the boxes will slide around, repeatedly striking the seams and potentially puncturing the plastic. For these items, calculate the dimensions carefully to ensure the product remains snug and stationary, while still leaving enough room to slide the item in smoothly without tearing the opening.
- Fragile or Irregular Items: Delicate goods like glassware, small electronics, or handmade ceramics require extra space for additional void fill, such as loose bubble wrap or packing paper. When shipping these items, verify that the built-in bubble lining of the mailer provides adequate cushioning and is not compressed flat against the product. If the item has sharp, irregular protrusions, wrap those areas individually before placing the item inside the mailer to prevent localized punctures.
Common Sizing Mistakes and How to Avoid Them
Avoiding common packaging pitfalls can save your business significant time and money. One frequent mistake is choosing a mailer that is too tight. This not only makes the packing process slow and frustrating for your fulfillment team, but it also leads to seam bursts, crushed protective bubbles, and insecure adhesive seals.
Conversely, using an excessively large mailer is a costly error. Most modern courier services calculate shipping rates based on dimensional weight rather than actual weight. A larger envelope occupies more space in delivery vans, which can push your shipping costs up, costing you more in S$ over time. Additionally, an oversized mailer allows the product to slide back and forth, which degrades the bubble lining through friction and increases the likelihood of internal damage.
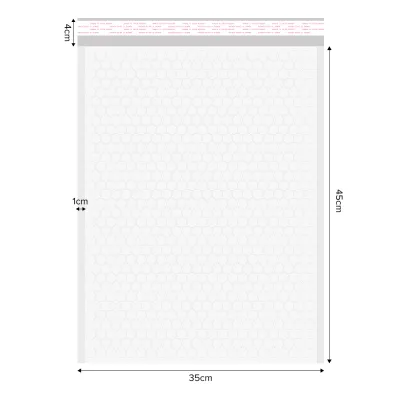
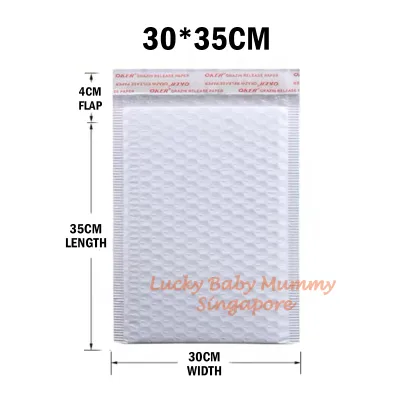
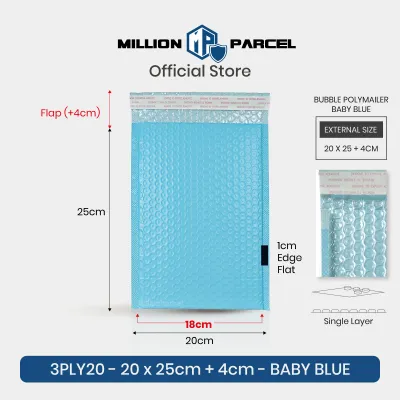
Always pay close attention to the specifications provided by your packaging supplier. Suppliers typically list the exterior dimensions of the mailer. The actual interior usable capacity is always smaller, typically reduced by the width of the side seams (usually about 10 mm to 15 mm on each side) and the length of the sealing flap.
Frequently Asked Questions (FAQ)
Can I use a bubble poly mailer for heavy items?
Bubble polymailers are highly durable, but they are not designed for heavy or dense items. Always check the manufacturer’s weight ratings and seam strength specifications before shipping. As a general rule, if an item weighs more than 2 to 3 kilograms, or if it has dense, sharp edges, you should transition to a rigid corrugated box. Heavy items can easily burst the plastic seams of a mailer when dropped during transit, and they do not receive adequate structural support from flexible packaging.
How do I determine the actual usable interior space?
To find the true usable interior space, subtract the width of the side seams (typically 10 mm to 15 mm per side) from the stated exterior width, and subtract the seal flap length (usually 40 mm to 50 mm) from the total exterior length. Because bubble linings vary in thickness, the most reliable method is to order a small sample pack of different mailer sizes from your supplier. Testing the physical fit with your actual products before placing a bulk order prevents costly purchasing mistakes.
Community discussion
Share your experience or ask a question. Comments are reviewed before publication.