
Selecting the perfect needle for your Brother sewing machine is the single most important step to achieving flawless stitches and protecting your machine from internal damage. To make the right choice, you must align three crucial factors: your machine’s specific needle system, the weight of your fabric, and the structural design of the material you are sewing. Using an incorrect needle leads to skipped stitches, broken threads, puckered seams, and can even throw off your machine’s timing.
For almost all domestic Brother sewing machines, the standard needle system is the flat-shank 130/705 H (also known as the 15×1 system). Once you verify this compatibility, you can select the correct needle size based on the thickness of your fabric and match the needle point to whether your fabric is woven, knit, or a specialty material.
Verify Your Brother Machine's Needle System First
Before purchasing any accessories, you must establish the foundational compatibility requirements of your specific Brother model. Most domestic Brother sewing machines—ranging from entry-level mechanical models to advanced computerized sewing and embroidery combination units—utilize a flat-shank needle system. This standard is universally designated as 130/705 H or 15×1. The flat side of the shank ensures that the needle is inserted in the correct orientation, aligning the needle scarf perfectly with the machine’s rotary hook or shuttle hook to form stitches reliably.
Products mentioned in this guide
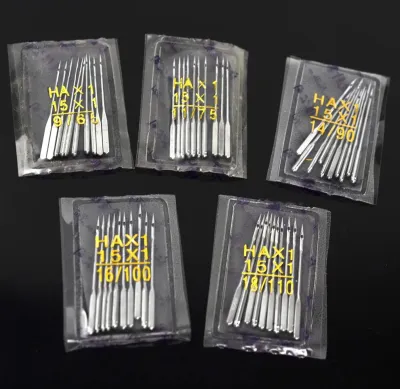
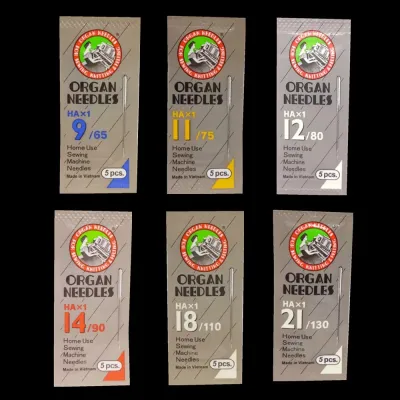
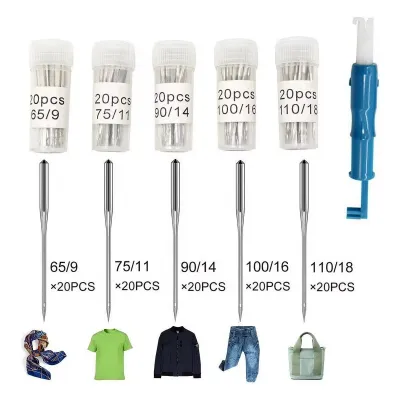
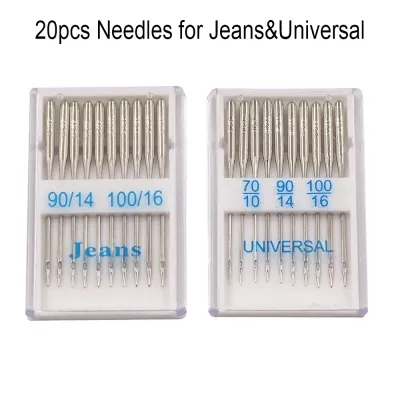
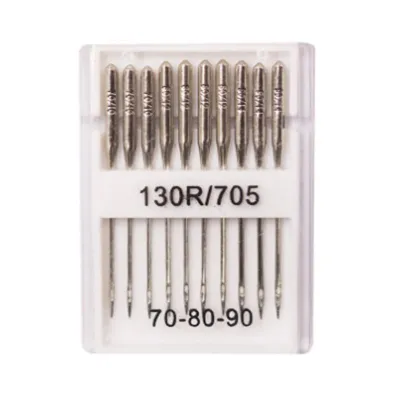
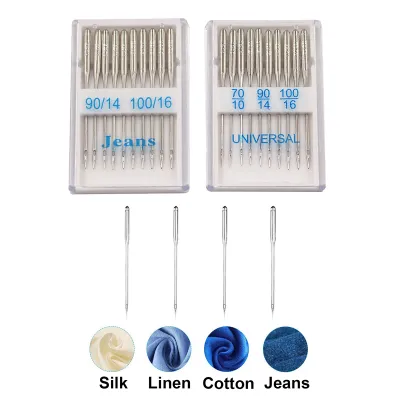
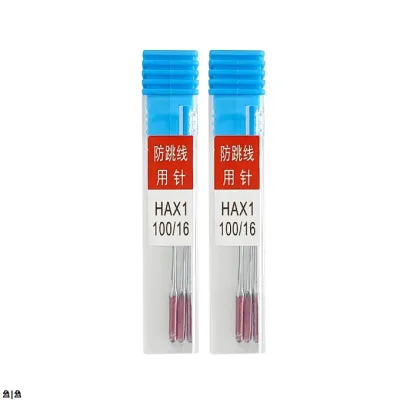
Prices are valid at publication and may change. Please refer to the product page for the latest price.
While the 130/705 H system is standard, you should always consult your specific Brother machine manual to confirm its exact requirements. This step is especially critical if you are operating specialized embroidery-only machines, heavy-duty semi-professional models, or when planning to use twin or triple needles. Twin needles require specific throat plate clearance widths; using a twin needle that is too wide for your machine’s maximum stitch width setting will cause the needle to strike the metal plate and shatter instantly, potentially damaging the internal timing mechanism.
You must strictly avoid purchasing industrial sewing machine needles for a domestic Brother machine. Industrial needles typically feature a completely round shank (such as the DBx1 or DPx5 systems) and lack the flat side required by domestic needle clamps. Attempting to force a round-shank needle into a domestic Brother machine will prevent proper alignment, cause severe timing issues, or result in the needle hitting the bobbin case, leading to expensive professional repairs.
Match the Needle Size to Your Fabric Weight
Once you have confirmed the correct needle system, the next step is selecting the appropriate needle size, which directly corresponds to the thickness and density of your fabric. When looking at a packet of sewing needles, you will notice a dual-numbering system, such as 80/12 or 90/14. The larger number represents the European metric size (ranging from 60 to 120), which measures the needle shaft’s diameter in hundredths of a millimeter. The smaller number represents the American imperial sizing system (ranging from 8 to 19).

Matching the needle size to your fabric weight prevents structural damage to the textiles and ensures smooth thread delivery. If you use a needle that is too thick on a delicate fabric, the needle will leave highly visible, permanent holes and may snag or pucker the fibers. Conversely, if you use a needle that is too thin on a heavy fabric, the needle will deflect, bend, or snap under the resistance of the dense weave.
To guide your selection, categorize your projects into three primary fabric weight brackets:
- Lightweight Fabrics: For delicate materials like silk, chiffon, organza, georgette, and fine lace, select a 60/8 or 70/10 needle. These ultra-fine needles pierce the delicate weave cleanly without pulling or tearing the threads. This size range is also highly suitable for sewing delicate lightweight cotton lawn or batik fabrics often used in Singapore's warm climate.
- Medium-Weight Fabrics: For standard everyday sewing, including quilting cotton, linen, poplin, chambray, and lightweight wool, use an 80/12 needle. This is the most versatile size and is ideal for constructing standard apparel or home decor items.
- Heavyweight Fabrics: For dense or thick materials such as denim, heavy canvas, corduroy, upholstery fabrics, and multiple layers of fabric, opt for a 90/14, 100/16, or even 110/18 needle. These robust needles are engineered with thicker shafts to withstand the force required to penetrate heavy layers without flexing.
Additionally, remember that your thread size must match your needle size. A thick thread threaded through a tiny needle eye will shred and break due to excessive friction, while a very fine thread in a large needle eye will not form the loop necessary for the bobbin hook to catch, resulting in skipped stitches.
Select the Right Needle Type and Point Shape
The shape of the needle’s point determines how it interacts with the fibers of your fabric. Using the wrong point shape can ruin your project, causing runs in knit fabrics or jagged holes in wovens.
Universal and Sharp Needles for Wovens
Woven fabrics are constructed by interlacing vertical and horizontal threads at right angles. To sew these materials cleanly, you need a needle point that can either slide between the tight weave or pierce it directly.
- Universal Needles: These are the most common needles and feature a slightly rounded point that is sharp enough to pierce woven fabrics but gentle enough to handle some stable knits. They are excellent for general sewing on quilting cotton, linen, and synthetic blends.
- Sharp or Microtex Needles: These needles feature an exceptionally slim, acute point designed to pierce high-density woven fabrics cleanly. They are the ideal choice for sewing microfibers, silk, polyester satins, and coated materials like faux leather. Because the point is so sharp, it creates clean, straight stitches without pushing the dense fibers aside or causing puckering along the seam line.
Ballpoint and Stretch Needles for Knits
Knit fabrics are constructed from interlocking loops of yarn, giving them their characteristic stretch. Using a standard sharp needle on a knit fabric will slice through the yarn loops, causing small holes that eventually unravel into ladders or runs.
- Ballpoint or Jersey Needles: These needles feature a distinctly rounded tip that is designed to push aside the loops of knit fibers rather than cutting through them. They are essential for sewing standard jersey, interlock, cotton knits, and sweater knits, preserving the structural integrity of the fabric.
- Stretch Needles: While similar to ballpoint needles, stretch needles are specifically engineered for highly elastic fabrics containing a high percentage of spandex, Lycra, or elastane, such as swimwear, activewear, and dance costumes. They feature a medium ballpoint and a specialized scarf and eye design that prevents the fabric from flagging (riding up with the needle), which is the primary cause of skipped stitches on highly elastic materials.
Specialty Needles for Heavy or Unique Materials
Certain challenging materials require specialized needle structures to handle extreme thickness or non-fibrous compositions.
- Denim or Jeans Needles: These needles are built with a reinforced, heavy-duty shaft and a very sharp, slender point. This combination allows the needle to pierce multiple layers of heavy denim, canvas, or tightly woven duck cloth without bending or breaking. They are highly recommended for sewing flat-felled seams on jeans or constructing sturdy tote bags.
- Leather Needles: Unlike other needles that push fibers aside, leather needles feature a wedge-shaped cutting point. This point acts like a tiny blade, slicing a small, clean hole through genuine leather, heavy suede, or thick non-woven synthetics.
- Warning: You must never use a leather needle on woven or knit fabrics. Because the wedge point cuts rather than pierces, it will permanently sever the yarns of woven and knit fabrics, causing the seams to fall apart and the fabric to shred under any tension.
Step-by-Step: Selecting, Installing, and Testing the Needle
Achieving professional sewing results on your Brother machine requires a disciplined workflow. Follow these steps for every new project to ensure your needle setup is correct and safe.
Step 1: Identify Your Materials Lay out your primary fabric and the thread you plan to use. Determine the fabric’s weight (light, medium, or heavy) and its structure (woven or knit). Use this information to select the corresponding needle type and size from your collection.
Step 2: Verify the Needle Packaging Before opening a new needle pack, read the label carefully. Confirm that the needle system is compatible with your domestic Brother machine (look for “130/705 H” or “15×1”). Check that the size and type match your material requirements.
Step 3: Install the Needle Safely Turn off your Brother sewing machine’s power switch to prevent accidental activation. Turn the handwheel toward you to raise the needle bar to its highest point, then lower the presser foot to give yourself more working room. Loosen the needle clamp screw using the screwdriver provided in your Brother accessory kit. Remove the old needle. Insert the new needle into the clamp, ensuring the flat side of the shank faces the back of the machine (unless your specific Brother manual indicates otherwise). Push the needle up as far as it will go into the needle bar. While holding it firmly in place, securely tighten the needle clamp screw.
Step 4: Perform a Stitch Verification Test Never begin sewing directly on your main project pieces. Cut a small scrap of your project fabric and fold it to mimic the actual number of layers you will be sewing. Thread your machine with your chosen thread. Sew a few test lines of straight stitches and zig-zag stitches. Inspect the stitches for skipped loops or uneven tension. Listen closely to the machine: a loud “thudding” or “punching” sound indicates the needle is too thick or dull. Check the thread for shredding or fraying near the needle eye, which indicates the needle size is too small for the thread thickness.
Recognize When It Is Time to Replace the Needle
Many sewing frustrations—such as skipped stitches, looped threads, and puckered seams—are caused by a dull or damaged needle. Sewing machine needles are consumable items designed to be replaced frequently to protect both your fabric and your machine’s internal components.
You should monitor your machine for several auditory and visual warning signs that indicate a needle needs immediate replacement:
- Auditory Clues: A distinct clicking, popping, or thudding sound every time the needle pierces the fabric. This indicates the tip has become blunt or slightly bent.
- Visual Clues: Skipped stitches along a seam, puckered fabric, visible snags, or thread that repeatedly shreds or breaks.
- Physical Damage: Any visible bending, bluntness, or rough burrs on the needle tip. You can test for micro-burrs by gently running the tip of the needle across the back of your fingernail; if it scratches or catches, discard it immediately.
As a general maintenance rule of thumb, you should replace your sewing machine needle after every 8 to 10 hours of active sewing time, or at the start of every major new project. While it may feel wasteful to discard a needle that is not broken, a worn needle forces your Brother machine’s motor to work harder and can damage the delicate throat plate or hook timing, leading to costly professional repairs.
Frequently Asked Questions (FAQ)
Can I use other brands of needles in my Brother sewing machine?
Yes, you can safely use other reputable brands of sewing machine needles in your domestic Brother sewing machine. Brother machines do not require proprietary needles. The critical factor is ensuring that the third-party needles use the standard flat-shank 130/705 H or 15×1 needle system. When purchasing needles from local haberdasheries or online marketplaces in Singapore, always verify this code on the packaging rather than relying solely on the brand name. High-quality needles from established manufacturers will work beautifully in your Brother machine, provided you match the size and point type to your fabric.
Community discussion
Share your experience or ask a question. Comments are reviewed before publication.