
Choosing the right blind sewing needle is the key to achieving professional, nearly invisible hems on your garments and home decor projects. A blind hem relies on a specialized stitch pattern where the needle swings sideways to catch only a single thread of the folded fabric. If the needle is too thick, it leaves noticeable puncture marks on the outside of the fabric; if it is incompatible with your machine, it can cause skipped stitches or even mechanical damage. By understanding how to verify machine compatibility, match needle sizes to fabric weights, and perform proper test stitches, you can ensure clean, durable, and invisible results every time.
Verify Your Sewing Machine Compatibility
Before purchasing any blind sewing needles, you must ensure they are physically compatible with your specific sewing machine model. Using an incorrect needle type can lead to poor stitch quality, broken threads, or severe damage to your machine’s internal hook mechanism.
The first step is to identify the shank type required by your machine. The shank is the upper portion of the needle that inserts into the needle bar. Most modern domestic sewing machines use a flat-sided shank, which ensures the needle can only be inserted in the correct direction. Industrial sewing machines, as well as some specialized vintage or dedicated blind hem machines, often require round shanks. You can easily verify this by inspecting your machine’s current needle or consulting the user manual.
Products mentioned in this guide
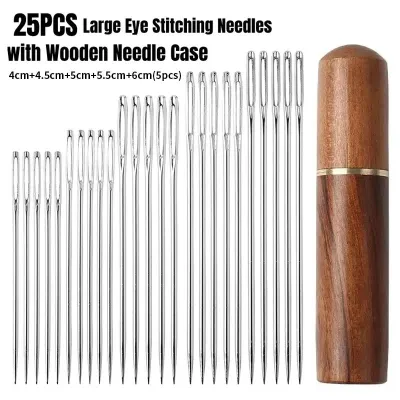
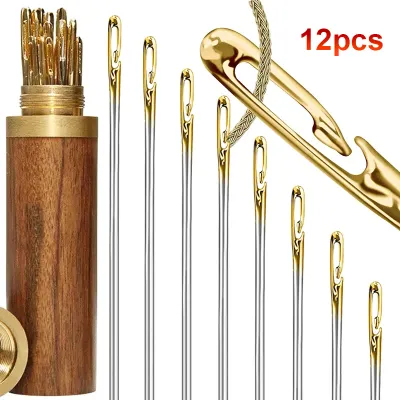
Prices are valid at publication and may change. Please refer to the product page for the latest price.
Next, you must locate the needle system code specified by your machine’s manufacturer. This code, such as 130/705 H for standard domestic machines or LWx6T for certain blind hem machines, determines the exact length of the needle, the thickness of the blade, and the alignment of the needle eye. Even a fraction of a millimeter difference in needle length can prevent the machine’s hook from catching the thread loop, resulting in constant skipped stitches or needle breakage.
Always establish a strict safety stop condition during the installation process. If the needle does not slide smoothly into the needle bar, or if the securing clamp screw cannot be tightened completely, stop immediately. Forcing an incompatible needle into the machine can bend the needle bar or strip the clamp threads, leading to costly professional repairs.
Match the Needle Size to Your Fabric Weight
Once you have confirmed the correct needle system for your machine, you must select the appropriate needle size based on the weight and density of your fabric. Needle sizes are typically labeled with two numbers, such as 70/10 or 90/14, representing the European metric size and the American sizing convention respectively. In both systems, larger numbers indicate a thicker, stronger needle blade.

For lightweight and delicate fabrics such as silk, chiffon, organza, and fine synthetics—often chosen for garments in warm, tropical climates—select a fine needle size ranging from 60/8 to 70/10. These needles have a very thin blade and a sharp point, allowing them to pierce delicate fibers cleanly without leaving visible holes or causing the fabric to pucker along the hemline.
For medium-weight woven materials, including cotton, linen, light wool, and standard synthetic blends, a medium needle size of 80/12 or 90/14 is generally the most effective choice. These sizes provide the necessary structural strength to penetrate multiple layers of fabric without bending, while still maintaining a small enough profile to keep the hem stitches discreet.
Heavyweight or highly dense fabrics, such as denim, heavy wool, canvas, and upholstery materials, require a thick needle size of 100/16 or 110/18. A thicker needle resists the high resistance of dense weaves, preventing the needle from flexing or breaking as it pierces the thick layers of a folded hem.
To ensure consistent results, always establish a visible testing standard before sewing your actual garment. Fold a generous scrap of your project fabric exactly as you intend to hem it, and sew a test line of at least fifteen centimeters. Inspect the right side of the fabric under bright light: if you see distinct, open holes where the needle penetrated, you must switch to a smaller needle size. If the fabric puckers or the thread bunches, adjust your machine’s tension or try a different needle thickness.
Identify True Blind Hem Needles on the Packaging
When shopping for needles, it is essential to distinguish specialized blind hem needles from standard universal needles. True blind hem needles are engineered with specific structural features designed to optimize the delicate stitch catching process.
Begin by examining the packaging for explicit labels such as “Blind Hem,” “Blind Stitch,” or specific manufacturer designations. These specialized needles often feature a unique point geometry, such as a slightly curved shaft or a highly specialized taper, which allows the needle to graze the surface of the folded fabric fold rather than piercing straight through it.
Another critical structural feature is the scarf—the short indentation on the back of the needle blade just above the eye. On dedicated blind hem needles, the scarf is precisely engineered to allow the machine’s rotating hook or shuttle to pass extremely close to the needle. This close clearance ensures that the thread loop is caught reliably every time the needle swings to the side, even when it only catches a single fiber of the fabric fold.
While a standard universal needle can sometimes suffice for stable, medium-weight fabrics like cotton or linen, specialized blind hem needles are highly recommended for challenging materials. Delicate, slippery, or highly elastic fabrics are prone to slipping away from a standard needle point, resulting in skipped stitches or uneven hems. Investing in a dedicated blind hem needle helps maintain consistent stitch formation and a clean finish on complex textiles.
Follow a Step-by-Step Selection and Testing Process
Achieving a clean blind hem requires a systematic approach to preparation, installation, and testing. Following a structured workflow minimizes the risk of fabric damage and mechanical errors.
Start by gathering all necessary materials. You will need your sewing machine manual, a selection of fabric scraps from your project, the correct blind hem needle, a high-quality sewing thread that matches your fabric color, and your machine’s designated blind hem presser foot.
Ensure your sewing machine is turned off before beginning the installation. Loosen the needle clamp screw and remove the old needle. Insert the new blind hem needle into the needle bar, ensuring the flat side of the shank faces the direction specified in your manual (typically toward the back of the machine). Push the needle upward as far as it will go, then tighten the clamp screw securely using a small screwdriver or the tool provided with your machine.
Thread your machine with your chosen thread, ensuring it passes correctly through all tension discs and guides. Attach the blind hem presser foot, which features a central guide designed to align the folded edge of the fabric. Fold your fabric scrap to mimic the final hem: fold the hem allowance up, then fold the main body of the fabric back on itself, leaving a small edge of the hem allowance exposed.
Place the folded fabric under the presser foot, aligning the soft fold directly against the foot’s central guide. Before pressing the foot pedal, manually turn the handwheel toward you for several full stitch cycles. Observe the needle’s movement carefully to ensure it clears the presser foot and the needle plate without striking any metal parts.
Once you have verified the mechanical clearance, sew slowly along the fold. Stop immediately if you encounter any warning signs, such as a clicking sound, a bent needle, skipped stitches, or excessive fabric bunching. If these issues occur, turn off the machine, remove the fabric, and re-verify your needle installation, size selection, and machine settings before proceeding.
Frequently Asked Questions (FAQ)
Can I use a standard universal needle for blind hemming?
Yes, you can use a standard universal needle for blind hemming, but this approach is generally limited to stable, medium-weight fabrics like cotton or linen. Universal needles feature a slightly rounded point that can successfully catch the fold of these cooperative materials. However, on delicate, slippery, or highly elastic fabrics, a universal needle is much more likely to cause skipped stitches or leave visible, unsightly puncture marks on the right side of the garment. For these challenging materials, a specialized blind hem needle is essential to achieve a truly invisible finish.
How do I know when to replace my blind sewing needle?
Sewing machine needles are consumable items that wear down and lose their precision over time. Physical signs that your needle needs replacement include a bent shaft, a dull or burred point, or a damaged eye that shreds your sewing thread. You may also notice performance issues during sewing, such as skipped stitches, uneven thread tension, or an unusual popping sound as the needle pierces the fabric. As a general rule, you should replace your needle after approximately eight hours of active sewing time, or at the start of any major hemming project, to maintain optimal stitch quality.
Community discussion
Share your experience or ask a question. Comments are reviewed before publication.