
Starting a beading journey is an exciting creative step, but using the wrong tools can quickly lead to frustration. If you try to use a standard household sewing needle for beadwork, you will likely find that your beads get stuck, your thread shreds, or your glass beads shatter. To avoid these common pitfalls, understanding the unique design of a specialized beading needle is essential.
Standard hand-sewing needles, such as sharps or embroidery needles, are designed with a tapered shaft that flares significantly at the eye to accommodate sewing threads. While this flare is helpful for general sewing, it is highly problematic for beadwork. Glass seed beads have incredibly narrow, uniform holes that cannot tolerate any widening of the needle shaft. A beading needle is engineered with a uniform, ultra-thin shaft from the tip all the way through the eye, allowing it to glide smoothly through tiny bead openings.
Furthermore, standard needles are stiff and rigid, designed to pierce woven fabrics without bending. In contrast, beading needles are highly flexible. This flexibility is a deliberate design feature, allowing the needle to bend and navigate through tight, complex bead clusters and multiple thread passes without cracking the delicate glass walls of the beads. When you hold a beading needle for the first time, its springy, bendable nature might feel unusual, but this characteristic is exactly what makes precise beadweaving possible.
Products mentioned in this guide
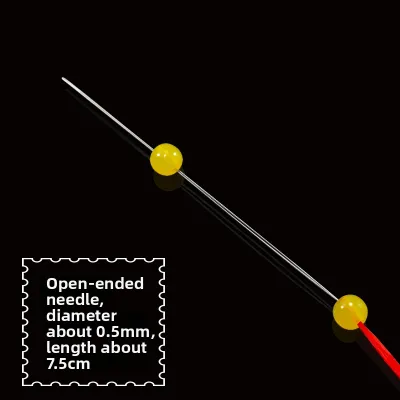
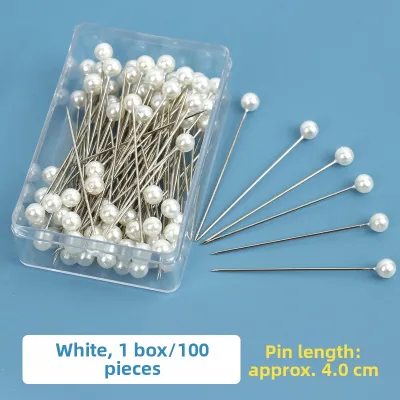
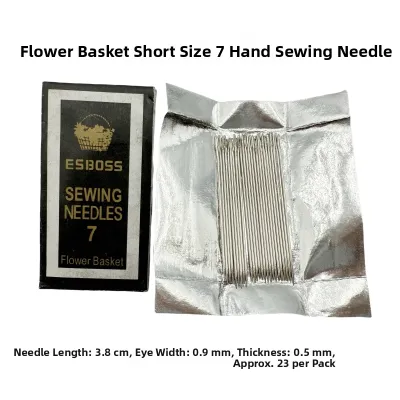
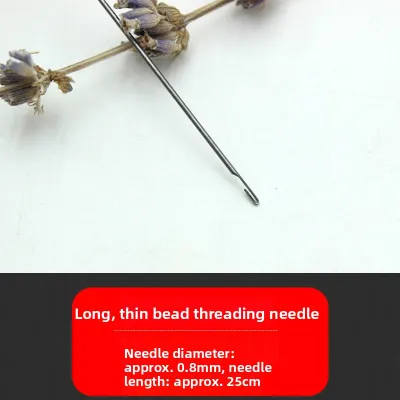
Prices are valid at publication and may change. Please refer to the product page for the latest price.
How to Match Needle Size to Your Beads and Thread
Selecting the correct needle size is the most critical decision in beadwork, as it directly impacts your stitching speed and the structural integrity of your piece. The sizing system for beading needles can be confusing for beginners because it runs in reverse: the higher the size number, the thinner and finer the needle. For example, a size 10 needle is much thicker and sturdier than a size 15 needle.
To choose the right size, you must match the needle to the specific size of your seed beads. Seed beads use an “aught” sizing system (written as 8/0, 11/0, 15/0), where a higher number indicates a smaller bead. Here are the standard guidelines to help you match your materials:
- Size 10 Beading Needles: These are relatively thick and sturdy, making them excellent for beginners who are working with larger beads such as size 8/0 or 6/0 seed beads. They are also highly compatible with thicker threads or cords used in basic stringing projects.
- Size 12 Beading Needles: This is the most versatile and widely used size in the beading community. It is the industry standard for size 11/0 seed beads, which are the most common beads used in peyote stitch, brick stitch, and looming. A size 12 needle strikes the perfect balance between flexibility and ease of handling.
- Size 13 and 15 Beading Needles: These are exceptionally thin, delicate needles designed for advanced work. They are necessary when you are using tiny size 15/0 seed beads or when your pattern requires you to pass the thread through a single bead four or five times.
When selecting your tools, always remember the Golden Rule of beadweaving: your needle must be thin enough to pass through the bead’s hole at least twice while carrying the thread. Because beadwork often requires reinforcing stitches or weaving in thread ends, a needle that fits snugly on the first pass may jam or break the bead on the second.
The Best Beading Needle Types for Beginners
When browsing craft shops in Singapore or online marketplaces, you will encounter several distinct styles of needles. Each type has its own structural characteristics, benefits, and limitations. Understanding these differences will help you select a user-friendly option for your first project.

English Beading Needles
These are the traditional standard for bead weavers worldwide. Made from high-carbon steel, they offer excellent springiness and a long, uniform shaft. The primary advantage of English needles is their durability and smooth glide. However, they feature a very tiny, rigid eye that can be incredibly difficult to thread, especially for beginners or those with limited eyesight.
Big Eye Needles
Designed specifically to eliminate threading frustration, big eye needles are made by welding two pieces of steel together at the ends, leaving a continuous slit down the entire center of the needle. To thread it, you simply pull the two halves apart and slip your thread through the massive opening. While exceptionally easy to use, they have a slight bulge at the welded ends that can snag on very small beads, and they tend to stretch out or bend permanently more quickly than other styles.
Collapsible Eye (Twist) Needles
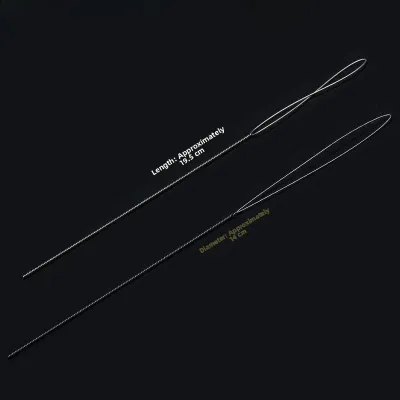
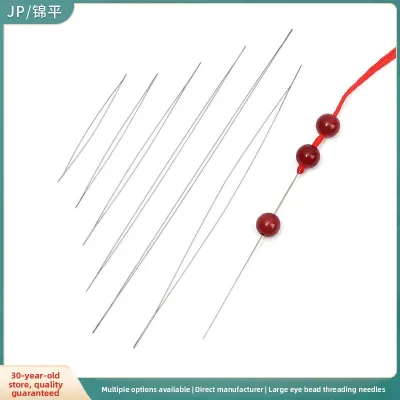
Constructed from fine, twisted wire, these needles feature a large, flexible loop at the end that collapses flat as it passes through a bead. They are highly flexible and beginner-friendly, making them ideal for stringing pearls, gemstones, or larger seed beads. The main trade-off is their delicate nature; if you pull too forcefully through a tight bead, the wire eye can deform, split, or break off entirely.
For your very first purchase, a practical approach is to buy a mixed pack containing both Size 12 English needles and a few collapsible eye needles. This allows you to test both styles, balancing the ease of threading against the precision and control of a traditional rigid-eye needle. In Singapore, these multi-packs are highly affordable, typically ranging from S$4 to S$8 at local haberdashery shops.
Choosing the Right Needle Length for Your Project
The length of your needle affects how much control you have over your stitches and how quickly you can pick up beads from your work surface. Beading needles generally fall into two categories: long and short.
Long Needles (approx. 2 to 2.5 inches / 50 to 64 mm)
Longer needles allow you to pick up multiple beads in a single motion, which is highly efficient for bead looming, creating long fringes, or working on wide, flat patterns. However, their length makes them highly susceptible to bending or bowing out of shape. For absolute beginners, a long needle can feel clumsy and difficult to guide accurately through tight spaces.
Short Needles (approx. 1.25 to 1.5 inches / 32 to 38 mm)
Often referred to as “shorts” or “betweens,” shorter needles offer superior control and leverage. They are ideal for intricate, off-loom beadweaving techniques such as right-angle weave, herringbone, or peyote stitch, where you work with one or two beads at a time. Because they are shorter, they are less likely to bend accidentally during tight stitching.
If you are just starting out with basic jewelry projects, beginning with shorter needles is highly recommended. They feel much closer to the standard needles you may have used for hand sewing, allowing you to develop your tension control and hand-eye coordination before transitioning to longer needles for specialized techniques.
Step-by-Step Guide to Testing Your Needle, Thread, and Bead Fit
Before committing to a complex project, you should always perform a physical compatibility test with your chosen needle, thread, and beads. This simple verification process prevents broken beads and ruined thread halfway through your work.
Step 1: Thread the Needle
Cut a short length of your chosen beading thread and pass it through the eye of the needle. The thread should sit comfortably within the eye without bunching up, shearing, or fraying. If you have to force the thread through, or if the thread immediately begins to split, the eye is too small or has a sharp internal metal burr.
Step 2: The Single Pass Test
Pick up a single bead from your project batch and slide it down the needle. The bead should glide effortlessly over the tip, down the shaft, and past the eye onto the thread. If the bead catches or requires any force to slide down, your needle or thread is too thick for that specific batch of beads.
Step 3: The Double Pass Test
To simulate securing a stitch or weaving in ends, pass the needle back through the same bead in the opposite direction. The needle must slide through smoothly without any scraping sensation. If you feel heavy resistance or a clicking sound, do not force it; this indicates that the combined thickness of the needle and two strands of thread exceeds the bead’s inner diameter.
Step 4: The Tension Check
Gently pull the thread back and forth through the bead. Check the thread near the needle’s eye for any signs of fraying, fuzziness, or stripping. If the thread appears damaged, the needle’s eye may have a sharp edge, or the friction within the bead is too high, requiring you to switch to a thinner needle or a finer thread.
Never attempt to force a stuck needle through a bead using pliers or hard surfaces. Doing so will almost certainly shatter the glass bead—sending sharp fragments onto your workspace—or permanently kink and ruin your needle.
Common Beginner Mistakes and How to Avoid Them
Even with the right tools, beginners often encounter a few common hurdles. Being aware of these pitfalls will help you maintain your tools and keep your projects running smoothly.
One of the most frequent mistakes is using a needle that is too thick out of a fear of threading tiny eyes. While a thicker needle is easier to thread, it leads to high friction, frayed thread, and broken beads. If you are struggling to pass through your beads, always size down to a thinner needle rather than trying to force your way through.
Another common issue is the improper handling of flexible needles. Because beading needles are designed to bend, they will naturally develop a slight curve over time as you stitch. This is normal, but bending them at a sharp, acute angle will cause them to snap. If your needle develops a gentle bow, you can easily straighten it by placing it on a flat, hard surface and rolling it under your thumb or a flat ruler.
Finally, never ignore a damaged needle eye. Over time, the friction of the thread can wear down the metal, or a cheap needle may have an microscopic burr from the manufacturing process. If you notice your thread constantly shredding or breaking at the eye, discard the needle immediately. Replacing a cheap needle is far better than losing hours of intricate beadwork to a broken thread.
For those living in Singapore’s highly humid climate, metal care is also important. High-carbon steel needles can rust or tarnish if exposed to moisture in the air. To extend their lifespan, store your needles in an airtight container or a needle case with a small silica gel packet to keep them dry and rust-free.
Frequently Asked Questions (FAQ)
How do I thread a beading needle with a tiny eye?
Threading a tiny eye can be challenging, but a few simple techniques can make it much easier. First, avoid using standard sewing needle threaders, as their wire loops are too thick and will break the delicate eye of a beading needle. Instead, use a specialized ultra-fine wire threader designed specifically for beadweaving. Alternatively, you can flatten the end of your thread by flattening it between your teeth or applying a tiny drop of thread conditioner or beeswax to stiffen the tip. Cutting the thread at a sharp 45-degree angle with sharp scissors also creates a clean point that slips through more easily. If traditional threading remains frustrating, switching to a collapsible eye or big eye needle is a highly practical solution.
What should I do if my beading needle bends?
A slight, gentle curve in your needle is completely normal and often happens naturally as the needle conforms to your hand movements and the path of the stitches. You can continue using a slightly curved needle if it feels comfortable. To straighten a bowed needle, place it on a hard, flat surface and gently roll it back and forth under your thumb or a flat wooden ruler. However, if the needle develops a sharp bend, a crease, or a visible kink, its structural integrity has been compromised. A kinked needle is highly prone to snapping mid-stitch, which can ruin your beadwork or cause minor finger injuries. In this case, discard the needle immediately and replace it with a fresh one.
Community discussion
Share your experience or ask a question. Comments are reviewed before publication.