
To choose the correct SmartPac bag size for your item, you must match the item’s fully wrapped three-dimensional measurements—length, width, and thickness—against the official capacity tiers of Singapore’s national postal service. Because these prepaid packaging options are specifically designed to fit directly into standard residential letterboxes, choosing a size that is too small prevents proper sealing, while an oversized bag leads to item shifting, potential transit damage, and unnecessary material waste.
By understanding how flat dimensions translate to three-dimensional volume, calculating the necessary margins for thickness, and factoring in weight limits, you can ensure your parcel arrives safely and cost-effectively. This guide breaks down the precise steps to measure your items, avoid common packaging mistakes, and verify the fit before sealing your package.
Understanding SmartPac Dimensions and Capacity Tiers
When selecting packaging, it is easy to look at the flat dimensions of a shipping bag and assume your item will fit. However, shipping bag dimensions are almost always presented as flat, two-dimensional measurements (Width x Length). These figures represent the outer boundaries of the empty, flat bag rather than the usable inner space once an item with physical volume is inserted.
Products mentioned in this guide
![[SINGPOST] MEDIUM smartpac - A postage-paid packaging for local delivery. Trackable via the SingPost mobile app.](https://img.lazcdn.com/g/p/3360d819ebee92c4900de5d10f98c2e8.png_400x400q80.png_.webp)
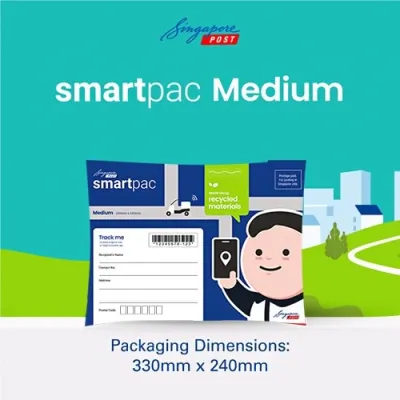
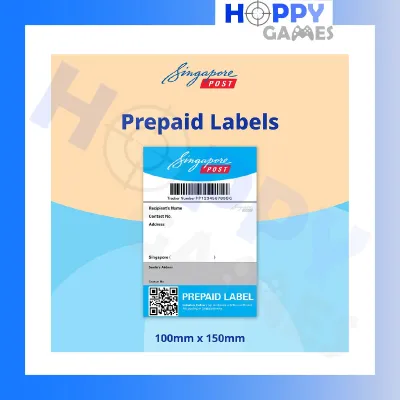
Prices are valid at publication and may change. Please refer to the product page for the latest price.
To make an accurate selection, you must understand how the construction of the bag impacts its internal volume. The heat-sealed seams along the sides of the bag and the folding adhesive flap at the top naturally reduce the effective internal area. When a flat bag is filled with a three-dimensional object, the front and back panels are pulled toward each other, which draws the side seams inward and shortens the usable length and width.
To simplify your selection process, it helps to categorize your shipping items into general volume tiers:
- Flat Documents and Paper Goods: Items such as certificates, contracts, and single magazines have negligible thickness. They fit easily into smaller, flatter bag tiers that align closely with standard paper sizes like A4 or A5.
- Small Apparel and Textiles: T-shirts, socks, and lightweight scarves are highly compressible. While they occupy volume, they can be flattened and molded to fit into medium-sized bags without putting stress on the seams.
- Bulky Soft Goods: Sweaters, hoodies, and larger textiles require significantly more depth. These items need a larger capacity tier that accommodates both their width and their expanded thickness.
- Rigid Boxed Items: Products like books, cosmetic boxes, mechanical keyboards, and small electronics have non-negotiable, rigid heights. These items require careful calculation because they cannot compress to fit the bag's shape.
Because product lines, standard dimensions, and postal regulations can update over time, you should always consult the official specification sheet from the national postal service in Singapore to verify the exact available size tiers and weight limits. Selecting the right tier is the critical first step in balancing a secure, protective fit with material waste and overall shipping costs.
How to Measure Your Item and Calculate the Required Bag Size
Determining the correct bag size requires a standard ruler or measuring tape and a simple geometric calculation. You must measure your item’s three primary dimensions: length, width, and height (or thickness). Always measure at the widest, tallest, and thickest points of the item to ensure you do not underestimate the required space.

To translate these three-dimensional measurements into a flat bag size, you can use a standard packaging allowance formula. This formula accounts for the way the bag’s panels pull inward when wrapped around a thick object.
To calculate the minimum required flat bag width, use this formula:
Required Bag Width = Item Width + Item Thickness + Seam Margin
For the seam margin, add at least 15 to 20 millimeters to account for the stiffness of the side seams and to prevent the bag from splitting under tension.
To calculate the minimum required flat bag length, use this formula:
Required Bag Length = Item Length + Item Thickness + Flap Margin
The flap margin must account for the adhesive sealing flap, which typically requires an additional 30 to 40 millimeters of space to fold over the back of the bag securely.
When packing soft, compressible items like clothing, you have more flexibility. You can fold and compress the item tightly, which reduces its effective thickness and allows it to fit into a slightly smaller bag than its loose state would suggest. However, you must still ensure the compressed item does not exceed the weight limit of the chosen tier.
For rigid, non-compressible items like books, boxed goods, or stationery organizers, there is no room for error. If your calculation is off by even 5 millimeters, a rigid item will physically prevent the bag from closing or will put excessive pressure on the seams, leading to tears during transit.
Always measure the item after it has been placed in its immediate inner packaging. If you plan to wrap a delicate item in bubble wrap, place it inside a protective plastic sleeve, or use a small corrugated box for structural support, you must measure this entire assembled bundle. The inner packaging adds significant thickness and width that must be factored into your final bag size selection.
Weight Limits and Cost-Efficiency in Size Selection
While physical dimensions determine whether an item physically fits inside a bag, the total weight dictates whether the chosen shipping tier is permissible and cost-effective. Every prepaid shipping bag tier in Singapore has a strict weight limit, typically ranging from 1 kilogram to 3 kilograms depending on the specific product tier.
Before selecting your final bag size, place your fully packed item—including all inner protective wrapping—on a digital scale. If your item is physically small but dense and heavy, it may exceed the weight limit of a smaller bag tier. In such cases, you must upgrade to a larger or sturdier tier that officially supports the weight, even if the item could physically fit into a smaller envelope.
Choosing an excessively large bag to accommodate a lightweight item can lead to unnecessary costs and transit risks. When a small, heavy item is placed in a large, empty bag, it can slide around violently. This shifting can damage the item, throw off the package’s balance, and cause the bag to fold or wrinkle, making it prone to catching on automated sorting machinery.
To maximize cost-efficiency, compare your packed item’s weight and dimensions against the current pricing tiers provided by the national postal service in Singapore. Selecting the smallest bag that safely accommodates your item’s dimensions and weight ensures you do not pay for unused shipping capacity, helping you maintain a lean and economical shipping process.
Common Sizing Mistakes and How to Avoid Them
Avoiding simple packaging errors can save you from returned parcels, damaged goods, and wasted shipping fees. By recognizing these common pitfalls, you can ensure a smooth delivery process.
Ignoring Item Thickness Many shippers make the mistake of comparing only the flat length and width of their item to the listed dimensions of the bag. For example, trying to fit a thick book into a bag that is only slightly wider than the book itself will fail. The book’s thickness pulls the bag’s front and back panels together, shortening the available width and leaving the bag open and unable to seal.
Overlooking the Sealing Flap The total manufactured length of a shipping bag includes the adhesive sealing flap. Because this flap must fold over the back of the bag to create a secure, tamper-evident seal, it cannot be used to cover the item itself. Always subtract the flap’s length (typically 30 to 40 millimeters) from the bag’s total length to determine the true usable internal length.
Assuming Stretchability While poly mailers have slight flexibility, they are not designed to stretch significantly. Forcing a rigid, sharp-cornered, or overly thick item into a tight bag creates high-tension points. These points are highly susceptible to puncturing or bursting when subjected to the friction of automated postal sorting belts and delivery bins.
Mismatching Inner and Outer Packaging Measuring a bare product and ordering a matching bag size without accounting for protective bubble wrap or an inner cardboard box is a frequent error. The protective layers can easily double the thickness of your item, forcing you to use a larger bag size than originally calculated.
Step-by-Step Verification Before Sealing
Before you remove the adhesive backing and seal your package, perform a quick, systematic verification to ensure the parcel is secure and ready for dispatch.
First, slide the fully wrapped item gently into the chosen bag. The item should slide in smoothly without requiring force. If you have to push, squeeze, or pull the plastic to get the item inside, the bag is too small and you should size up.
Second, inspect the empty space around the item. If there is excessive empty space that allows the item to shift, fold the excess bag material flat against the package and secure it with heavy-duty packaging tape. Ensure the sealing flap can lay completely flat against the back of the bag without pulling, wrinkling, or stretching.
Third, perform a gentle shake test. Hold the unsealed bag and move it slightly. If you feel the contents sliding violently from side to side or top to bottom, the bag is too large. You must add appropriate void fill (such as crumpled paper or bubble wrap) to secure the item, or transition to a smaller, more form-fitting bag size.
Finally, inspect the adhesive strip and the sealing zone. Ensure the area is completely free from dust, paper fibers, moisture, or oils from your hands. Peel the protective backing off the adhesive strip and press the flap down firmly across its entire width, applying even pressure from the center outward to guarantee a permanent, tamper-evident bond that will not burst open during transit.
Frequently Asked Questions (FAQ)
Can I use a larger SmartPac bag if the exact size is unavailable?
Yes, you can use a larger size if the ideal match is out of stock, but you must manage the excess space. Fold the empty portion of the bag flat against the package and secure it tightly with heavy-duty packaging tape. This prevents the item from sliding around inside and keeps loose plastic flaps from catching in automated postal sorting machinery.
Do SmartPac bags stretch to accommodate slightly thicker items?
No, they are not designed to stretch. While the poly material has minimal flexibility, stretching it over thick or rigid items creates high-tension points. These points are highly vulnerable to tearing or bursting under the friction of sorting belts. Always size up to a bag that accommodates your item’s thickness without putting tension on the seams.
Community discussion
Share your experience or ask a question. Comments are reviewed before publication.