
Personalizing your wardrobe with iron-on alphabet patches is an accessible, creative way to express your style, but finding the right patches in Singapore requires understanding how local climate conditions and fabric choices affect adhesive performance. High humidity and frequent laundering mean that a standard iron-on backing must be carefully matched to your base garment. Whether you are customizing a denim jacket, a canvas tote bag, or a school uniform, selecting the correct patch material and applying it with the proper technique ensures your design remains intact.
What to Look for When Choosing Alphabet Patches
When selecting alphabet patches for your DIY projects, the adhesive backing is the most critical component to evaluate. Most patches feature a heat-activated hot-melt adhesive backing that liquefies under a hot iron and bonds with the fabric fibers as it cools. You must verify if this adhesive is compatible with your base fabric. Natural fibers like cotton and denim handle high heat exceptionally well, allowing the adhesive to melt and bond deeply. However, synthetic blends like polyester, nylon, or rayon can melt, scorch, or discolor under the high temperatures required to activate the glue. Waterproof or water-resistant coatings, often found on windbreakers, rain jackets, or outdoor gear, repel adhesives entirely, preventing a secure bond from forming.
The edge finishing of the patch plays a vital role in its long-term durability and aesthetic appeal. Merrowed borders, which feature a thick, wrapped thread edge, provide excellent protection against fraying and give the patch a classic, raised look. This style is highly durable and holds up well to repeated washing. On the other hand, laser-cut edges offer a flatter, cleaner profile that is ideal for modern, minimalist fonts. However, laser-cut edges can be more prone to lifting if the adhesive backing does not extend completely to the very edge of the patch.
Products mentioned in this guide
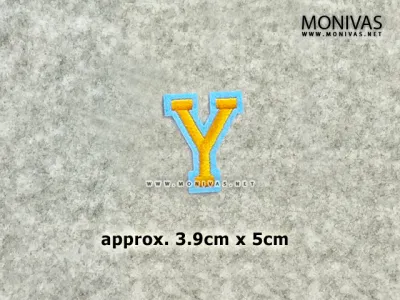
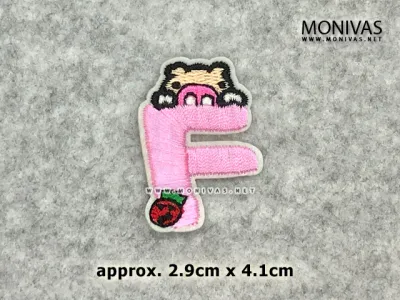
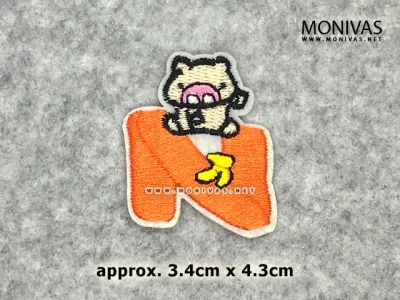
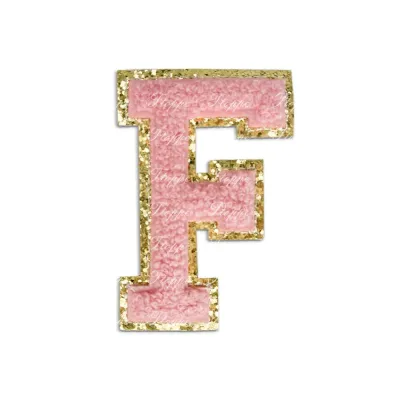
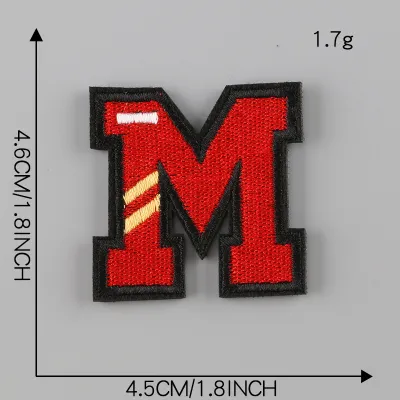
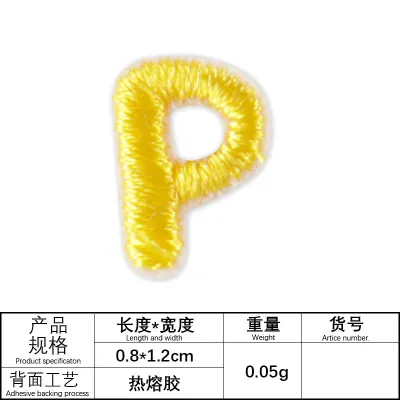
Prices are valid at publication and may change. Please refer to the product page for the latest price.
Font styles, size proportions, and color contrast are essential design elements that determine the legibility of your customization. Consider the scale of your project before purchasing. A small canvas pouch or pencil case requires compact, high-contrast letters to remain readable, whereas a denim jacket back or a large backpack can accommodate bolder, larger varsity-style fonts. Ensure the color of the patch contrasts sharply with the background fabric. For example, dark navy letters on a black jacket will blend in and become unreadable, while white or bright yellow letters will stand out clearly.
In Singapore’s warm and humid climate, garments are washed frequently, making colorfastness a priority. Check the product packaging or seller specifications for colorfastness claims to ensure the dyes in the patch threads will not bleed onto your garment during a wash cycle. Look for clear care symbols or instructions regarding washing temperatures and drying methods to confirm that the patch can withstand your typical laundry routine.
Matching Patch Materials and Styles to Your Project
Embroidered patches are the traditional choice for DIY customization, featuring dense threadwork on a sturdy fabric backing. They are highly durable and work beautifully on heavy-duty fabrics like denim, canvas, or thick cotton twill. Before purchasing, feel the patch to assess its stiffness. Very thick embroidered patches require more heat and pressure to activate the adhesive fully, which can be challenging on delicate garments. If the patch is too stiff, it may not conform well to curved areas of a garment, such as sleeves or caps, leading to premature peeling at the edges.

Chenille or velvet patches offer a soft, fuzzy texture that brings a classic, varsity-style aesthetic to casual wear, sweatshirts, and bomber jackets. These patches are excellent for creating a vintage look, but they require careful handling. The raised pile of chenille is prone to shedding if subjected to constant friction, such as under the straps of a backpack. Additionally, chenille and velvet patches often have strict care limitations, frequently requiring gentle hand-washing or dry cleaning to maintain their texture, making them less suitable for everyday activewear.
Sequin or rhinestone patches add sparkle and visual interest, making them popular for festive outfits, party wear, or decorative bags. However, plastic sequins and acrylic rhinestones have very low heat tolerance. Direct contact with a hot iron can melt or discolor the embellishments, so you must use a protective pressing cloth and apply heat primarily from the reverse side of the fabric. These decorative patches also demand strict hand-washing in cold water, as the agitation of a washing machine can easily detach the sequins or rhinestones.
Printed or woven patches are the best option if your design features intricate fonts, thin lines, or highly detailed multicolored graphics. Woven patches use much thinner threads than embroidered ones, resulting in a smoother, flatter surface with high-resolution detail. Because they are thinner, they are also more flexible and conform easily to lightweight fabrics. However, you must inspect the edge sealing on these patches carefully, as any loose threads can quickly lead to unraveling after a few runs through the washing machine.
Where to Source and Verify Patches in Singapore
Visiting local craft stores, haberdashery shops, and traditional fabric districts in Singapore allows you to inspect the patches firsthand before making a purchase. This hands-on inspection is highly beneficial, as it lets you physically feel the thickness of the embroidery, check the flexibility of the adhesive backing, and verify the true colors under natural light. This helps you avoid stiff, low-quality patches that won’t conform to curved garment surfaces. Local shops also allow you to buy individual letters, which is highly convenient if you only need a few specific characters to complete a name or phrase.
When browsing online marketplaces or ecommerce platforms, you cannot physically inspect the product, making careful verification crucial. Read the seller’s descriptions thoroughly, looking for specific details like adhesive activation temperatures, exact dimensions in millimeters or centimeters, and fabric compatibility lists. Cross-reference these details with unedited buyer photos in the review section. These photos often provide a more accurate representation of the patch’s true color, thread quality, and how well the adhesive holds up after actual application and washing.
Inspect the product packaging or online specifications for clear material composition and washing symbols. High-quality patches usually come with clear instructions detailing the recommended iron temperature, pressing time, and care guidelines. Avoid unbranded, loose patch sets that lack basic usage instructions, as they often use low-grade adhesives that fail after a single wash cycle or damage your fabric due to improper heat guidelines.
If you are purchasing bulk or pre-packaged alphabet sets, pay close attention to the letter distribution. Many standard sets only include one of each letter from A to Z. This can be problematic if your desired word or name requires multiple vowels or common consonants, such as ‘A’, ‘E’, ‘O’, or ‘S’. Look for sets that offer duplicates of common letters, or verify if the seller allows you to purchase individual letters to supplement your pre-packaged set, ensuring you have adequate quantities for your project.
Step-by-Step Application and Long-Term Care
Before applying any heat, prepare your garment by washing and drying it thoroughly. Do not use fabric softener during this wash, as softeners leave a chemical residue on the fibers that prevents the iron-on adhesive from bonding securely. Test the heat tolerance of your fabric by pressing an inconspicuous area, such as an inside seam, with the iron at the recommended setting. If the fabric shows any signs of scorching, melting, or shrinking, do not proceed with ironing; instead, plan to sew the patch onto the garment.
To apply the patch, set your iron to the temperature recommended by the manufacturer, which is typically the cotton or linen setting (around 150°C to 160°C), and ensure the steam function is turned completely off. Place the garment on a hard, flat, heat-resistant surface rather than a heavily padded ironing board, as a firm surface ensures even pressure distribution. Position your alphabet patches exactly where you want them, then cover them with a thin, clean cotton pressing cloth, such as a pillowcase or tea towel, to protect the patch surface from direct heat. Press the iron down firmly on the patch for 15 to 30 seconds without moving the iron back and forth, as sliding the iron can shift the patch out of alignment. Flip the garment inside out and press from the reverse side for another 15 seconds to draw the melted adhesive deep into the fabric fibers.
While iron-on adhesives are highly convenient, they are rarely permanent on items subjected to frequent washing or heavy physical stress, such as school backpacks, canvas totes, or activewear. To prevent the edges of your alphabet patches from lifting over time, plan for supplementary hand or machine stitching around the perimeter of each letter. A simple running stitch or blanket stitch using a matching thread color provides excellent security and ensures the patch remains attached even if the adhesive begins to degrade.
To preserve the integrity of the adhesive bond in Singapore’s humid climate, adhere strictly to proper maintenance practices. Always wash customized garments inside out in cold water on a gentle cycle to minimize friction against the patch edges. Avoid using harsh detergents, bleach, or fabric softeners, which can chemically break down the hot-melt glue. After washing, air-dry the garments on a hanger rather than using a high-heat clothes dryer, as the intense heat of a dryer can re-liquefy the adhesive and cause the patches to peel off.
Troubleshooting Peeling or Failed Applications
If an alphabet patch begins to peel or lift shortly after application, the primary cause is usually incomplete adhesive activation. This occurs when the iron temperature was too low, the pressure applied was insufficient, or the pressing time was too short to melt the glue completely. To remedy this, you can attempt to re-apply heat using the same steps, ensuring you press down firmly on a hard surface and allow the patch to cool completely before moving or wearing the fabric.
Fabric surface incompatibilities can also cause adhesion failure. Fabrics treated with water-resistant, stain-resistant, or silicone coatings prevent the melted glue from gripping the fibers. Similarly, heavily textured fabrics like chunky knits or fabrics with high synthetic fiber ratios (like 100% nylon or polyester mesh) do not allow the adhesive to penetrate the weave. If the adhesive cannot grip the fibers, the patch will slide off regardless of how much heat or pressure you apply.
If your patch fails to adhere due to fabric incompatibility or degraded glue, do not continue to apply high heat, as this can scorch your garment. Instead, plan safe remediation steps by using a flexible, washable fabric glue designed specifically for textiles. Apply a thin, even layer of fabric glue to the back of the patch, press it firmly onto the fabric, and secure it with pins or a heavy book until the glue cures completely according to the manufacturer’s instructions. Alternatively, hand-sew the patch in place along the border.
There are certain stop conditions where you should replace the patch rather than forcing a repair. If the edges of the alphabet patch are severely frayed, or if the original adhesive backing has turned brittle, yellowed, or flaked off, attempting to re-iron or glue the patch will result in an untidy appearance. In these cases, it is best to remove the damaged patch entirely and replace it with a fresh one to avoid leaving permanent glue stains or ruined fabric on your garment.
Frequently Asked Questions (FAQ)
Can iron-on patches be removed without damaging the fabric?
Yes, most iron-on patches can be removed by reheating the adhesive to soften it. Place a clean cotton pressing cloth over the patch and apply a hot iron for 15 to 20 seconds, then carefully peel the patch off using tweezers while the glue is still warm. To remove any remaining sticky residue, apply a small amount of rubbing alcohol or a commercial adhesive remover to a clean cloth and gently rub the area, ensuring you test a small, hidden spot first to confirm it does not discolor the fabric.
How do I handle missing letters when buying pre-packaged alphabet sets?
If your pre-packaged alphabet set does not contain enough duplicates of the letters you need, you can purchase individual replacement letters from local haberdashery shops or online sellers to complete your word. Alternatively, you can embrace a creative, eclectic look by mixing and matching different font styles, colors, or textures—such as pairing an embroidered letter with a chenille or sequin letter—which adds a unique, intentional design element to your customized garment.
Community discussion
Share your experience or ask a question. Comments are reviewed before publication.