
Selecting the best A3 laminating machine for a school or office setting requires a careful balance of capacity, speed, and material compatibility. The right machine does more than simply seal paper in plastic; it preserves critical teaching aids, protects high-traffic office signs, and ensures that frequently handled documents remain pristine over time.
In Singapore’s tropical climate, high relative humidity can cause unprotected paper, cardstock, and printed notices to absorb moisture, leading to warping, ink bleeding, and structural degradation. Lamination serves as an essential barrier against this environmental moisture, making it a staple process in local staff rooms, administrative offices, and print shops.
Whether you need to laminate large A3 posters, delicate student artwork, or hundreds of standard A4 worksheets, understanding the technical differences between machine classes is the key to making an efficient investment. By matching your weekly document volume and the specific types of media you use with the correct roller configuration and heating system, you can avoid common issues like cloudy finishes, bubbling, and frustrating roller jams.
Products mentioned in this guide
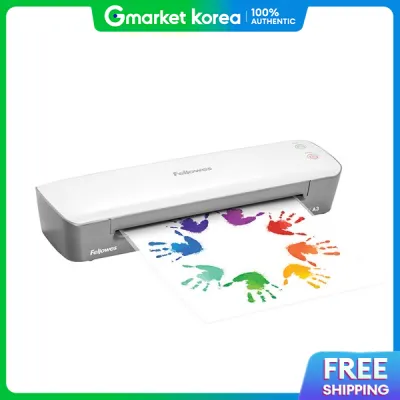
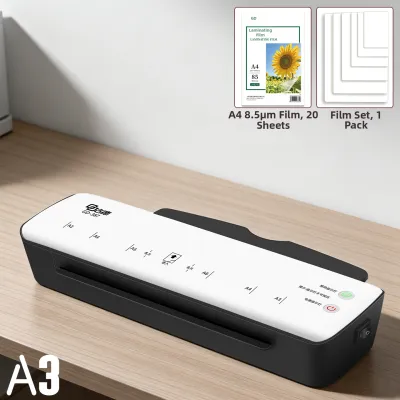
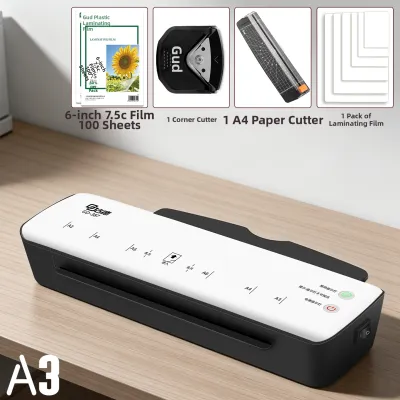
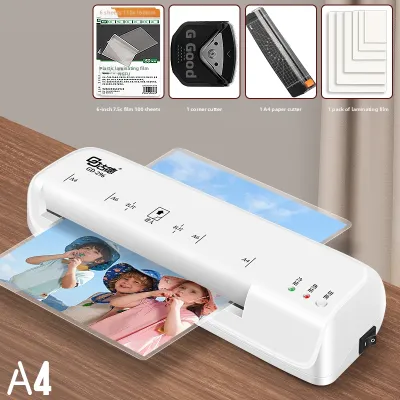
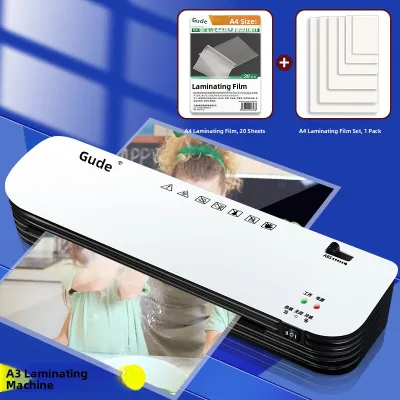
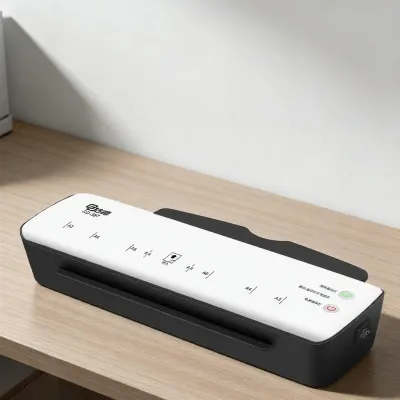
Prices are valid at publication and may change. Please refer to the product page for the latest price.
Understanding Your Laminating Needs in Schools and Offices
Before evaluating specific technical specifications, it is vital to analyze how your school or office will interact with the laminating machine on a weekly basis. Document volumes, the thickness of the materials being processed, and the physical location of the machine all dictate the level of performance required.
Occasional Classroom Use vs. High-Volume Administrative Tasks
For individual teachers or small academic departments, laminating is often an episodic activity. You might find yourself preparing a batch of flashcards at the start of a school term, sealing student certificates once a month, or laminating weekly classroom posters. For these lighter, intermittent tasks, a compact and straightforward machine is usually sufficient, as it can be easily stored in a cabinet when not in use.
In contrast, school administrative offices, reception desks, and central corporate print rooms face a completely different set of demands. These environments often require continuous, daily lamination of visitor passes, safety signage, library book covers, and heavy-duty instructional materials. A machine placed in these high-traffic hubs must be built to withstand prolonged operating periods without overheating or slowing down your workflow.
Document Media and Lamination Methods
The physical properties of the items you plan to laminate will determine whether you need a hot laminator, a cold laminator, or a hybrid machine that supports both modes. Standard copier paper, drawings made with colored pencils, and photocopies are highly heat-resistant and respond beautifully to hot lamination, which melts the pouch adhesive to form a permanent bond.
However, heat-sensitive materials require a different approach. Glossy photographs, thermal paper receipts, delicate historical documents, and prints from certain older inkjet printers can warp, blister, or suffer severe color shifting when exposed to high temperatures. For these delicate items, cold lamination—which uses pressure-sensitive adhesive pouches instead of heat—is necessary to protect the integrity of the print.
Estimating Pouch Consumption and Workflow Bottlenecks
Estimating your weekly pouch consumption helps prevent the common mistake of purchasing an underpowered machine that cannot keep up with your team’s needs. If your office laminates fewer than 20 sheets a week, an entry-level model is highly cost-effective and perfectly adequate.
However, if your department regularly processes batches of 50 or more sheets at a single time, an entry-level machine will quickly become a bottleneck. These smaller machines typically require long cooling-off periods after 20 to 30 minutes of continuous use to prevent the internal heating elements from warping. Investing in a mid-range or heavy-duty machine ensures uninterrupted operation, saving valuable staff time and preventing frustration during busy periods.
Core Specifications to Check Before Buying an A3 Laminator
When comparing different A3 laminating machines, looking past marketing claims to examine the actual technical specification sheet is essential. The following key features directly determine the machine’s durability, speed, and compatibility with your projects.

Pouch Thickness Compatibility (Microns)
Laminating pouches are measured in microns (often abbreviated as mic), which refers to the thickness of the plastic film. Standard pouches generally range from 75 microns to 250 microns per side.
- 75 to 80 Microns: This thickness provides light, flexible protection ideal for documents that are handled occasionally, such as classroom worksheets or notices pinned to a bulletin board.
- 100 to 125 Microns: Offering a medium level of rigidity, this range is perfect for frequently handled items like menus, flashcards, and instructional guides.
- 150 to 250 Microns: This heavy-duty thickness provides maximum rigidity and water resistance, making it the standard choice for outdoor signage, ID cards, and items that must withstand severe wear and tear.
Ensure the machine you select supports the specific micron range required for your projects. While almost all A3 laminators can handle 75 to 100 microns, only mid-range and heavy-duty models can safely process 150 to 250-micron pouches without jamming or failing to melt the adhesive completely.
Warm-up Time and Laminating Speed
The time it takes for a laminator to reach its optimal operating temperature is a critical factor in a shared office environment. Budget models can take anywhere from 5 to 8 minutes to warm up, which can lead to frustrating delays when a teacher needs to quickly laminate a single sheet before a class. Premium models often feature rapid-heating technology, reducing this wait time to under 60 seconds.
Laminating speed, measured in millimeters per minute (mm/min), determines how quickly a document passes through the rollers. A standard speed of 300 mm/min is perfectly acceptable for occasional use, but high-volume administrative tasks benefit significantly from speeds of 500 mm/min to over 1,000 mm/min. Always verify these performance metrics on the manufacturer’s official specification sheet to ensure they align with your operational expectations.
Anti-Jam Technology and Release Mechanisms
Even with careful operation, document jams can occur if a pouch is inserted crookedly or if the temperature is set incorrectly. When a jam happens, the plastic pouch can wrap around the hot internal rollers, causing permanent damage to the machine and destroying the document inside.
To prevent this, look for machines equipped with an anti-jam release lever or a dedicated manual reverse button. The release lever mechanically separates the rollers, allowing you to easily pull the stuck pouch back out of the entry slot. Advanced models may also include intelligent sensors that detect a misfeed, automatically stopping the motor and reversing the rollers to eject the document before any damage occurs.
Maximum Entry Width
An A3 laminating machine must have an entry slot that is wide enough to accommodate the short edge of an A3 sheet (297 mm) plus the extra width of the laminating pouch itself, which typically measures around 303 mm to 310 mm.
To ensure smooth feeding, look for a machine with a maximum entry width of at least 320 mm to 330 mm. This extra clearance provides a helpful buffer, reducing the likelihood of the pouch catching on the sides of the entry slot and folding over as it enters the rollers.
Power, Voltage, and Safety Certifications
Because laminating machines utilize high temperatures and electrical heating elements, verifying safety standards is paramount, especially in educational environments where children may be nearby. In Singapore, ensure the machine is designed to operate on the local standard voltage of 230V at 50Hz and comes fitted with a compliant 3-pin plug.
Look for key safety certifications and built-in protective features, such as an automatic shut-off function. This feature automatically powers down the heating elements after 30 minutes of inactivity, significantly reducing fire risks and conserving energy if the machine is accidentally left turned on overnight in a school staff room.
Recommended A3 Laminator Types for Educational and Administrative Tasks
To narrow down your search, it is helpful to categorize A3 laminators into three primary functional types. Each category is designed to serve a specific volume of work, user environment, and budget.
Heavy-Duty Commercial A3 Laminators
These robust machines are engineered for continuous, daily operation in high-demand environments, such as central school administrative offices, university print rooms, or large corporate departments. They typically feature a system of four to six internal rollers.
The primary advantage of a multi-roller system is that it distributes heat and pressure much more evenly across the document. This results in an exceptionally smooth, bubble-free finish, even when laminating thick cardstock or large A3 posters. Heavy-duty models also boast high-wattage heating elements that allow for rapid warm-up times and continuous operation without the need for frequent cooling periods. While these machines offer outstanding durability and speed, they represent a larger physical presence on the desk and a higher initial financial investment, typically ranging from S$250 to S$600.
Standard/Mid-Range A3 Laminators
Ideal for individual school departments, staff rooms, or small office reception desks, mid-range laminators offer a practical balance of cost, speed, and reliable performance. These units usually utilize a two-roller or four-roller heating system and have moderate warm-up times of three to five minutes.
They are highly versatile, easily handling daily laminating tasks of moderate volume. Because they are compact and lightweight, they can be easily moved between classrooms or stored away when not in use. For most educational and standard office settings where lamination is performed in small batches, a mid-range machine priced between S$80 and S$200 provides excellent value without sacrificing output quality.
Cold Lamination A3 Machines
Cold laminators are specialized tools that do not use electrical heating elements to seal documents. Instead, they rely on high-pressure rollers to activate the adhesive on cold-seal laminating film.
These machines are highly recommended for preserving heat-sensitive materials such as thermal paper, old photographs, glossy inkjet prints, or delicate craft projects that would melt or warp under heat. Because they generate no heat, cold laminators are incredibly safe for direct student use in classrooms and art studios, completely eliminating the risk of accidental burns. While many electric hot laminators include a “cold” setting (which simply turns off the heater while keeping the rollers spinning), dedicated manual cold laminators operate via a hand crank, requiring no electrical power at all.
Comparison of A3 Laminator Types
The following table outlines the key differences between the three main categories of A3 laminating machines to help you determine the best fit for your specific environment:
| Machine Type | Ideal User/Scenario | Key Features to Verify | Typical Warm-up Expectation | Limitations |
|---|---|---|---|---|
| Heavy-Duty Commercial | Central print rooms, high-volume admin offices | 4 to 6 rollers, cooling fans, high speed (>500 mm/min) | 1 to 2 minutes | Higher cost (S$250+), larger desk footprint |
| Standard/Mid-Range | Staff rooms, small offices, individual departments | 2 to 4 rollers, compact design, anti-jam release | 3 to 5 minutes | Requires cooling periods after continuous use |
| Cold Lamination | Art classrooms, photo studios, heat-sensitive media | Pressure adjustment, manual crank or electric cold mode | Instant (no warm-up required) | Requires specialized cold-seal adhesive pouches |
Safe Operation and Maintenance Tips to Prevent Jams
Proper operation and routine maintenance are essential to keeping your A3 laminating machine running smoothly and extending its operational lifespan. Following a few simple guidelines can prevent the vast majority of roller jams and adhesive buildup issues.
Pre-Operation and Temperature Verification
Before turning on your laminating machine, clear the area around the entry and exit slots to ensure that documents can pass through completely unimpeded. Place the unit on a flat, stable, and heat-resistant surface.
Always check the manufacturer’s guidelines to match the temperature setting of the machine with the thickness of the pouch you are using. If the temperature is set too high for a thin pouch, the plastic can melt excessively, leading to bubbles or causing the pouch to wrap around the rollers. If the temperature is too low for a thick pouch, the adhesive will not melt completely, resulting in a cloudy, semi-opaque finish that easily peels apart.
Proper Pouch Loading Techniques
The single most important rule of lamination is to always insert the sealed, pre-bonded edge of the pouch into the machine first.
Inserting the open end of the pouch first allows air to become trapped inside, creating unsightly bubbles and creases across your document. More seriously, the open edges can easily fold backward as they contact the rollers, allowing melted adhesive to squeeze out and coat the internal mechanisms. Over time, this adhesive buildup will cause subsequent pouches to stick to the rollers, leading to severe jams.
Handling Jams Safely and Effectively
If you notice a pouch feeding crookedly, folding, or beginning to wrap around the rollers, act immediately. Press the manual reverse button or engage the anti-jam release lever to disengage the roller tension. Once the tension is released, gently and slowly pull the pouch back out through the entry slot.
Never attempt to pull a jammed pouch forcefully from the exit slot while the machine is hot, as this can easily tear the delicate silicone coating on the rollers. Additionally, never insert sharp metal objects, scissors, knives, or rulers into the feed slot to scrape away stuck plastic. Doing so can permanently gouge the rollers, damage the heating elements, and present a severe risk of electrical shock.
Routine Cleaning and Professional Maintenance
As pouches pass through the machine, tiny amounts of adhesive naturally squeeze out and deposit onto the rollers. To prevent this residue from building up, run a manufacturer-approved cleaning sheet or a clean sheet of folded, uncoated cardboard through the laminator while it is still warm. The cardboard will absorb the soft, warm adhesive residue, keeping the rollers clean and smooth.
If a pouch has wrapped heavily around the internal rollers or if the machine exhibits electrical faults, do not attempt to disassemble the plastic housing yourself. Unplug the machine immediately, allow it to cool completely, and contact a qualified professional technician or refer strictly to the manufacturer’s authorized service center for repairs.
Frequently Asked Questions (FAQ)
Can I laminate A4 documents in an A3 laminating machine?
Yes, an A3 laminator is fully backward-compatible and can easily process smaller document sizes, including A4, A5, and small flashcards. When laminating smaller documents, it is highly recommended to use a pouch that matches the size of the document (for example, using an A4 pouch for an A4 sheet) rather than placing multiple small items inside a single A3 pouch. If you must use a larger pouch for smaller items, ensure they are spaced correctly and always feed the sealed edge of the pouch into the machine first. Never cut a laminating pouch before running it through the machine, as the cut edges can warp, release raw adhesive, and stick to the rollers.
What is the difference between hot and cold lamination for school projects?
Hot lamination utilizes heated rollers to melt the adhesive on the inside of the pouch, creating a highly durable, rigid, and permanent seal. This method is ideal for standard paper, cardstock, and items that require long-term protection against heavy handling. Cold lamination, on the other hand, uses pressure-sensitive adhesive pouches and no heat. It is the only safe option for preserving heat-sensitive materials such as thermal paper receipts, glossy photographs, or children’s crayon drawings, which would melt or discolor under high heat. Additionally, cold laminators are excellent for classroom environments as they eliminate any risk of accidental burns.
How do I clear a jammed pouch without breaking the machine?
To clear a jam safely, immediately turn off the power and engage the manual anti-jam release lever or hold down the reverse button. This releases the pressure holding the rollers together, allowing you to carefully draw the misfed pouch back out of the entry slot. If the pouch is completely wrapped around the internal rollers and cannot be moved, turn off the machine, unplug it from the wall, and let it cool down completely. Do not attempt to scrape or cut the plastic off the rollers with scissors, knives, or other sharp tools, as this will permanently damage the roller surface and void your warranty. If the jam cannot be cleared using the release lever, consult the manufacturer’s troubleshooting guide or contact a professional repair service.
Community discussion
Share your experience or ask a question. Comments are reviewed before publication.