
Choosing your first pair of circular knitting needles is a pivotal moment in your crafting journey. Selecting the right tool ensures your initial projects are satisfying and comfortable rather than a struggle with slipping stitches or stiff cords. For most beginners, starting with a pair of medium-sized (4.0 mm to 5.5 mm) wooden or bamboo circular needles with an 80 cm cable provides the perfect balance of control, versatility, and ease of use.
While traditional straight needles are often shown as the default beginner tool, circular needles are highly versatile and ergonomic. They consist of two short needle tips connected by a flexible cable, allowing you to knit both flat projects and circular items. By understanding how the anatomy, sizing, cable length, and materials of these needles interact with your yarn, you can confidently choose a tool that supports your hands and your stitches.
Understanding the Anatomy of Circular Knitting Needles
Understanding the physical components of circular needles helps you evaluate their quality and suitability before making a purchase. A circular needle is composed of three distinct parts: the needle tips, the flexible cable, and the joins that connect them. Each part plays a specific role in how the needle feels in your hands and how smoothly your yarn moves as you work.
Products mentioned in this guide
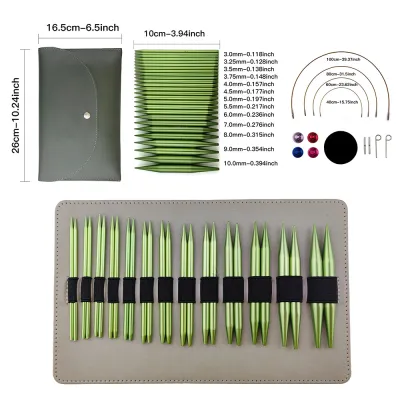
Prices are valid at publication and may change. Please refer to the product page for the latest price.
The needle tips are the rigid ends where you physically manipulate the yarn to form stitches. These tips come in various lengths, typically ranging from 9 cm to 13 cm. Shorter tips are designed for small-circumference knitting, while longer tips are more comfortable for standard projects as they fit fully within the palm of your hand. The sharpness of the tip point also varies, with lace tips being pointier for intricate stitches and standard tips being blunter to prevent splitting plied yarns.
The cable is the flexible tube or wire that connects the two tips. It holds the bulk of your active stitches, allowing the weight of your project to rest comfortably in your lap rather than on your wrists. This weight distribution is a major ergonomic benefit, especially for larger projects like blankets or sweaters. Cables can be made of nylon, plastic, or coated stainless steel, and their flexibility directly impacts your knitting experience.
The join is the transition point where the rigid needle tip meets the flexible cable. This is the most critical quality indicator of any circular needle. A high-quality join is completely smooth and flush, allowing stitches to glide effortlessly from the cable back onto the needle tip. If the join is rough, raised, or has a gap, your yarn will constantly snag, split, or get stuck, which disrupts your rhythm and can damage delicate fibers.
For a first project, fixed circular needles—where the cable is permanently attached to the tips—are highly recommended. They are generally more affordable and have fewer moving parts than interchangeable needle sets, which feature detachable cables and tips. Starting with a fixed pair allows you to focus on learning the basic stitches without worrying about cables unscrewing or detaching mid-project.
Matching Needle Size to Your Yarn Weight
Selecting the correct needle size is essential for achieving the proper fabric density and ensuring your stitches are neither too tight nor too loose. Needle diameter is measured in millimeters (mm) internationally, which directly dictates the physical size of the stitches you create. In Singapore, you will commonly see metric measurements on needle packaging, though some brands also list US or UK sizes.

To find the correct needle size, your first step should always be to check the paper band or label on your yarn. Yarn manufacturers print a recommended needle size range on the label, along with an estimated stitch gauge. This recommendation is designed to produce a balanced fabric with a pleasing drape. If you use a needle that is too small for the yarn, your fabric will be stiff and dense; if you use a needle that is too large, the fabric will be loose, floppy, and full of holes.
For absolute beginners, starting with medium-weight yarn and corresponding medium-sized needles is highly recommended. Look for yarns labeled as worsted weight, aran weight, or 8-ply/10-ply, and pair them with needles between 4.0 mm and 5.5 mm. This size range is comfortable to hold, and the yarn is thick enough that you can easily see your stitches, making it simpler to identify and correct mistakes.
Avoiding extreme sizes is key to a successful first experience. Very thin needles (under 3.0 mm) paired with fine fingering or lace-weight yarns require precise finger dexterity and can quickly cause hand cramping. Furthermore, progress with thin yarn is slow, which can be discouraging when you are eager to see results. On the other hand, extremely thick needles (over 8.0 mm) and bulky yarns require a lot of physical effort to manipulate, making your hands and wrists tire out quickly.
Choosing the Right Cable Length for Your Pattern
Choosing the correct cable length is just as important as choosing the needle diameter, as the length determines how your project physically fits onto the needles. A crucial detail to remember is that the stated length of a circular needle always measures the entire tool from tip to tip, including both needle tips and the cable itself. If a package says “80 cm,” the cable alone is actually shorter than 80 cm because it includes the length of the two tips.
The length of the needle dictates what kind of projects you can comfortably knit. If you use a cable that is too long for a circular project, your stitches will be stretched too far apart, making it impossible to join them into a round without distorting the fabric. Conversely, if your cable is too short for a large project, your stitches will be bunched up tightly, making them difficult to slide and manage.
Shorter circular needles, such as those measuring 40 cm, are designed specifically for small-circumference circular items like beanies, collars, or baby garments. Medium lengths, like 60 cm, are excellent for child-sized sweaters or narrow cowls. Longer cables, ranging from 80 cm to 100 cm or more, are required for large-circumference projects like adult sweaters, shawls, and blankets, or for knitting flat projects with many stitches.
For a beginner’s very first purchase, an 80 cm (32-inch) needle is the most versatile and practical option. This length is long enough to hold a wide variety of flat-knitted items, such as a scarf or a simple baby blanket, without the stitches falling off the ends. It also provides enough length for you to learn the Magic Loop technique later on, which allows you to knit small-circumference items like socks or sleeves using a single long circular needle.
Comparing Needle Tip and Cable Materials
The physical materials used to make your needle tips and cables have a significant impact on how the yarn behaves and how comfortable your hands remain during long knitting sessions.
Needle Tip Materials: Wood vs. Metal
The choice between wood and metal tips comes down to a trade-off between grip and speed, which directly affects your control over the stitches. Bamboo and wooden needles offer a natural surface texture with a moderate amount of friction or “grip.” This grip is incredibly beneficial for beginners because it keeps the yarn from sliding off the needle tips accidentally. If you drop a stitch or set your work down, the wooden surface holds the loops securely in place, giving you time to correct errors without losing your progress. Wood is also warm to the touch and has a slight natural flexibility that is gentle on arthritic or tired hands.
In contrast, metal needles—typically made of stainless steel, brass, or aluminum—are exceptionally smooth, slick, and polished. Stitches slide across metal with virtually no resistance, allowing for much faster knitting speeds. While this is highly desirable for experienced knitters or when working with sticky, textured yarns like mohair, it can be frustrating for beginners. On metal needles, stitches can easily slip off the tips when you are not paying attention, leading to unraveled work. It is best to transition to metal needles once you have established a consistent tension and feel confident in your stitch control.
Cable Flexibility and Memory
The quality of the cable is often what separates budget needles from premium ones. “Cable memory” refers to the tendency of a plastic, vinyl, or nylon cable to retain the tightly coiled shape it held while packaged inside a small plastic sleeve. When a cable has strong memory, it will constantly twist, curl, and kink as you try to knit, fighting against your hands and distorting your stitch tension. This constant resistance causes significant hand fatigue and can turn an otherwise relaxing hobby into a frustrating struggle.
When selecting circular needles, look for cables that are labeled as flexible, kink-free, or memory-free. High-quality cables, such as those made of nylon-coated steel or ultra-flexible nylon, will lay flat and straight immediately out of the package. A limp, flexible cable allows the weight of the knitting to hang straight down, keeping your hands relaxed and allowing you to focus entirely on learning the basic stitches.
A Step-by-Step Checklist for Your First Purchase
To make your first purchase simple and stress-free, follow this step-by-step checklist to ensure you get the exact tool you need for your project:
- Step 1: Select your pattern and buy your yarn first. Never buy needles in a vacuum. Choose a simple, beginner-friendly pattern—such as a basic garter stitch scarf—and purchase the recommended yarn. Having the yarn in hand allows you to inspect its texture and thickness.
- Step 2: Read the yarn label for the recommended size. Locate the small grid or icon on the yarn band that lists the recommended needle size in millimeters. If you are a beginner, stick to yarns that recommend a needle size between 4.0 mm and 5.5 mm.
- Step 3: Choose a versatile cable length. For your first flat-knitted scarf or simple cowl, select an 80 cm needle. This length is highly adaptable and will serve you well across multiple future projects.
- Step 4: Select bamboo or wooden tips. Choose a pair made of bamboo or high-quality wood to give you maximum grip and control over your stitches, reducing the risk of dropped loops.
- Step 5: Inspect the quality before finalizing your purchase. If you are shopping at a physical craft store, run your fingernail gently over the join where the needle tip meets the cable to verify that it is completely smooth and snag-free. If you are purchasing online, read customer reviews specifically regarding cable stiffness and the smoothness of the joins, and verify that the retailer has a clear return policy in case the needles arrive with defects.
Frequently Asked Questions (FAQ)
Can I use circular needles for flat knitting?
Yes, circular needles can absolutely be used to knit flat projects back and forth, exactly like traditional straight needles. To do this, you simply cast on your stitches, knit across the row to the other end, and then turn the work by switching the needle tips between your hands. Instead of joining your work into a circle, you leave the ends open and work back and forth.
Knitting flat on circular needles offers a massive ergonomic advantage over straight needles. With straight needles, the entire weight of the growing fabric is suspended on the ends of the needles, putting significant leverage and strain on your wrists and hands. With circular needles, the heavy fabric rests on the flexible cable in your lap, minimizing wrist strain and making long sessions much more comfortable.
How do I fix a curled or stiff cable?
If your circular needle cable is stiff, curled, or retaining its packaged shape, you can easily relax it using a simple, low-risk heat treatment. Fill a shallow bowl or sink with warm water—ensure it is warm to the touch, but never boiling. Carefully submerge only the plastic or nylon cable portion into the water for two to three minutes. It is crucial to keep the needle tips (especially if they are wood or bamboo) and the metal joins completely dry, as water can warp wood or degrade the adhesive holding the join together.
After a few minutes, remove the cable from the water and gently pull it straight to smooth out any remaining kinks. Hang the needles over a hook or hanger, and attach a light weight, such as a small binder clip or clothes peg, to the bottom loop of the cable. Allow the needles to hang straight until they are completely cool and dry.
Never use boiling water, hair dryers, irons, or other direct heat sources on your needles. Extreme heat can melt or permanently warp the plastic cable, weaken the adhesive at the joins, or cause the materials to expand and separate, ruining your tool.
Community discussion
Share your experience or ask a question. Comments are reviewed before publication.