
Selecting the right circular knitting needles is the foundation of a successful knitting project. To make the correct choice, you must coordinate two distinct measurements: the needle tip diameter, which dictates your stitch size, and the cable length, which supports the physical volume of your work. Matching these dimensions to your yarn weight and project circumference ensures comfortable tension, prevents stretched stitches, and keeps your project from slipping off the needles.
Understand the Core Rules for Needle Size and Cable Length
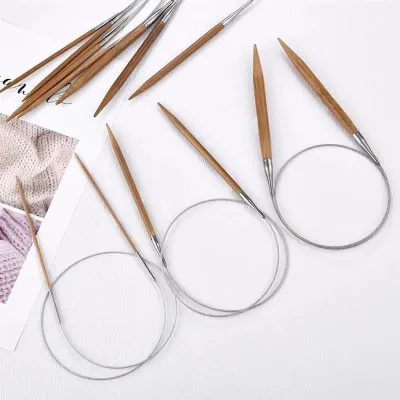
Circular knitting needles consist of two rigid needle tips joined by a flexible cable. Unlike straight needles, which limit your project width to the length of the shaft, circular needles allow you to hold hundreds of stitches comfortably. The needle tip diameter determines the size of your stitches, while the cable length determines the physical capacity of the needle.
To knit successfully in the round, you must follow a fundamental rule: the total length of your circular needle (measured from tip to tip) must be shorter than the finished circumference of your project. If the needle and cable combination is longer than the project’s circumference, you will stretch your stitches around the loop. This tension makes it difficult to slide the stitches and can warp your fabric.
Products mentioned in this guide
Prices are valid at publication and may change. Please refer to the product page for the latest price.
When starting a new project, the yarn label serves as your primary guide. Most yarn manufacturers print a recommended needle size range on the paper band. This recommendation provides a reliable baseline, but you will need to adjust this size based on your specific project goals, personal knitting tension, and pattern requirements.
Step 1: Match Needle Diameter to Your Yarn and Gauge
The diameter of your needle tips directly influences the density and drape of your finished fabric. To begin, locate the recommended needle size on your yarn band, which is typically listed in millimeters or standard national sizing systems. This suggested size is designed to produce a balanced fabric that is neither too stiff nor too loose for that specific yarn weight.

You can adjust this baseline size to alter the characteristics of your fabric. If you want a loose, flowing drape—ideal for lightweight summer garments or delicate shawls—choose a needle diameter that is one or two sizes larger than the label suggests. Conversely, if you need a dense, structured fabric for items like warm hats, mittens, or stuffed toys, select a smaller needle diameter to keep the stitches tight and prevent stuffing or wind from passing through.
Your personal knitting style also plays a significant role in needle selection. Knitters naturally hold yarn with varying levels of tension. If you tend to knit tightly, your stitches will be smaller than average, and you may need to use a larger needle diameter to achieve the correct project dimensions. Loose knitters, on the other hand, often need to scale down their needle size to prevent their stitches from becoming overly relaxed and sloppy.
Finally, always verify whether your pattern specifies a mandatory needle size. Professional patterns are written with a specific “gauge”—the number of stitches and rows per inch or centimeter. To ensure your finished garment fits correctly, you must match this gauge, even if it requires using a needle size different from the one recommended on the yarn label or in the pattern instructions.
Step 2: Choose the Cable Length Based on Project Circumference
Selecting the correct cable length requires you to estimate or measure the finished circumference of your project. If you are following a pattern, look for the finished bust, neck, or width measurements. If you are designing your own project, you can calculate the expected circumference by multiplying your target stitch count by your estimated stitch gauge.
Different project types naturally align with specific cable length categories. Matching your project to the correct length ensures that your stitches slide smoothly without stretching or crowding.
Small Circumference Projects (23 cm to 30 cm) These ultra-short circular needles are designed for small, tubular items. They are highly efficient for knitting socks, sleeve cuffs, mittens, and baby booties without needing alternative techniques. However, the very short needle tips can sometimes cause hand fatigue during long knitting sessions.
Medium Circumference Projects (40 cm to 50 cm) This is the standard length for knitting hats, cowls, collars, and the sleeves of adult sweaters. The needle tips are long enough to hold comfortably in your hands, while the cable is short enough to accommodate the average circumference of an adult head.
Large Circumference Projects (60 cm to 80 cm) These versatile lengths are ideal for sweater bodies, small blankets, shawls, and children’s garments. They are also long enough to comfortably accommodate flat-knitted projects with a moderate number of stitches, as the cable supports the weight of the fabric in your lap.
Extra-Large Circumference Projects (100 cm to 150 cm) These long cables are essential for large blankets, oversized shawls, and heavy cardigans. They hold hundreds of stitches without crowding. Attempting to fit a large blanket onto a short cable can cause stitches to bunch up, making it difficult to read your work and increasing the risk of stitches slipping off the ends.
If you do not have the exact cable length required for a small project, you can use the “Magic Loop” method. This technique requires a long circular needle, typically 80 cm or 100 cm, with a highly flexible cable. By pulling excess cable out in loops on either side of your work, you can knit small-circumference items like socks or hat crowns using a single long needle.
Avoid using a cable that is too long for your project when knitting standard rounds, as this forces you to stretch the stitches to reach from one needle tip to the other, creating unsightly gaps or laddering. Conversely, a cable that is too short will crowd your stitches, making them difficult to move and increasing the risk of accidentally dropping stitches off the needle tips.
Step 3: Test Your Needle Choice with a Gauge Swatch
Before committing to your entire project, you must verify your needle size by knitting a gauge swatch. A gauge swatch is a small test square, typically measuring 15 cm by 15 cm, worked in the same stitch pattern and yarn as your intended project. This step is crucial because yarn behavior and personal tension can vary significantly from initial estimates.
To create an accurate swatch for a project worked in the round, you should knit your swatch in the round. You can do this by using your circular needles to knit a small tube, or by carrying the yarn loosely across the back of a flat swatch to mimic circular knitting. Once completed, lay the swatch flat on a hard surface and use a rigid ruler to count the number of stitches and rows within a 10 cm square.
Compare your counted stitches against the gauge requirements listed in your pattern. If your swatch has more stitches per 10 cm than the pattern requires, your stitches are too small, meaning you should switch to a larger needle diameter. If your swatch has fewer stitches than required, your stitches are too large, and you must switch to a smaller needle diameter.
For the most accurate results, always wash and block your gauge swatch before measuring. Many fibers, especially natural wool, cotton, and bamboo, relax or shrink when wet. Blocking allows the yarn to settle into its permanent state, ensuring that your finished garment will maintain its shape and fit after its first wash.
Troubleshoot Common Circular Needle Setup Issues
Even with the correct needle size and cable length, you may encounter physical challenges during your project. One of the most common issues is a stiff, coiled cable that resists straightening. This plastic memory is common in new needles or those stored in tight packaging. To resolve this, carefully dip the flexible cable portion into warm water for a few minutes, then gently pull it straight to relax the material before casting on.
Another frequent issue is a rough or tight join where the needle tip meets the cable. If yarn snags at this transition point, it can disrupt your rhythm and damage delicate fibers. For interchangeable needle sets, ensure the tips are fully tightened using the manufacturer’s tightening key. If the join remains rough on fixed circular needles, you can try smoothing the transition with a tiny piece of fine-grit sandpaper, or consider replacing the needle if the defect is severe.
Heavy projects like blankets or large sweaters can place significant physical strain on your hands, wrists, and shoulders. To minimize this discomfort, always work in a supportive chair and allow the weight of the growing fabric to rest in your lap or on a table in front of you. Avoid letting the weight of the project hang unsupported from your needle tips, as this tension transfers directly to your joints.
Finally, establish a clear stop condition for your equipment. If you find that your yarn is constantly slipping off slick metal tips, or if a permanently kinked cable continues to twist your stitches, pause your work. Continuing with incompatible tools can lead to frustration and dropped stitches. In these cases, testing a different needle material, such as grippy bamboo or wood, or investing in a more flexible cable system is the most effective path forward.
Frequently Asked Questions (FAQ)
Can I use circular needles instead of straight needles for flat projects?
Yes, you can easily use circular needles to knit flat projects. To do this, simply cast on your stitches and work back and forth in rows, turning your work at the end of each row just as you would with straight needles. The cable will simply hold the weight of the fabric in your lap, which is highly beneficial for large, heavy items like blankets or shawls. This setup reduces physical strain on your wrists and hands compared to long, heavy straight needles.
What should I do if my circular needle cable is too short for my stitch count?
If your cable is too short and your stitches are heavily crowded, you risk dropping stitches or distorting your fabric. To resolve this without buying a new needle, you can transfer your work onto two circular needles of the same size, working half the stitches on each needle. Alternatively, if you are using an interchangeable needle set, you can use a cable connector to join two cables together, instantly expanding your working capacity. Always monitor your stitch density to ensure your work slides smoothly along the needle shaft.
Community discussion
Share your experience or ask a question. Comments are reviewed before publication.